32
Settings
The ISP includes a variety of system wise settings
that are set in this menu that govern behavior
of the unit. Ensure these are set as required
for easy operation of the ISP and any attached
devices. These are only accessible to those with
Installer level access or Expert User if assigned
by the Installer.
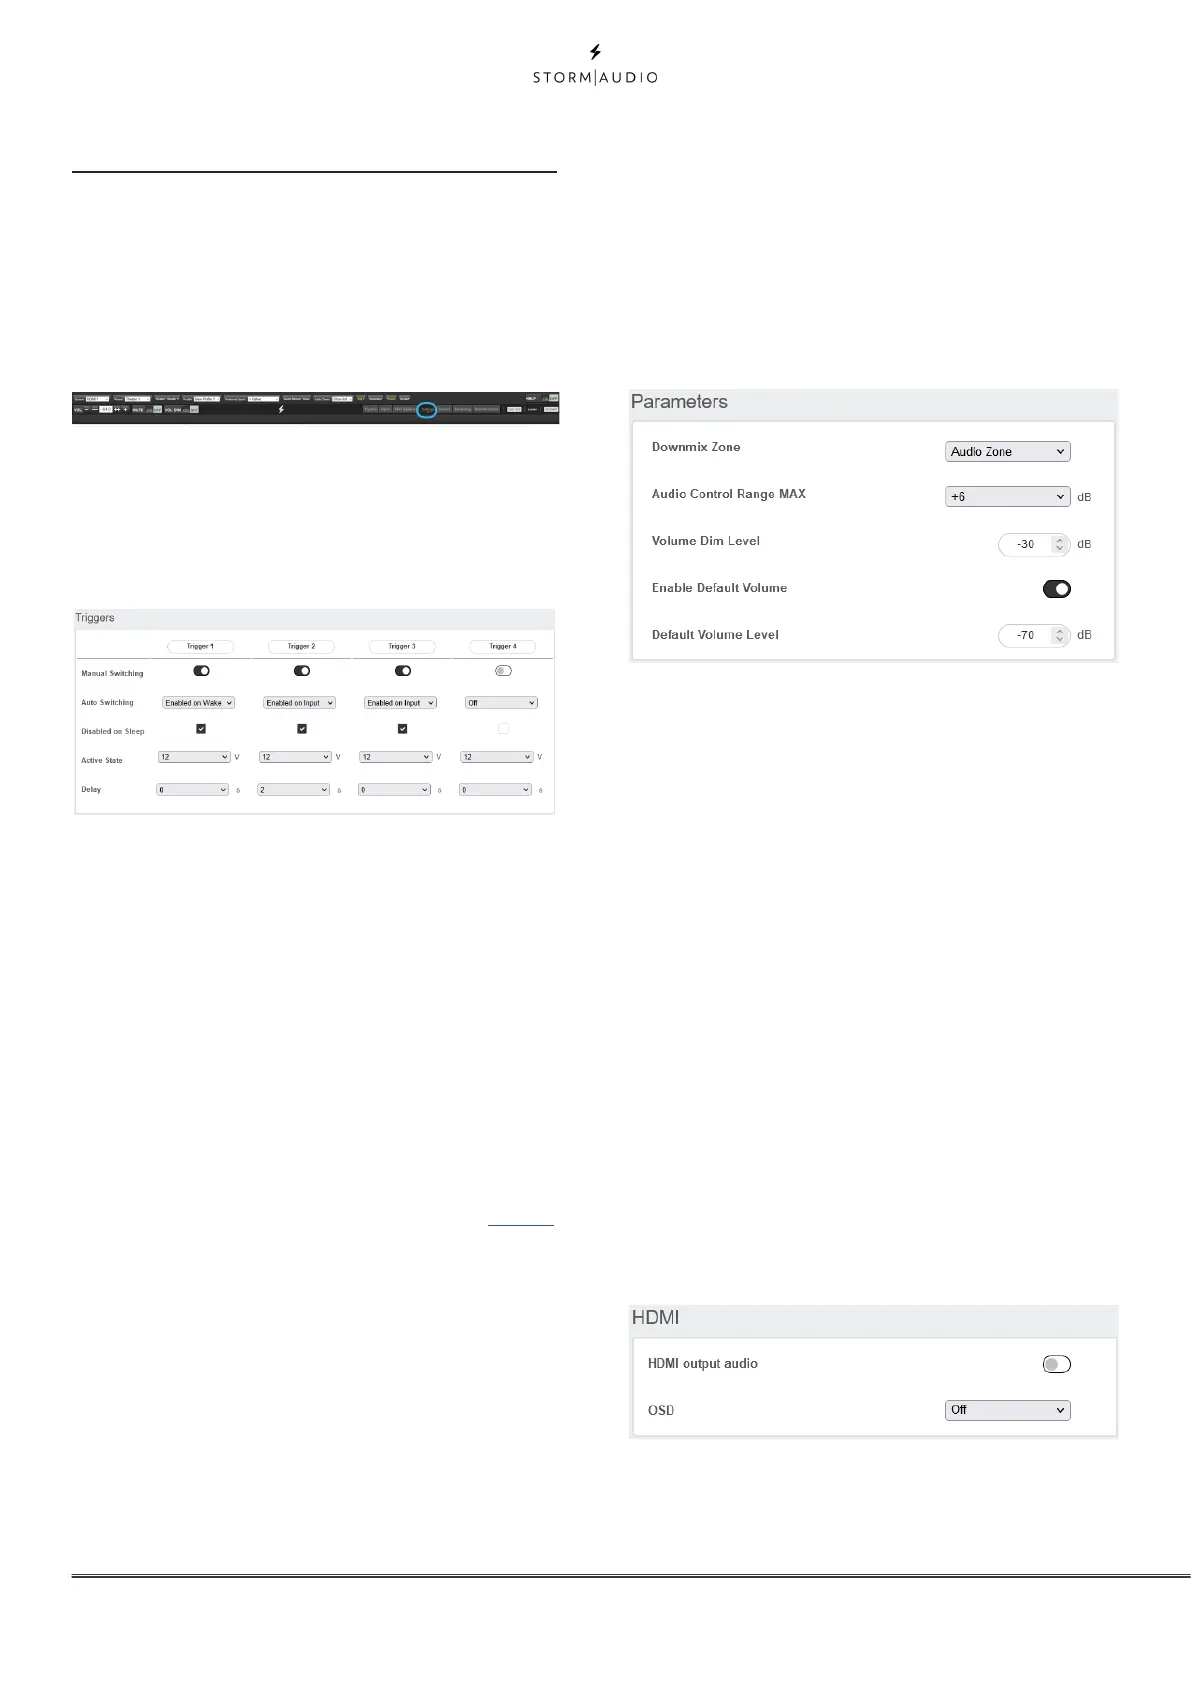
Triggers
The ISP has 4 independent DC voltage triggers
which can be configured to modulate the power/
standby status of connected equipment such as
projectors, source components, or amplifiers.
You may keep the default name for each trigger,
or rename them to something more descriptive.
Each trigger has the following options available:
• Manual Switching: Turn on to enable a button on
the remote control interfaces that allows a user
to toggle the trigger manually.
• Auto Switching: “Enabled on Wake” activates
the trigger when the ISP is powered on from
standby. It will not automatically deactivate
the trigger when the ISP is placed into standby.
“Enabled on Input” makes the trigger available in
the Input Menu. When set to Y for an input, the
trigger activates when that input is selected from
a remote interface. See “9. Triggers” on page 15.
“Enabled on Preset” makes the trigger available
in the Preset menu. When a preset is selected in
which a trigger is marked Y, the trigger is activated.
Note that Auto Switching trigger behavior will
override any Manual Switching behavior.
• Disabled on Sleep: Select Y if the trigger should
deactivate when the ISP is placed into standby.
• Active State: Select whether the active state for
the trigger is 12V or 0V.
• Delay: You may wish to set a delay of up to
8 seconds. Usually this is done if you are using
triggers to activate multiple amplifiers. If all
amplifiers power on at once, the inrush current
could trip a circuit breaker. StormAudio amplifier
triggers may be daisy chained so that only once
the preceding amplifier is fully powered does the
following amplifier initiate it’s power up sequence
thereby obviating the need for a delay (or
multiple triggers) when using modern StormAudio
amplifiers.
Parameters
• Downmix zone: define whether the dedicated
downmix outputs feed an audio only zone or an
audio video zone. When A/V, lipsync adjustment is
available in that zone’s remote control functions,
and that zone’s general delay can be set using the
setting below in this page.
• Audio Control Range MAX: Set the maximum
allowable level. +6dB (default), +3dB, 0dB.
• Volume Dim Level: To quickly attenuate the
Master volume (but not mute it), a user can click
Volume Dim. Set the level of attenuation here.
Default is -20dB
• Default Volume Level: To ensure the ISP always
starts up with a known Master volume level, it is
possible to define a default volume level to which
the unit should refer to at power up. You must
select “On” to enable this feature. When “Off”,
the volume will be loaded with the Last volume
level. Note that the Default level is common to all
Theaters and Zones defined in the system.
HDMI
The HDMI outputs can be adjusted with two
parameters.
• HDMI output audio: it is possible to provide the
two channels downmixed version of the Main
Theater audio stream to the screen(s) connected
to the ISP output(s). By default it is turned to “Off”.