18
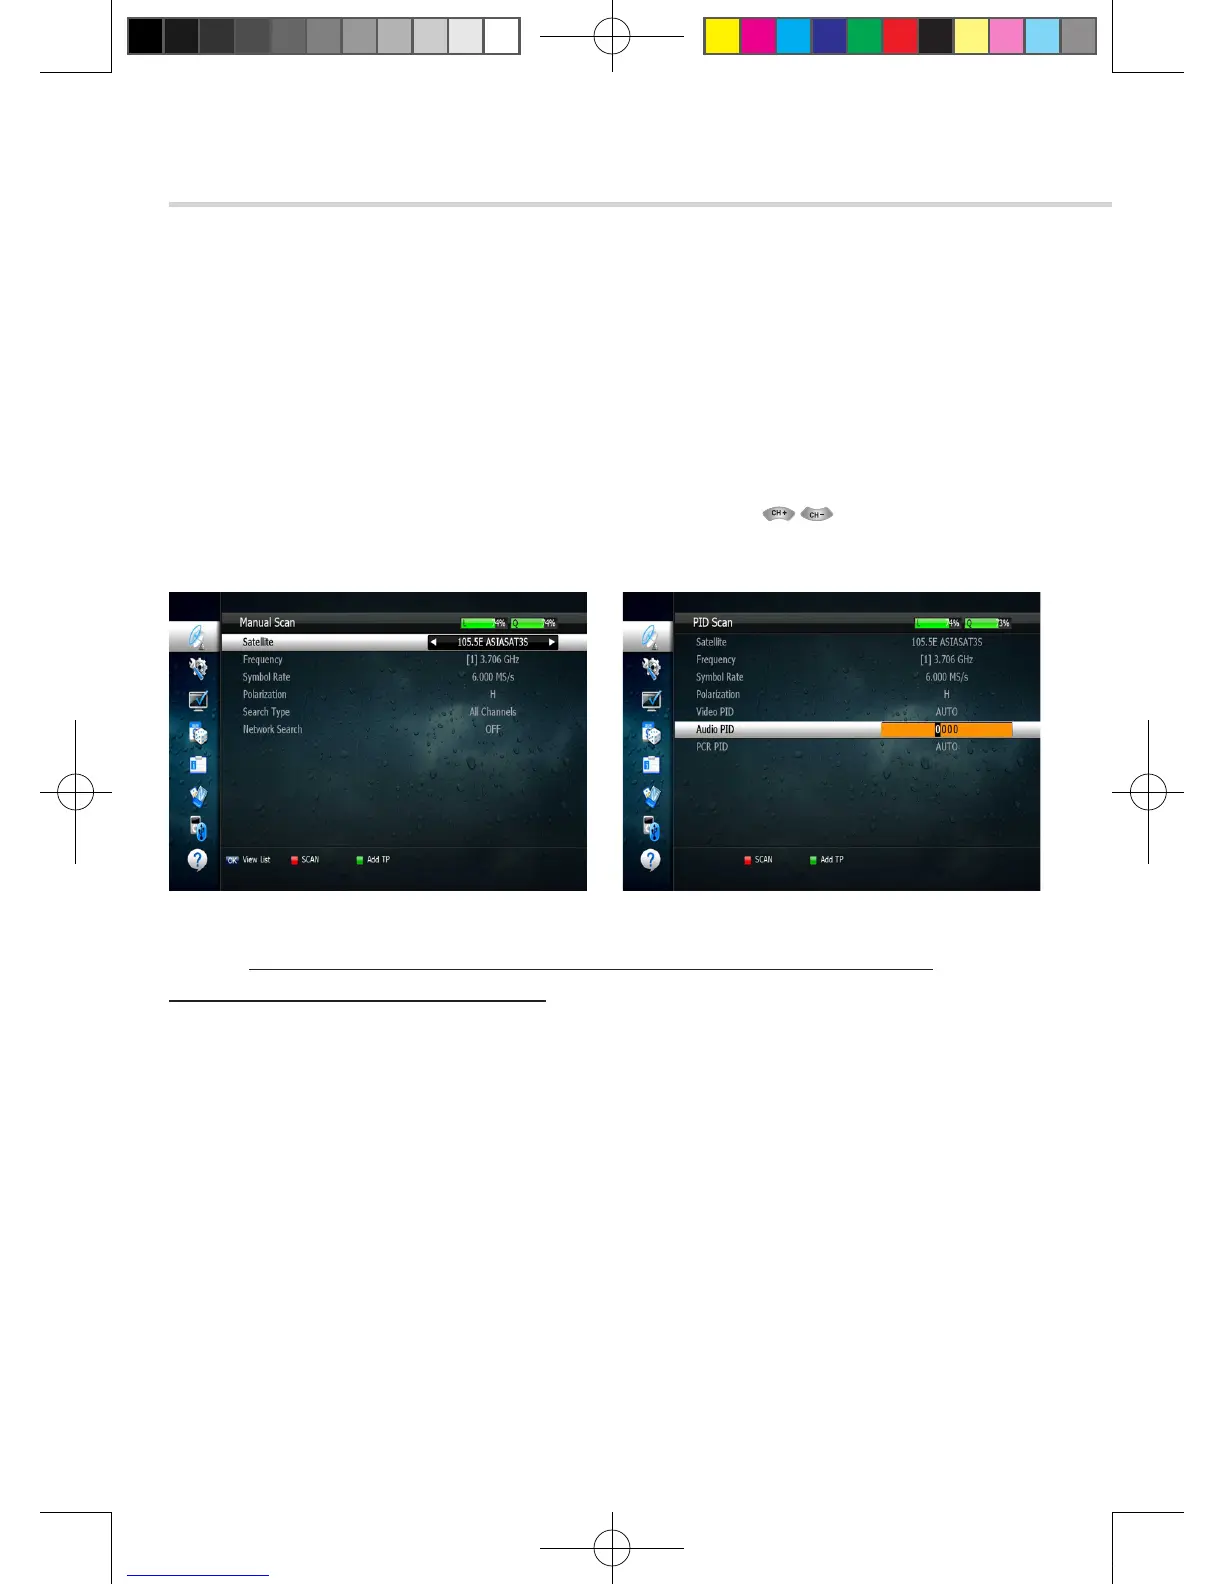
▣ Package Identifier (PID) Scan <Figure 6.1.12>
1. Select a transponder.
2. To change a transponder’s information (Frequency, Symbol Rate), use the NUMERIC buttons.
3. To add a new transponder, press the GREEN button.
4. To delete a transponder, press the YELLOW button with the cursor next to the Frequency parameter.
5. To search a transponder, set its different parameters and press
You can search a specific channel of the transponder by setting its PID data (Video, Audio and PCR).
6. Operation
6.1
Getting Started
Figure 6.1.11 Figure 6.1.12
▣ OTA Menu
1. Scan Mode
▪ Default: OTA service by default setting
▪ User: OTA service by user’s setting
2. Select a satellite for OTA service (Available only when Scan Mode sets as User’s mode)
3. Enter the transpondes’s information (frequency, symbolrate)by 0~9 buttons.
(Available only when Scan Mode sets as User’s mode)
4. Press RED button to start Scan.
5. If transponder’s information is correct, a pop-up window will display to update software.
✽ Note: If you cannot access programs after correctly completing a scan procedure,
please contact your seller or your installer.
[2013.01.04]SRT4922A 매뉴얼_english_AUS.indd 18 2013-01-04 오후 4:49:48