EasyManua.ls Logo

Strong SRT 82 - User Manual

Strong SRT 82
24 pages
Print Icon
To Next Page IconTo Next Page
Loading...
User Manual
Bedienungsanleitung
Manuel d’ulisaon
Manuale d’uso
Manuale utente
Manual del usuario
Instrucciones de instalación
Návod k obsluze
Používateľská príručka
Telepítési Utasítás
Bruksanvisning
Uživatelská příručka
Korisnički priručnik
Používateľská príručka
Руководство пользователя
Εγχειρίδιο χρήστη
Terrestrial HDMI Receiver for your TV
SRT 82
Picture similar

Questions and Answers

  • D
    Daniel HensleyAug 18, 2025
    Why is there no sound on my Strong SRT 82?
    • S
      Shannon MayAug 19, 2025
      If you're not getting any sound on your TV or amplifier with your Strong TV Receiver, here's what you can check: * Ensure the volume isn't too low on either the TV or the receiver; increase it using their respective remote controls. * Verify that the correct input is selected on your TV or amplifier. * Make sure the TV, digital receiver, and amplifier are all switched on and connected to the mains. * Check the cable connections between the equipment. * Ensure audio is not muted by pressing the ! button on your remote control. * Confirm that the TV power is on.
  • A
    Amy SmithAug 21, 2025
    What to do if Strong SRT 82 remote control not working?
    • L
      Leah BuckAug 21, 2025
      If your Strong TV Receiver isn't responding to the remote control, try these steps: * Make sure the receiver is plugged in and turned on. * Aim the remote directly at the IR sensor on the front of the receiver. * Ensure nothing is blocking the IR sensor. * Check the batteries in the remote to make sure they are correctly inserted and not exhausted. Replace them if needed.
  • K
    Kristi SmithAug 23, 2025
    How to fix no signal on Strong SRT 82?
    • C
      Cheryl MaldonadoAug 23, 2025
      If your Strong TV Receiver shows 'No signal,' consider the following: * Check the antenna or cable connection to the receiver. * Inspect connectors for damage. * Examine the antenna for visible damage. * If using an active antenna, ensure the antenna power is switched ON or connect an external power source. * Adjust the antenna direction for optimal signal strength and quality. * If using a multiswitch, verify it's functioning correctly and its power cable is connected.
  • P
    Penny MccormickAug 26, 2025
    Why is my Strong TV Receiver not turning on?
    • J
      John JacksonAug 26, 2025
      If the LED/standby indicator and LED display aren't turning on, and the external IR sensor isn't working on your Strong TV Receiver, check these: * Ensure the power cable or adapter is properly plugged into the wall outlet. * If your receiver has a main power switch, make sure it's switched on. * Verify the external IR sensor is correctly connected. * Test the electrical outlet with another device to confirm it's working.
  • R
    rparkAug 28, 2025
    How to stop Strong TV Receiver from turning off automatically?
    • M
      Mr. Richard RojasAug 28, 2025
      If your Strong TV Receiver is automatically switching to standby mode, the Auto Standby function may be enabled and has reached its set time. Disable the Auto Standby feature in the receiver's settings. Consult the user manual for specific instructions.
  • J
    Julie ArroyoAug 30, 2025
    Why does my Strong TV Receiver turn off by itself?
    • J
      Joseph RichardsonAug 30, 2025
      If your Strong TV Receiver switches off automatically after a certain time, the Auto Standby function may be enabled. Check the Auto Standby setting and disable it if necessary.
  • A
    Adrienne BellSep 1, 2025
    What to do if Strong DVB-T2 Receiver lost signal after moving?
    • T
      Timothy PhelpsSep 1, 2025
      If you're unable to receive digital reception after moving your Strong DVB-T2 receiver, it might be due to weak antenna signals. Press INFO on the remote to view the signal bars and adjust the indoor antenna for maximum reception. Alternatively, rescan the channels. If using an active antenna, ensure the antenna power setting is On. You may also need to use an outdoor antenna.
  • M
    Mary PatelSep 4, 2025
    Why is my Strong TV Receiver picture freezing?
    • V
      Veronica SmithSep 4, 2025
      If the picture and sound freeze, or you see macro blocks or distortion on the screen with your Strong TV Receiver, it could be due to weak transmission signals or interference. Press the INFO key on the remote control three times to check the signal strength and quality. Both parameters should be visible in the last third of the infobars.
  • M
    Michael SchmidtSep 6, 2025
    Why is my USB storage device not working with Strong SRT 82 TV Receiver?
    • B
      brian69Sep 6, 2025
      If the USB storage device isn't working properly with your Strong TV Receiver, it could be due to high power consumption. Try connecting an extra power supply adapter to your USB HDD device. Also, ensure the USB device is formatted to FAT32 on a PC.
  • L
    Lindsay BakerSep 8, 2025
    Why does my Strong SRT 82 TV Receiver picture freeze when playing video?
    • V
      Vickie MaldonadoSep 9, 2025
      If video playback or Timeshift causes picture freezing or distortion, especially with HD content on your Strong TV Receiver, the read/write speed of your USB device might be too low. Use a USB storage device with sufficient speed and space. Pen drives may not support sufficient speed.

Summary

Introduction

Safety Instructions

Read all instructions before operating. Use only specified attachments. Refer to product enclosure for information.

Storage

Equipment Set-up

Accessories

Usage of external USB devices

Your Receiver

PIN-CODE DEFAULT: 1234

The default PIN code for the receiver is 1234. Use it for initial setup and security.

Side Panel

Details the ports on the side panel: TV (HDMI), Micro USB, IR extender, Antenna connection.

Remote Control

Installing the batteries

Using the remote control and the IR extender

Connection

Connecting to a terrestrial antenna

Connect antenna to RF IN connector using shielded cable and SMA to IEC adapter.

Connecting to TV with HDMI extender cable or directly to HDMI port

Connect TV using HDMI extender or directly to HDMI port. Ensure sufficient space and avoid tension.

Connecting a USB storage device

Connect USB 2.0 HDD for recording/playback. Use Y-cable for power and receiver connection. Fast USB device needed.

Starting Up For The First Time

Quick Guide To Using Your Receiver

Operation

Changing channels

Four ways to change channels: direct access (0-9), channel list, PG+/PG- keys, and directional keys.

Info Banner

Press INFO to get current channel and event information. Press twice for technical details.

Selection of audio language

Select audio streams or languages if available. Use AUDIO button and navigate with directional keys.

Teletext

Access Teletext using TEXT button. Input page number or use coloured buttons and directional keys.

Subtitles

Timeshift

EPG (Electronic Programme Guide)

Instant Recording

Sleep

Main Menu

Programme

Programme Edit: Move, Skip, Lock, and Delete channels. Requires password (default 1234).

EPG (Electronic Programme Guide)

LCN (Logical Channel Numbering)

Picture

Channel Search

Time

Option

System

USB

Subtitle Configuration

Record Device Configuration

USB Format Utility

Troubleshooting

LED;standby indicator not switching on

Troubleshooting for receiver not powering on. Check power cable, adapter, and main switch.

External IR sensor not working

Troubleshooting for the external IR sensor. Check connection and electrical outlet.

No signal.

No sound on TV or amplifier.

No access to scrambled services.

No response to the remote control.

Receiver not receiving digital reception after moving.

Receiver switches off or to standby automatically.

Forgotten PIN code;password.

Playback issues (frozen picture, macro blocks) on HD content.

Technical Specifications

Overview

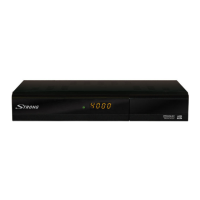
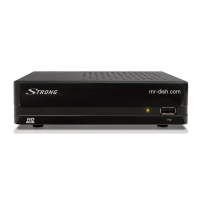
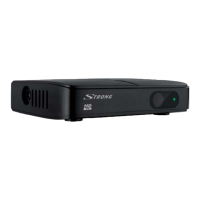
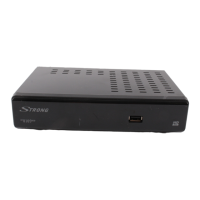
This document describes the Terrestrial HDMI Receiver SRT 82, a device designed to receive digital terrestrial television signals and output them via HDMI to a television. The receiver offers a range of features for enhanced viewing, recording, and multimedia playback.

Function Description

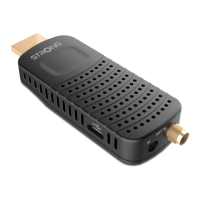
The SRT 82 is a digital terrestrial receiver that connects to your TV via an HDMI port, either directly or using an extender cable. It receives broadcast signals from a terrestrial antenna, converting them into a format your TV can display. The device supports both standard and high-definition video resolutions, ensuring compatibility with various TV sets. A key function of the receiver is its ability to record TV programmes and offer Timeshift functionality when a suitable USB storage device is connected. This allows users to pause live TV and resume playback later, as well as schedule recordings of their favourite shows. The receiver also features an Electronic Programme Guide (EPG) to view event schedules and information, making it easier to plan viewing and recordings. For multimedia enthusiasts, the SRT 82 supports playback of various file types from a connected USB storage device, including MP3 audio, JPG images, and several video formats.

Usage Features

The receiver is controlled primarily via a remote control, which offers a comprehensive set of buttons for navigation and function access. An external IR extender is included, allowing the receiver to be discreetly placed while still receiving commands from the remote.

Channel Management:

  • Changing Channels: Channels can be changed in four ways: direct access using numeric buttons (0-9), via the channel list accessed by the OK button, using PG+/PG- keys for 10-channel steps, or with the ▲▼ keys for sequential channel changes.
  • Channel List: Pressing OK in viewing mode displays the channel list. Users can navigate this list with ▲▼ and select a channel with OK. The FAV button allows toggling between favourite lists.
  • Programme Edit: Within the main menu, the "Programme Edit" section allows for advanced channel management. This includes:
    • Moving Channels: Channels can be reordered within the list.
    • Skipping Channels: Channels can be marked to be skipped when zapping, though they remain accessible from the channel list.
    • Locking Channels: Parental guidance can be enforced by locking channels, requiring a password (default 1234) to access them.
    • Deleting Channels: Unwanted channels can be marked and deleted.
    • Favourite Lists: Channels can be added to up to four different favourite groups for quick access.
    • Renaming Channels: Channels can be renamed for personalization.
  • LCN (Logical Channel Numbering): If activated and supported by the broadcaster, channels will be stored in a broadcaster-defined order. This function applies during a new channel search.

Viewing Enhancements:

  • Info Banner: Pressing INFO displays information about the current channel and event. Pressing it twice provides more detailed programme and technical information.
  • Audio Language Selection: For channels supporting multiple audio formats or languages, the AUDIO button allows users to select their preferred audio stream.
  • Teletext: The TEXT button provides access to a fully featured Teletext service, with numeric buttons for page input and coloured buttons for quick navigation to selected pages.
  • Subtitles: The SUB button displays a list of available subtitle languages, allowing users to select their preference.
  • Aspect Ratio and Resolution: The "Picture" menu allows users to adjust the aspect ratio (e.g., 16:9 widescreen, 4:3 Pillarbox, 16:9 Pan&Scan) and video resolution (e.g., 576p, 720p, 1080i, 1080p) to match their TV and personal preference. An "Auto" setting is available for both.
  • TV Format: Options for PAL and NTSC are available, with PAL being the default for European broadcasts.

Recording and Timeshift:

  • Instant Recording: The ● button initiates instant recording of the currently viewed programme. A recording sign appears on screen, and recording can be stopped by pressing ■.
  • Timeshift: The II/TIMESHIFT button activates Timeshift, allowing users to pause live broadcasts and resume playback later. Fast rewind/forward is available with the ◄◄/►► buttons.
  • EPG for Recording: The EPG allows users to view event schedules and mark programmes for recording. Users can set timers for recording, specifying the mode (View or Record) and other options.

Multimedia Playback:

  • USB Multimedia: The "USB" menu provides access to multimedia functions, allowing playback of MP3 audio, JPG images, and various video formats from a connected USB storage device.
  • Photo Configure: Settings for photo viewing include slide time and slide mode (e.g., random order).
  • Movie Configure: Subtitle size and background colour can be configured for movie playback.

System Settings:

  • OSD Language: The language for the On-Screen Display can be selected.
  • Time Settings: Users can set the time offset, time zone, and configure automatic standby (1, 2, or 3 hours, or Off) and daily power On/Off times.
  • Digital Audio Outputs: Options for digital audio include Off, PCM (Stereo downmix), RAW HDMI On (raw audio passthrough), and RAW HDMI Off (no audio forwarded).
  • Audio Description: An option for visually impaired users to select an audio track that describes on-screen content, if available from the broadcaster.
  • Parental Guidance: Programmes with a Parental Guidance Rating can be blocked, requiring a password to view.
  • Set Password: Users can change the default password.
  • Restore Factory Default: Resets the receiver to its default factory settings, deleting all channels, favourite lists, and custom settings.
  • Information: Displays receiver-specific information such as hardware and software versions.
  • Software Update: Allows updating the receiver software via a USB port.
  • Recall List: If enabled, displays a list of last-watched channels when the RECALL button is pressed, allowing quick navigation back to previous channels.

Maintenance Features

  • Battery Installation: The remote control requires 2x AAA batteries, inserted with correct polarity.
  • USB Device Compatibility: The receiver is compatible with USB 2.0 HDDs. For proper functioning of Timeshift and recording, a fast USB device (such as a hard disk drive) is recommended. USB devices should be formatted to NTFS or FAT32.
  • USB Power: If an external USB HDD exceeds the receiver's supported power output (5V/500mA), it should be connected to an external power adapter. The provided Y-cable allows the HDD to be powered by the TV's USB port.
  • Troubleshooting: The manual provides a troubleshooting guide for common issues, such as no signal, no sound, remote control unresponsiveness, or recording problems, offering possible causes and solutions. For persistent issues, contacting customer support is advised.
  • Software Updates: Regular software updates, available from the manufacturer's website, can improve performance and add new features.
  • Factory Reset: In cases of unexpected behaviour, a factory reset can resolve issues by returning the device to its initial state.

Strong SRT 82 Specifications

Video Decoder IconVideo Decoder
profile levelHEVC (H265)
video resolution480i, 480p, 576i, 576p, 720p, 1080i, 1080p
decodingPAL/NTSC
Audio Decoder IconAudio Decoder
audio supportDolby Digital Plus*/AC3+/PCM
sampling rate32, 44.1, 48 KHz
audio modeStereo, Multi-Audio
Tuner IconTuner
input frequency range174 – 230 MHz (VHF) and 470 - 790 MHz (UHF)
input signal level-20 ~ -82 dBm
antenna power5 V DC, max. 50 mA, short cut protected
Memory and System IconMemory and System
flash memory4 MB
SDRAM64 MB
Connectors IconConnectors
ANT INSMA to IEC adapter (female)
Micro USB port5 V/500 mA (max.) supported
HDMIYes
General Data IconGeneral Data
power consumption2.5 W (max)
operating temperature0 ~ +40° C
weight0.120 kg

Related product manuals