EasyManua.ls Logo

Strong SRT 8205 User Manual

Strong SRT 8205
28 pages
To Next Page IconTo Next Page
Page #1 background imageLoading...
Page #1 background image
User Manual
Manuel d'u lisa on
Uputstvo za upotrebu
Εγχειρίδιο χρήστη
Instrukcja obsługi
Руководство пользователя
Посібник користувача
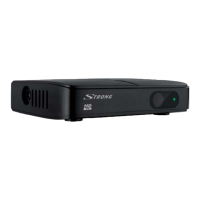
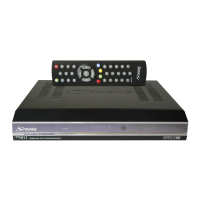
Digital Terrestrial HD Receiver
SRT 8205
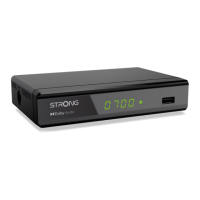
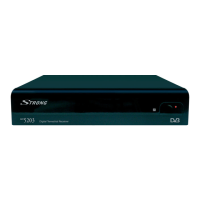
Picture similar

Questions and Answers:

Strong SRT 8205 Specifications

General IconGeneral
BrandStrong
ModelSRT 8205
CategoryTV Receiver
LanguageEnglish

Summary

1.0 Introduction

1.1 Safety Instructions

Read all instructions before operating. Keep them for later use.

1.2 Equipment Set-up

Installation of the receiver requires no special skills. Follow instructions.

1.3 Accessories

Lists included accessories like QIG, Power Supply, Remote Control, Batteries.

1.4 Usage of external USB devices

Recommendations for USB 2.0 devices, formatting, compatibility, power requirements.

2.0 Your Receiver

2.1 Default PIN: 1234

The default PIN code for the receiver is 1234.

2.2 Front Panel

Description of the front panel components, including USB port.

2.3 Rear Panel

Details connections on the rear panel: RF IN, RF OUT, CVBS, AUDIO L/R, HDMI, Power adapter.

2.4 Remote Control Unit (RCU)

Explains the function of each button on the remote control.

2.5 Installing the batteries

Step-by-step guide on how to install batteries in the remote control.

2.6 Using the remote control

How to point and use the remote control, range and angle limitations.

3.0 Connection

3.1 Connecting to a terrestrial antenna

Instructions for connecting an antenna to the RF IN connector.

3.2 Connecting to TV with HDMI cable

How to connect the receiver to a TV using an HDMI cable for best quality.

3.3 Connecting to TV with 3 RCA-3 RCA cable

How to connect to older TVs without HDMI using RCA cables.

3.4 Connecting to a Digital Audio Amplifier and TV using HDMI

How to connect to amplifiers or Home Cinema systems via HDMI.

3.5 Connecting a USB storage device

How to connect a USB device for media playback.

4.0 Starting Up for the First Time

5.0 Quick Guide to Using Your Receiver

6.0 Operation

6.1 Changing channels

Explains different methods to change channels.

6.1.1 Direct access via 0~9 buttons

How to change channels using the number buttons.

6.1.2 Channel list

How to navigate and select channels using the channel list.

6.1.3 Using the or CH+/CH- buttons

How to change channels using channel up/down buttons.

6.2 Info Banner

How to display channel and event information using the INFO button.

6.3 Selection of audio language

How to select different audio streams or languages.

6.4 Teletext

Accessing and using the Teletext function.

6.5 Subtitles

How to select available subtitle languages.

6.6 Timeshift

How to pause live TV and resume playback later.

6.7 EPG (Electronic Programme Guide)

How to use the EPG to view schedules and mark recordings.

6.8 Quick Recording

How to make a quick recording of the current program.

7.0 Main Menu

7.1 Edit Channel

Options for managing channels: list, lock, skip, move, edit.

7.1.1 Adding channels to favourite lists

How to add channels to up to 8 favourite groups.

7.1.1.2 Locking channels

How to lock channels using a PIN code.

7.1.1.3 Skipping channels

How to mark channels to be skipped during channel zapping.

7.1.1.4 Moving channels

How to change the order of channels in the list.

7.1.1.5 Editing channels (Sort, Rename, Delete)

Sorting, renaming, and deleting channels.

7.1.2 Radio Channel List

Operation of the radio channel list is similar to the TV channel list.

7.1.3 Delete All

How to delete all stored channels and favourite lists.

7.1.4 Rename Favourite list

How to personalize the names of favourite lists.

7.2 Installation

7.2.1 Auto Scan

How to perform an automatic scan for channels.

7.2.2 Channel Scan

How to perform manual channel scanning by channel or frequency.

7.2.3 Antenna Power

How to enable/disable 5V power for active antennas.

7.2.4 LCN (Logical Channel Numbering)

How to activate or deactivate logical channel numbering.

7.3 System Setup

7.3.1 Language

Setting preferred languages for OSD, audio, and subtitles.

7.3.2 TV System

Configuring video resolution and aspect ratio for the TV.

7.3.3 Local Time Setting

Setting the region, GMT usage, offset, and daylight saving.

7.3.4 Timer Setting

Setting up timed events for recording or waking the receiver.

7.3.5 Parental Lock

Protecting installation menu and channels with a PIN code.

7.3.6 OSD Setting

Adjusting OSD timeout and transparency.

7.3.7 Auto Standby

Configuring the auto standby function to reduce power consumption.

7.4 Tools

7.4.1 Information

Displaying receiver hardware/software version and web address.

7.4.2 Load Factory Settings

Resetting the receiver to factory defaults, clearing all data.

7.4.3 S/W Upgrade by OTA

Information on upgrading software Over The Air.

7.4.4 Upgrade by USB

How to upgrade receiver software using a USB port.

7.4.5 Auto-update OTA

Configuring automatic checks for Over The Air software updates.

7.5 Media Player

7.5.1 Records

Managing recorded programs, including lock and delete functions.

7.5.2 Video

Playing video files, sorting, renaming, creating folders.

7.5.3 Music

Playing music files, creating playlists, sorting.

7.5.4 Image

Viewing image files, creating playlists, sorting.

7.5.5 HDD Information

Viewing USB device information and formatting the device.

7.5.6 DVR Setting

Configuring settings for Timeshift, recording, and playback.

7.5.7 Remove USB device safely

Safely removing a USB storage device from the receiver.

8.0 Troubleshooting

9.0 Technical Specifications

Related product manuals