Suddenlink Confidential and Proprietary. © All rights reserved 6/2014
Connected Home User Manual 18
SM
ADDING YOUR OWN PHOTOS TO
PHOTO FRAME
Insert a SD Card* into your computer.
* We recommend using a “class 4” or higher
SDHC card with 4gb –16gb storage space.
Copy the images you want on your panel onto
the SD Card. Please note the requirements for
your photos:
Safely eject the SD Card from STEP your computer.
Insert the SD Card into the slot on the left
side of the Connected Home panel.
*Do not insert SD Card into panel if panel is off.
Touch “Apps”
Touch “Photo Frame”
Touch “Load from SD Card”
Choose one of the following
“Replace” deletes the existing photos and saves the new ones in
their place. “Add” adds your new photos to the ones already on the
Connected Home panel.
Once the photos are loaded they will appear in the
preview pane. Press “Start Photo Frame” to test.
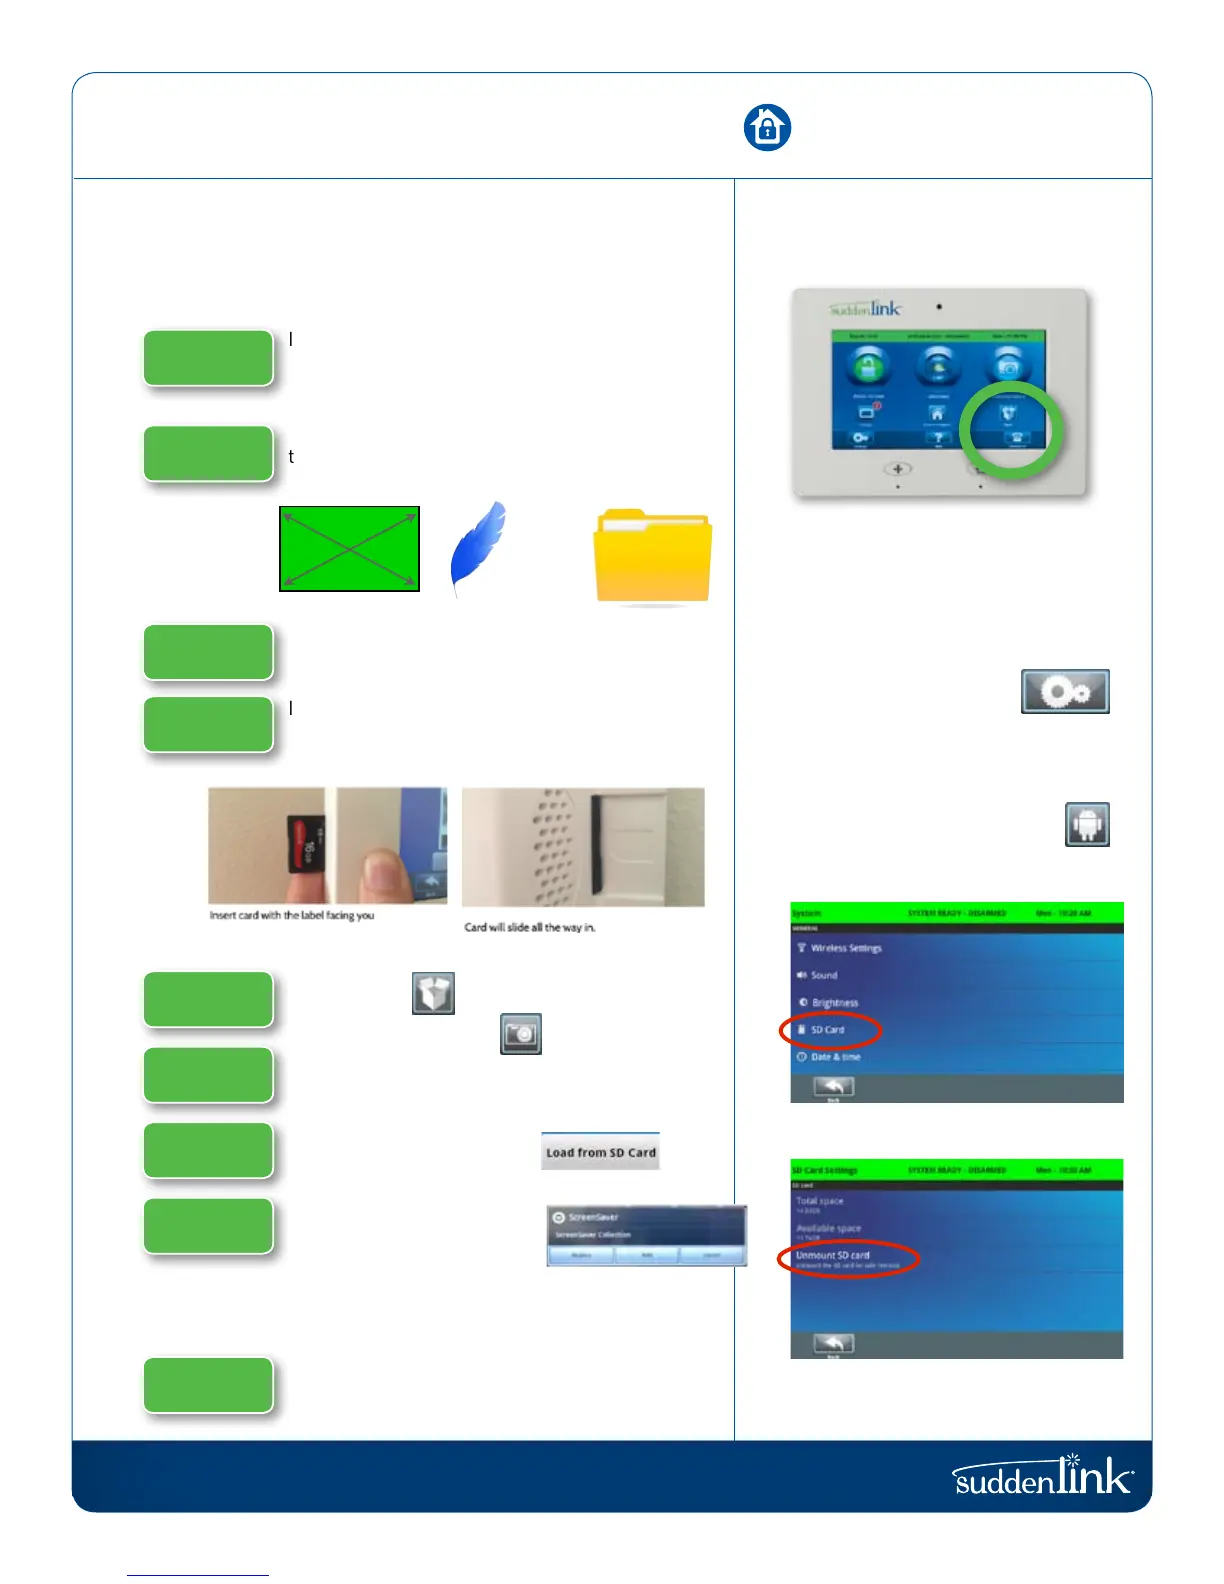
REMOVING THE SD CARD
Once you are done with the SD Card
you need to safely remove it.
From the home screen,
touch “Settings”
Enter your user code
Touch “System Settings”
Touch “SD Card”
Touch “Unmount SD Card”
Remove the SD Card from the back
of the Connected Home panel
-No larger
than 800x480
Saved in a
folder called
“Photos”
Less than
1MB each
PHOTO FRAME
FIND IT
STEP 1
STEP 2
STEP 3
STEP 4
STEP 5
STEP 6
STEP 7
STEP 8
STEP 9