Installation
Slide clutch pull rod through bin collar and into rear compartment of center sump. If not already installed
on unload tube in bin 31' dia. or larger, bolt clutch rod support clamp midway on unload tube and slide
clutch pull rod through support (support not needed in smaller bins).
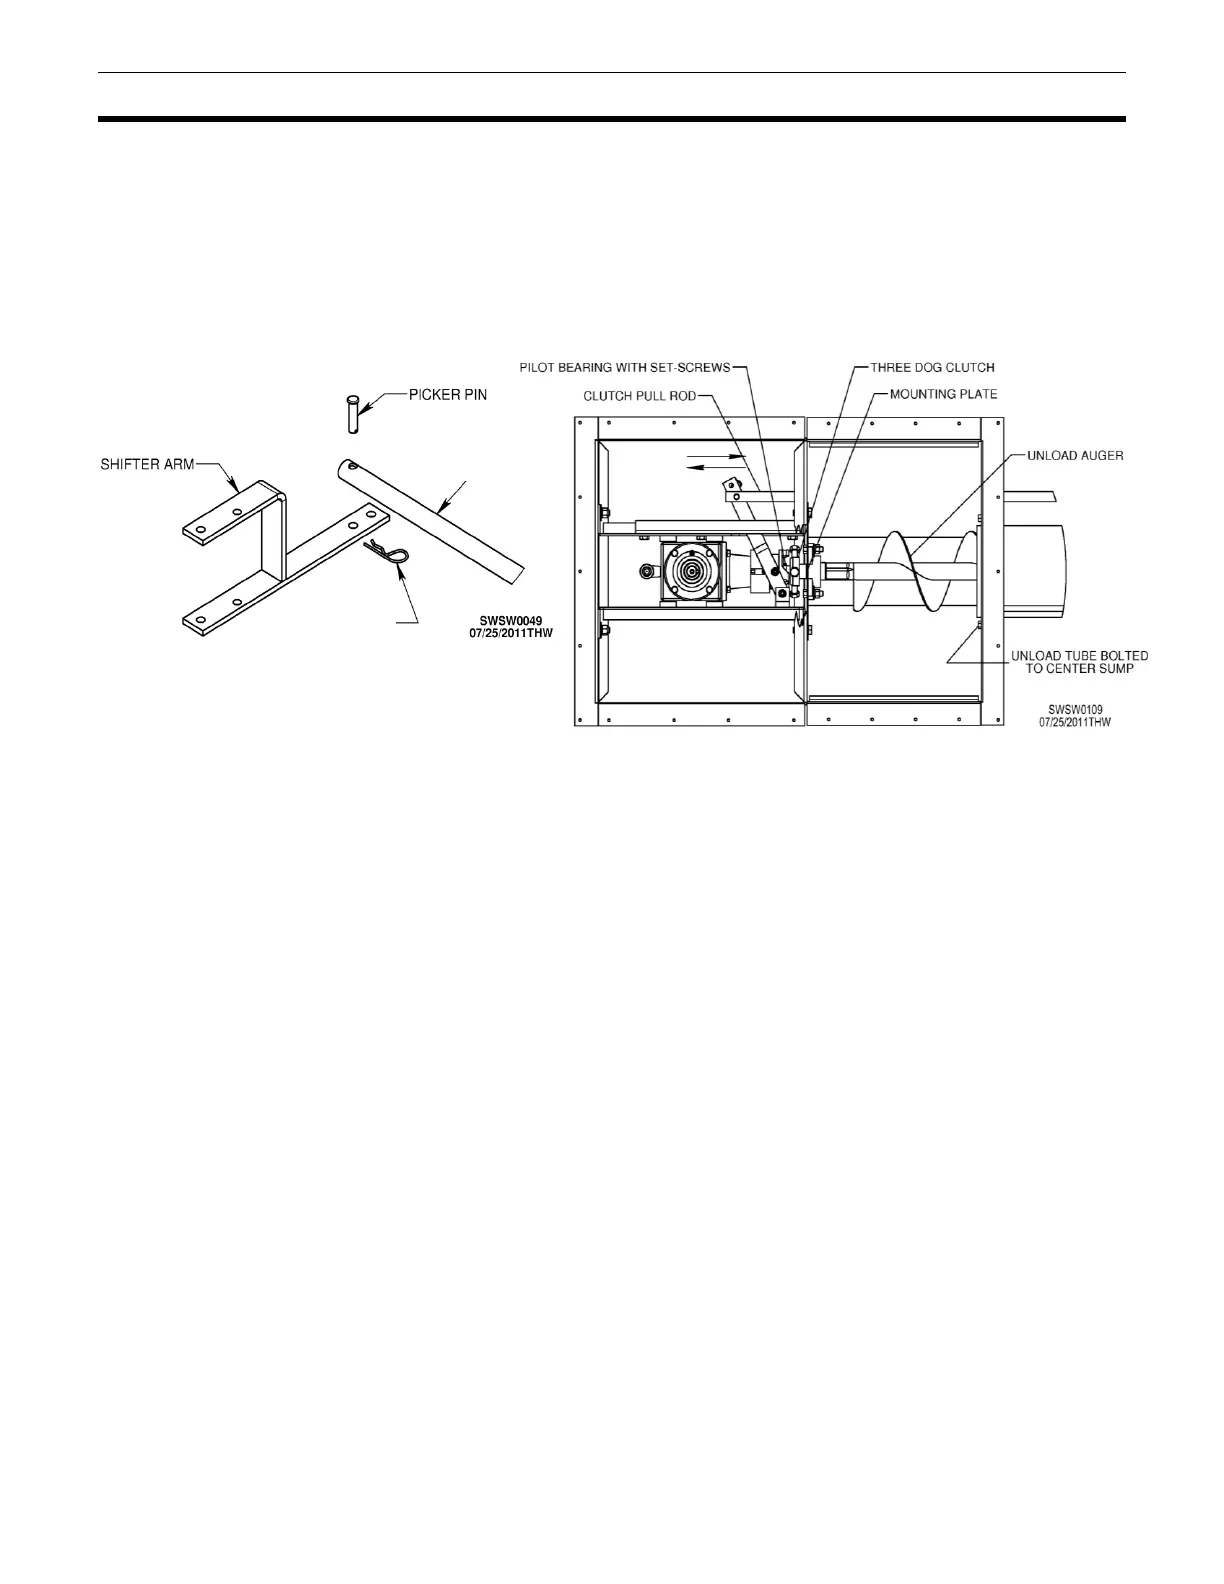
Attach clutch pull rod to clutch shifter arm with 3/8 x 1-1/2” picker pin and hairpin clip. Use hole closest to
end of shifter arm for 10” unit. Use other hole for 6” or 8” unit. See Fig. 13. See Fig. 14 for overview of
center sump and clutch assembly.
Fig. 14 – Overview of sump w/ pull rod connected
Guide center sump gate pull rod up to 1/2" nut rivet on center sump slide gate. See Fig. 5. Thread pull rod
into nut rivet until tight. Turn nut on pull rod until it is tight against slide gate.
As floor installation or re-installation continues, cut floor planks where intermediate sumps will be located.
Number of sumps varies with diameter of bin.
Put top half of each intermediate sump into hole cut into bin flooring. Secure flanges to flooring with self-
drilling screws. See Fig. 5. Also, ensure bottoms of sump covers extend into intermediate sumps. Sump
covers may have to be trimmed so they do not interfere with sump gate operation.
With all intermediate sumps in position and all sump slide gates operating freely, tighten clamps on bin
collar. See Fig. 11.
Fig. 13 – Connecting clutch
pull rod to shifter arm
ATTACH ROD TO
INSIDE HOLE OF ARM
FOR 6” OR 8” UNIT;