Installation
Slide 1" lock collar onto clutch pull rod with clutch disengaged (rod pushed in). Push latch down and slide
1” lock collar against bin collar so that when latch is released, lock collar is sandwiched between latch and
bin collar. See Fig. 15. Tighten 1” lock collar setscrew. Latch will keep clutch disengaged. When latch is
pushed down, rod can be pulled for engagement of clutch.
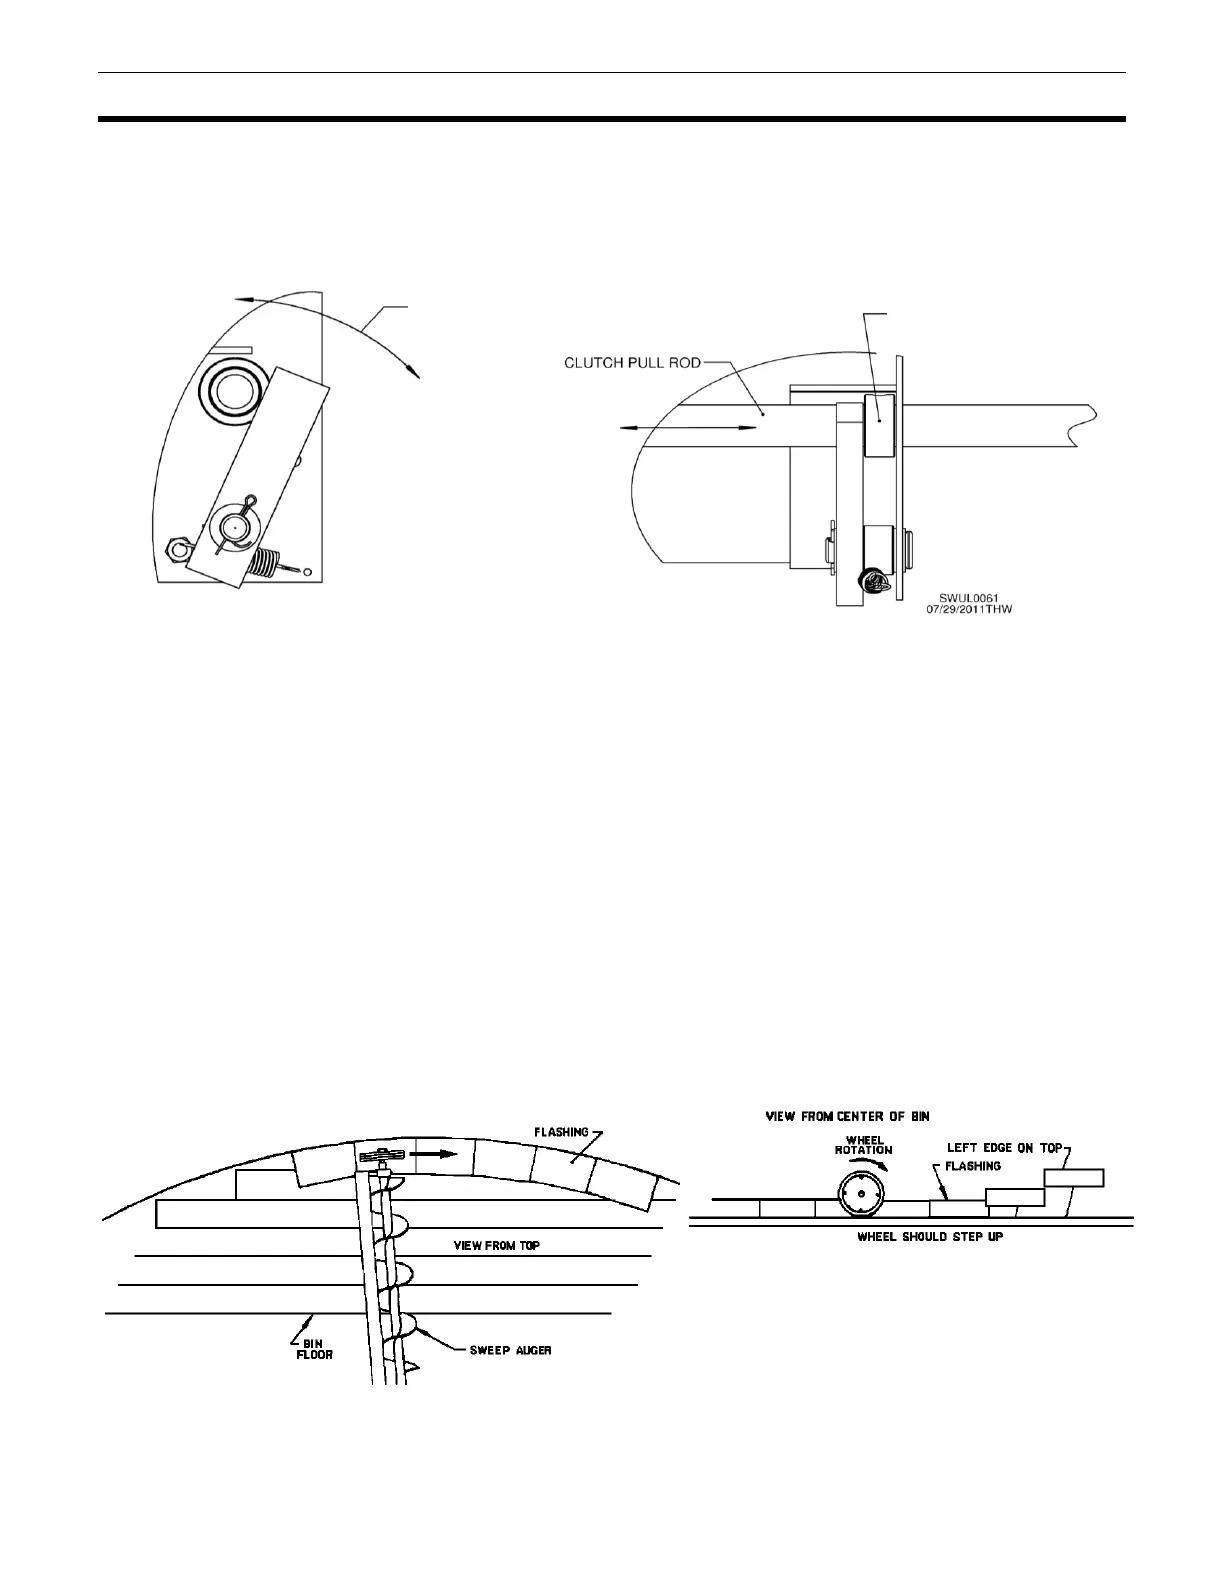
Fig. 15 – Front and side views of clutch lock assembly
NOTE: Clutch is factory-set. However, make sure teeth engage and disengage properly. There should
be about 1/4" clearance when clutch is disengaged. See Fig. 10. Clutch disc may be adjusted by
loosening bolts.
COMPLETING FLOOR INSTALLATION
Complete installation of bin floor, making sure to provide adequate support along unload tube and near
sump. This applies to full-aeration steel floors and flooring over concrete trench.
NOTE: If small, easy-flowing grain will be stored in bin, it is best to seal sumps with silicone or a rubber
membrane (not provided) to avoid leaking.
IMPORTANT: Ensure supports do not interfere with sump gate operation.
NOTICE: Floor flashing must be installed over steel aeration floor as shown in Fig. 16 to prevent
excessive wear on drive wheel. Sweep moves clockwise. Ensure that flashing is overlaid so sweep
wheel “steps up.”
PUSH LATCH DOWN TO
MOVE PULL ROD