INSTALLATION, OPERATION, AND MAINTENANCE MANUAL
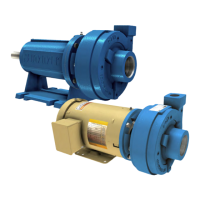
28 SUMMIT PUMP MODEL CCFM GENERAL PURPOSE
(06) with a soft rubber hammer or dead blow until the bearing retaining ring (18A) sets against
the frame (19).
8. Install the bearing cover (37) and tighten the bearing cover bolts (37A) to torque values in
Table 15-1.
9. Slide the deflector (40) over the shaft (06) from the impeller (02) end. Install the grease
fittings (19C, 37C).
12.2 ADAPTOR KIT
The following order of assembly instructions vary slightly between frame 1 and frame 2 sizes as
well as stainless frame 1 construction due to the sealed shaft. Be aware of the differences when
reading the following.
When replacing the mechanical seal (65-80B), always replace the complete seal. Never mix seal
parts with another seal, even if they are the same size and type of seal.
1. With a compatible lube for the rubber and pumped fluid, lubricate the shaft sleeve O-Ring
(130). Install into the machined groove in the sleeve (14).
For frame 2 pumps, install the sleeve (14) over the shaft (06) now, before installing the
adaptor (71). Make sure the sleeve (14) slides all the way to the shoulder on the shaft (06).
2. Apply a compatible lubricant on the O-Ring of the stationary element (65). Install the
stationary element (65) into the adaptor (71) taking extreme care not to scratch or contaminate
the highly polished seal face. Use a soft micro-fiber cloth to cover the seal face when pushing
the stationary element (65) into the adaptor (71). Install only using your fingers or a flat arbor
when pushing into the adaptor (71).
3. Install adaptor plugs (71B) into adaptor (71). Apply a thread sealant to the threads.
4. Carefully install the adaptor (71) over the shaft (06) trying not to damage the stationary
element (65) against the shaft (06). Secure the adaptor with the adaptor to frame bolts (71A)
and torque to specifications in Section 15.1.1 on page 32.
For Frame 1 Cast Iron/Bronze construction, follow steps 5-7.
5. For frame 1 cast iron/bronze pumps, the sleeve (14) can now be installed. Make sure the
opening for the impeller key (32) is nearest the impeller (02) end of the shaft (06).
6. Apply a compatible lubricant for the rubber and pumped fluid over the sleeve (14) and the
inner diameter of the rotating element (80). Slide the rotating element (80) over the sleeve (14)
by hand. Make sure the seal faces of the rotating element (80) and stationary element (65)
meet, take extra care to keep the seal faces free from scratches and debris.
7. Install the mechanical seal spring (80B). It should seat on the rotating element (80) and stay in
place. Install the impeller key (32) into the shaft (06) and sleeve (14) groove.