INSTALLATION, OPERATION, AND MAINTENANCE MANUAL
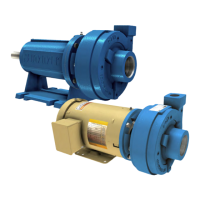
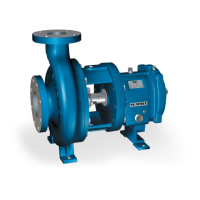
SUMMIT PUMP MODEL CCFM GENERAL PURPOSE 29
For frame 1 Stainless Steel construction, follow steps 8-10.
8. For frame 1 stainless steel pumps, the mechanical seal spring (80B) can be installed over the
sleeve (14). Lubricate the inner diameter of the rotating element (80) and outside of the sleeve
(14) with a compatible lubricant for the rubber and pumped fluid. Install the rotating element
(80) over the sleeve (14) and mate with the mechanical seal spring (80B), take extreme care
not to scratch or get debris on the seal face.
9. Slide the sleeve (14) with spring (80B) and rotating element (80) over the shaft (06) until the
rotating element (80) seal face mates with the stationary element’s (65) seal face.
10. Install the impeller sleeve O-Ring (131) into the groove of the sleeve (14). Install the impeller
key (32) into the shaft (06) and sleeve (14) groove with the angled edge of the key (32)
towards the sleeve (14)
For frame 2 in both materials of construction, follow steps 11-12.
11. Lubricate the inner diameter of the rotating element (80) and sleeve (14) with compatible
lubricant of the rubber and pumped fluid. Slide the rotating element (80) over the sleeve (14)
until the seal faces mate. Take extra care not to scratch or damage either seal face.
12. Install the mechanical seal spring (80B) over the sleeve (14) and it should remain attached to
the rotating element (80). Install the impeller key (32) into the shaft (06) groove.
12.3 Liquid End
Continue assembly for all frame sizes and material of construction:
1. Slide the impeller (02) over the shaft (06) aligned with the impeller key (32). Hold the
impeller (02) in position with one hand and with the other hand install the impeller washer
(24A), impeller bolt gasket (26A) (only for frame 1 stainless construction) and the impeller
bolt (26).
2. When torqueing the impeller bolt (26) make sure the mechanical seal spring (80B) is set on
the impeller (02) correctly. The sleeve (14) slides back, if not already, to the shoulder on the
shaft (06).
3. Rotate the impeller (02) and listen for any rubbing in the seal area.
4. Lightly coat the casing gasket (73A) with a non-hardening sealing product, such as graphite.
This will help the initial seal of the casing (01) and keep the casing gasket (73A) in place
when installing the casing (01).
5. Maneuver the casing (01) over the impeller (02) hub and line up the casing bolt holes. Thread
in all the casing bolts (01A) by hand. Rotate the shaft (06) and listen for rubbing of the
impeller hub and casing ring (07) or casing (01). Adjust the casing (01) if rubbing is present.
6. Torque the casing bolts to the specifications in Table 15-1 on page 32.
7. Connect any flush lines to the stuffing box as required.