2 Sun Blade 150 Getting Started Guide • June 2002
Planning the Installation Process
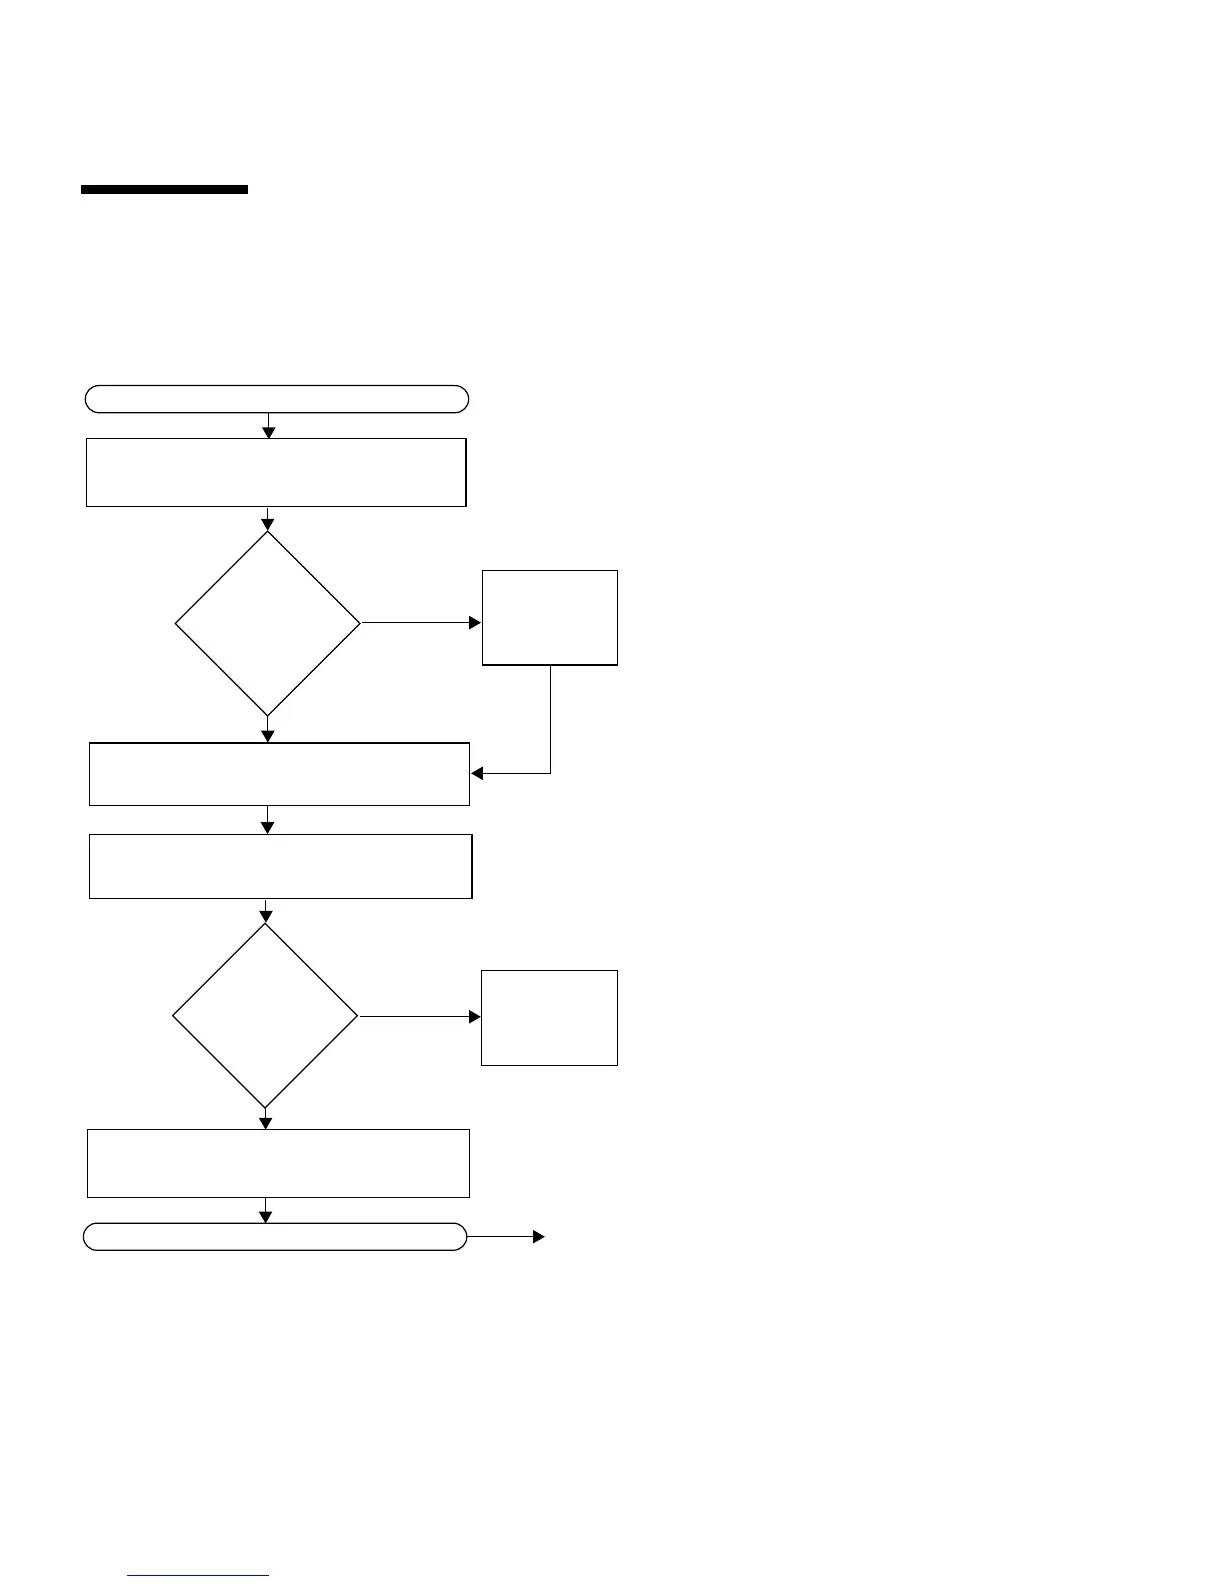
Use the following flow chart as a process tool to assist you with installation of the
Sun Blade 150 workstation.
FIGURE 1-1 Navigational Flow Chart for the Sun Blade 150 Workstation
Unpack the workstation and familiarize yourself
with the workstation features.
Connect the workstation and external device
cables.
Power on the workstation.
Answer the Solaris software prompts.
READY TO WORK!
START
Install
different
version.
No
Yes
“Unpacking the Workstation” on page 4.
Also see “Front Panel Overview” on page 5, and “Back Panel Overview”
on page 6.
See “Cabling the Workstation” on page 8.
See “Powering On the Workstation” on page 10.
For instructions, refer to the documentation in the
Solaris Media Kit for you operating environment.
See “Setting Up Your Operating Environment” on page 13.
Also see “Getting Started With the Additional Preinstalled
Software” on page 19.
Use the
preinstalled
version of
software?
Install optional
components?
Install
optional
components.
Yes
No
See “Installing Optional Internal Hardware” on
page 43 to install DIMMs, graphic accelerators,
PCI cards, hard drives, diskette drives, or
CD-ROM/DVD-ROMs.

 Loading...