SunFounder picar-x
• Once inside the Raspberry Pi desktop, open Terminal and type the following command to run it, or just open
and run it with a Python editor.
cd /home/pi/picar-x/example
sudo python3 color_detect.py
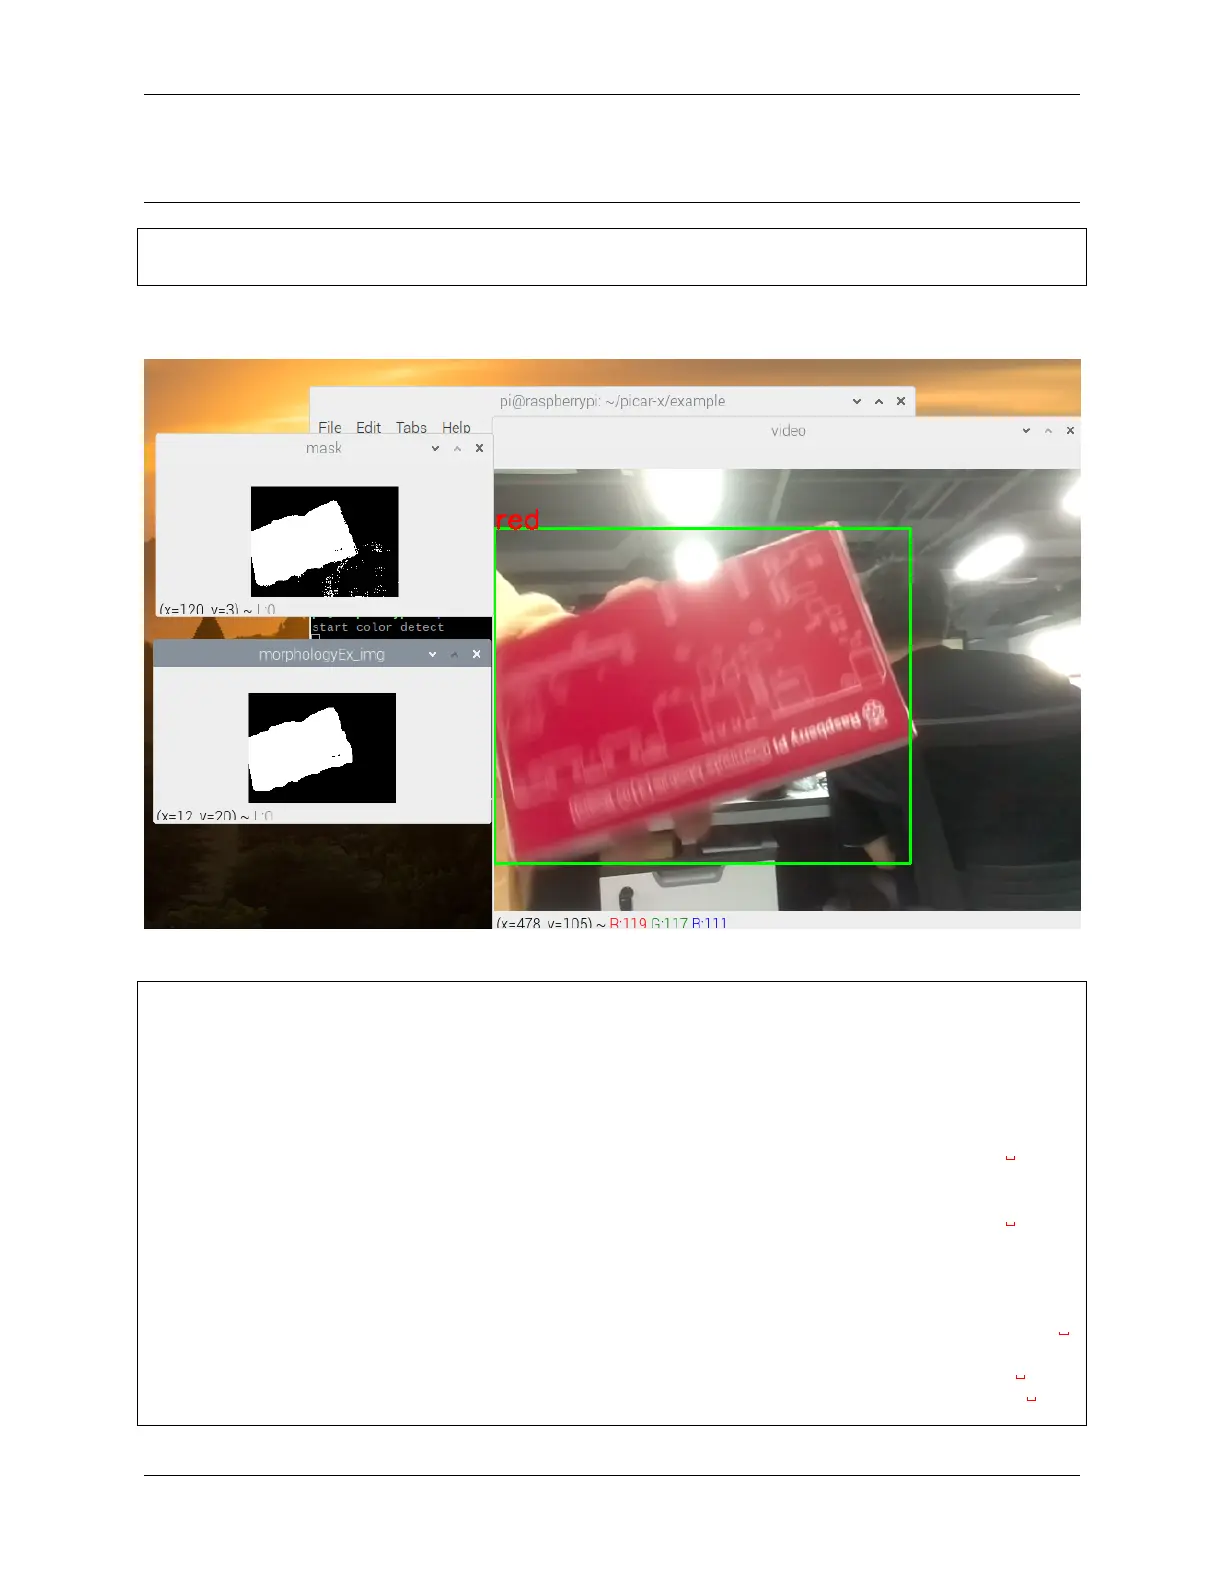
When the code is run, if PiCar-X captures a red object, it will frame it out. You can also change the 'red' in the
code to another color for detection.
Code
import cv2
from picamera.array import PiRGBArray
from picamera import PiCamera
import numpy as np
import time
color_dict = {'red':[0,4],'orange':[5,18],'yellow':[22,37],'green':[42,85],'blue':[92,
˓→110],'purple':[115,165],'red_2':[165,180]} #Here is the range of H in the HSV
˓→color space represented by the color
kernel_5 = np.ones((5,5),np.uint8) #Define a 5×5 convolution kernel with element
˓→values of all 1.
def color_detect(img,color_name):
# The blue range will be different under different lighting conditions and can be
˓→adjusted flexibly. H: chroma, S: saturation v: lightness
resize_img = cv2.resize(img, (160,120), interpolation=cv2.INTER_LINEAR) # In
˓→order to reduce the amount of calculation, the size of the picture is reduced to
˓→(160,120)
(continues on next page)
64 Chapter 4. Play with Python