SunFounder picar-x
Now you can continue the installation as instructed on the assembly foldout.
Note:
• Do not unplug this servo cable before fixing it with the servo screw, you can unplug it after fixing it.
• Do not rotate the servo while it is powered on to avoid damage; if the servo shaft is not inserted at the right
angle, pull the servo out and reinsert it.
• Before assembling each servo, you need to plug the servo cable into P11 and turn on the power to set its angle
to 0°.
After the PiCar-X assembly is completed, try running the projects below:
4.2 Calibrating the PiCar-X
Some servo angles may be slightly tilted due to possible deviations during PiCar-X installation or limitations of the
servos themselves, so you can calibrate them.
Of course, you can skip this chapter if you think the assembly is perfect and doesn’t require calibration.
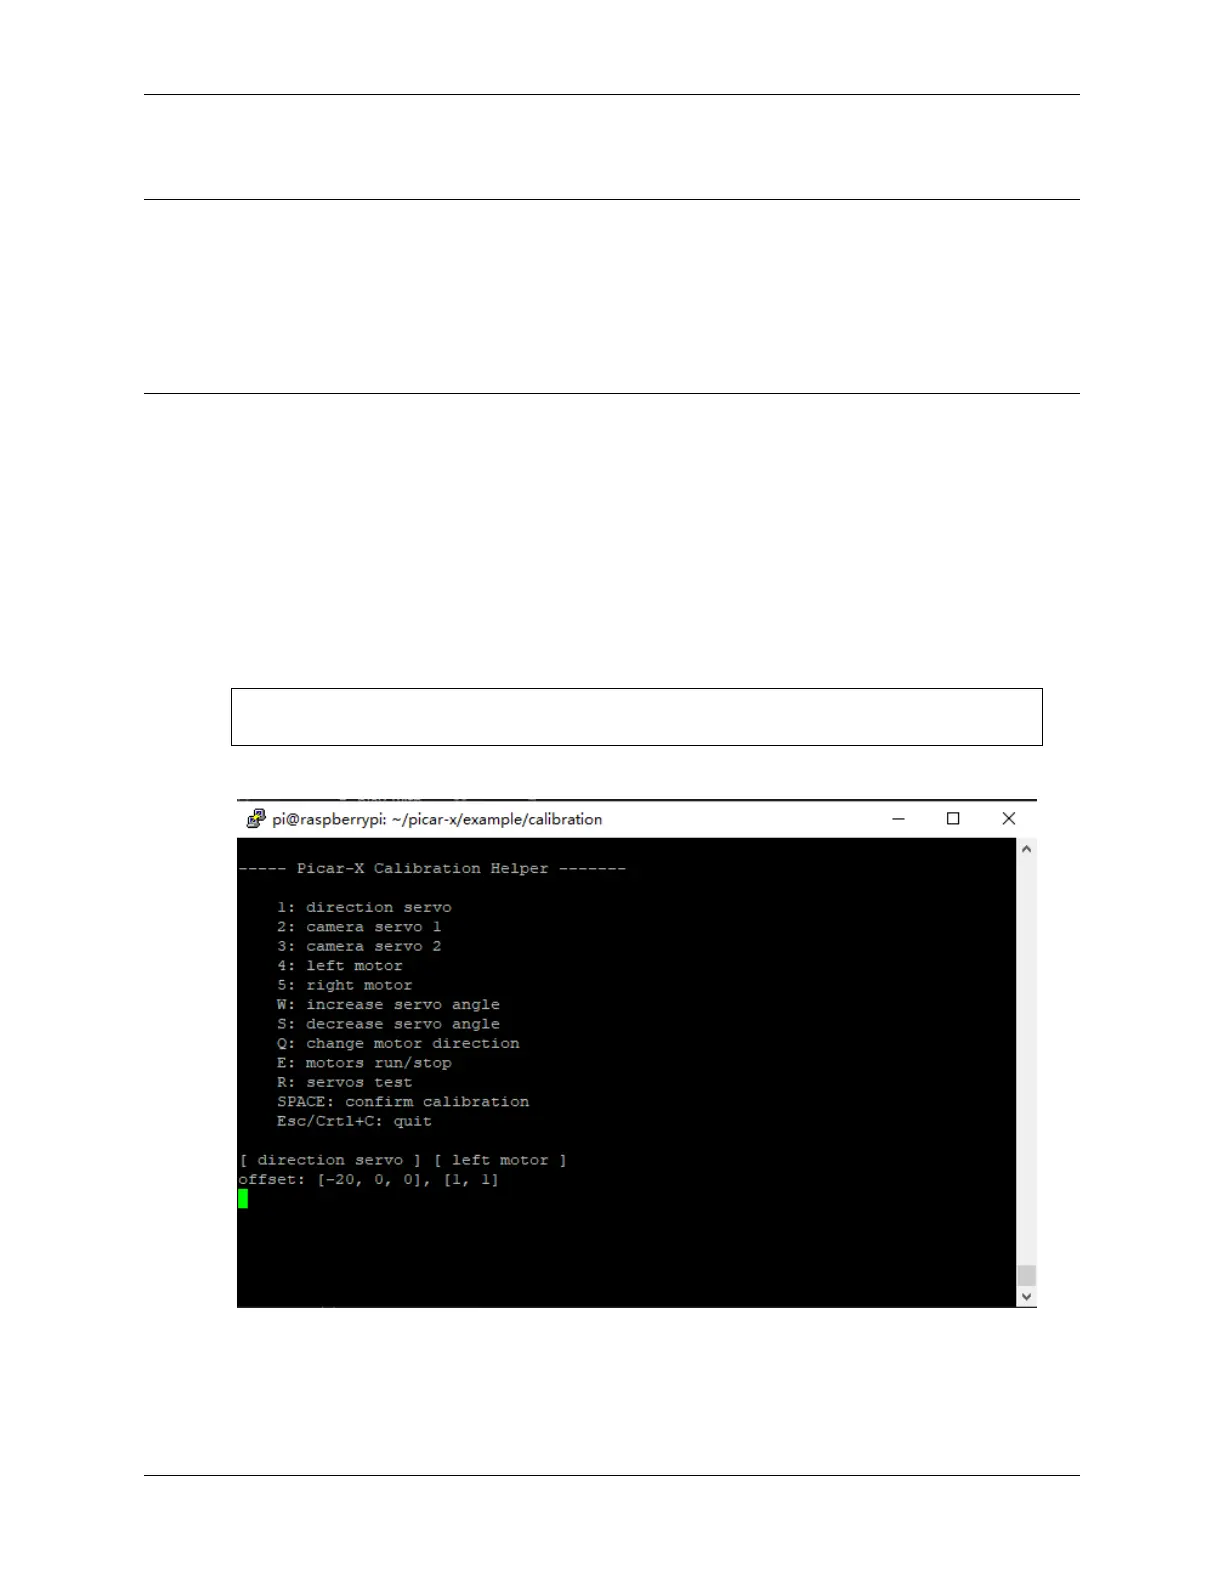
1. Run the calibration.py.
cd /home/pi/picar-x/example/calibration
sudo python3 calibration.py
2. After running the code, you will see the following interface displayed in the terminal.
3. The R key is used to test whether the servo that controls the direction of the front wheel can work normally and
is not damaged.
4. Press the number key 1 to select the front wheel servo, and then press the W/S key to let the front wheel looks
as forward as possible without skewing left and right.
50 Chapter 4. Play with Python