S
S
S
R
R
R
F
F
F
6
6
6
1
1
1
8
8
8
B
B
B
6
6
6
U
U
U
s
s
s
e
e
e
r
r
r
’
’
’
s
s
s
M
M
M
a
a
a
n
n
n
u
u
u
a
a
a
l
l
l
~40~
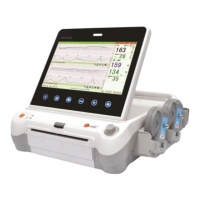
8.7 Using Wireless Transducers
The monitor can collocate with two wireless FHR transducers and one wireless TOCO transducer optionally.
When you use the wireless transducers, please note the following:
When it is turned on, verify the power and wireless signal indicators of each wireless transducer are
normal. It is recommended to use the wireless transducers with full battery power.
Using a mixture of wired and wireless fetal transducers on one pregnant woman is NOT supported. You
can use either wired or wireless transducers.
To avoid interference on wireless channels from different monitors: When use wireless transducers from
different monitors at the same time, there may be cross interference. To avoid this interference, you
must setup the different wireless transducer No. for different monitors. Before setting the wireless
transducer No., you should put the wireless transducers back to the Wireless Transducer Holder. Please
note that you mustn’t misuse the wireless transducers from different monitors. Please refer to section 6.2
Fetal setting 16) Wireless Transducer No. for the wireless transducer No. settings.
8.8 Start Monitoring
After the START key is pressed, the monitor automatically zeroes the pressure and starts monitoring.
Press the PRINT key to start printing.
8.9 Inputting Maternal Information
8.9.1 Auto ID
After you press the START key , the system creates an auto-ID for the present patient if Mat. Info
inputting is switched off. The auto-ID consists of the date and time when the monitoring starts.
8.9.2 Changing Maternal Information
You can change the patient’s information after the monitoring starts:
1) Press the Bed key
to and rotate the control knob to select the Tools menu key , press the
control knob and enter the shortcut menu, shown as Fig.8-3. Select the Patient Info item and enter the
Patient Information menu, shown as Fig.8-4.