S
S
S
R
R
R
F
F
F
6
6
6
1
1
1
8
8
8
B
B
B
6
6
6
U
U
U
s
s
s
e
e
e
r
r
r
’
’
’
s
s
s
M
M
M
a
a
a
n
n
n
u
u
u
a
a
a
l
l
l
~14~
Chapter 3 Installation Guide
NOTE:
Installation must be carried out by qualified personnel authorized by the manufacturer.
3.1 Unpacking and checking
1) Unpack all external packing for the monitor and its accessories.
2) Check all items according to the Packing List.
3) Check the monitor and its accessories for any damage.
4) If any item is missing or damaged, please contact the consignment unit and our company.
3.2 Installing Battery
WARNING:
Switch off the monitor and unplug it before installing or removing the battery.
If your monitor has been configured with a rechargeable lithium-ion battery, follow these steps to install the
battery:
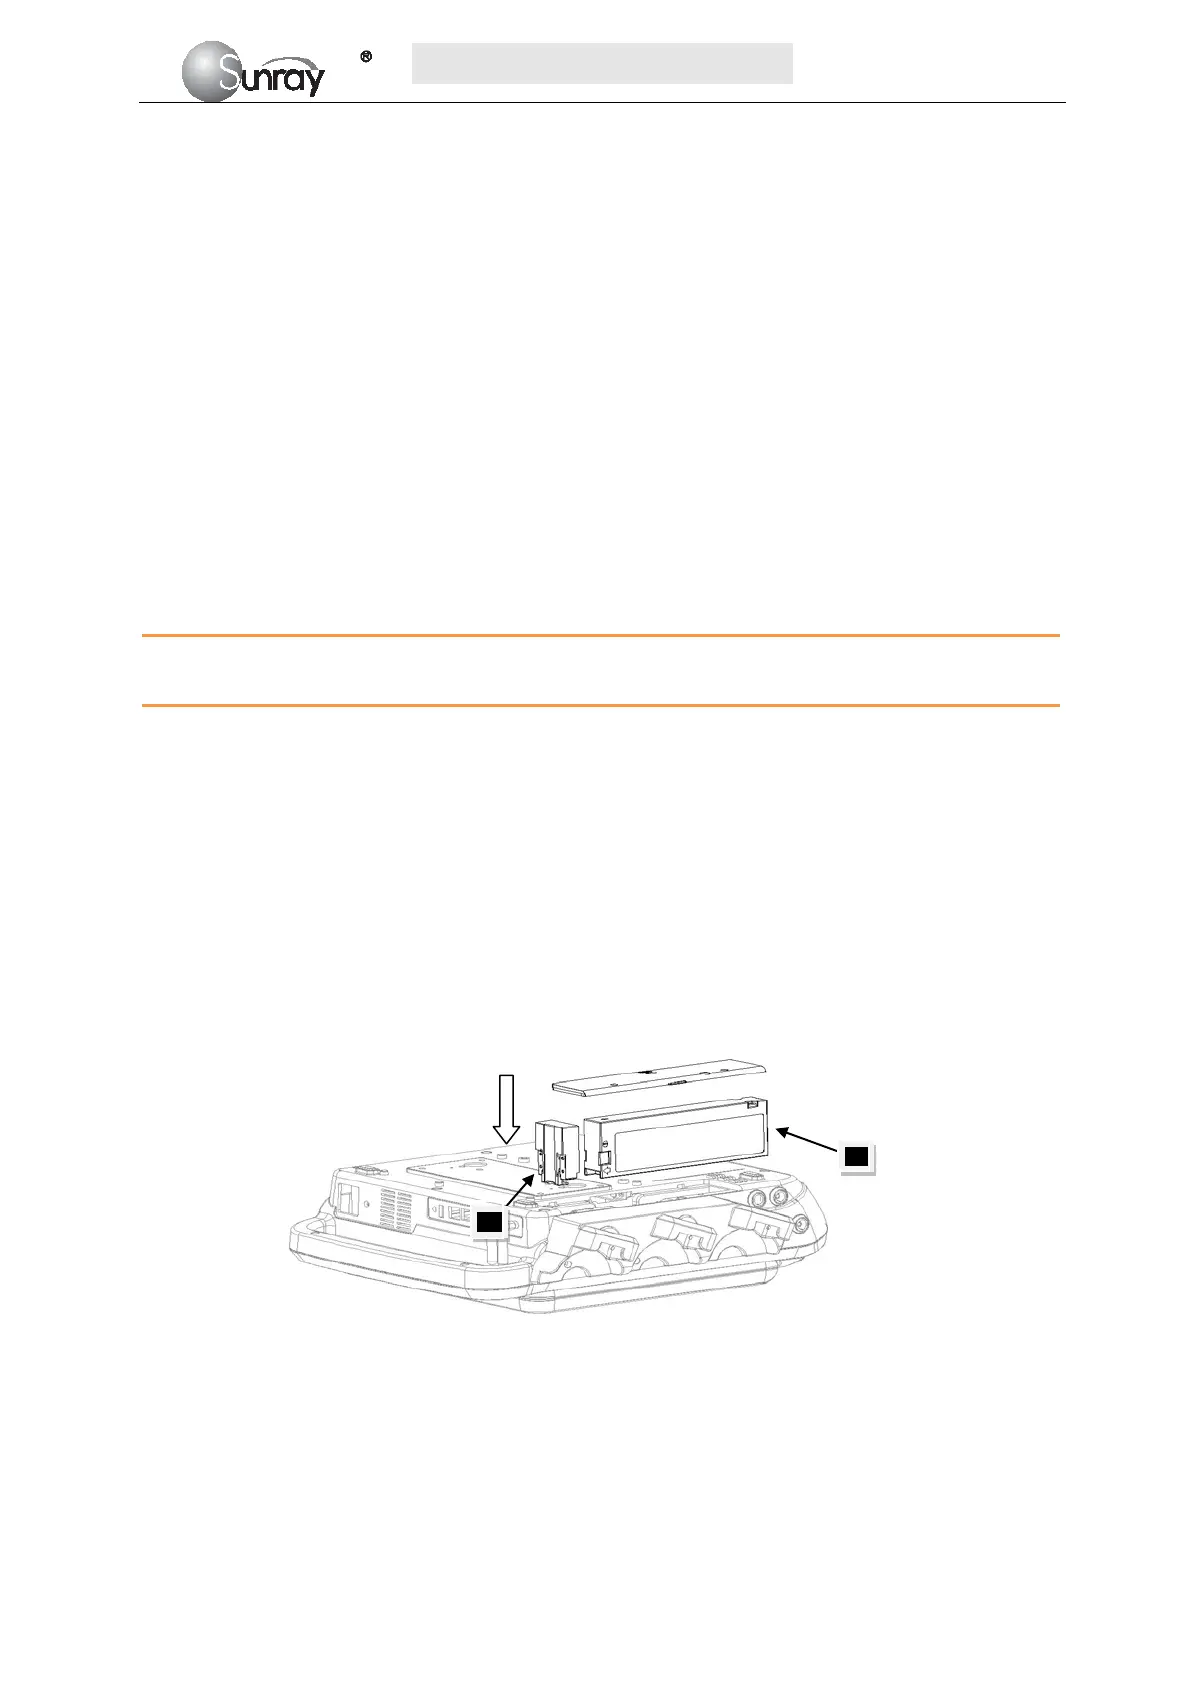
1. Battery Installation
1) Carefully place the monitor upside down on a flat surface covered with cloth or other type of
protecting pad.
2) Remove the screws of the battery compartment using a cross-head screw driver. Remove the
battery compartment cover, and take out the case 1(“1”, shown as Fig.3-1).
3) Plug the battery (2) to the case 1, and then put it into the battery compartment.
4) Shut the battery compartment cover and fix the screws.
Fig.3-1
2. Battery Removal
Fold the LCD display completely flat before turning the monitor upside down. Remove the battery in reverse
order.
NOTE:
If a rechargeable battery is outfitted, charge it fully each time after using the device to ensure the electric
power is enough.