S
S
S
R
R
R
F
F
F
6
6
6
1
1
1
8
8
8
B
B
B
6
6
6
U
U
U
s
s
s
e
e
e
r
r
r
’
’
’
s
s
s
M
M
M
a
a
a
n
n
n
u
u
u
a
a
a
l
l
l
~22~
5.3 Choosing Paper Speed
You can choose a paper speed of 1 cm/min, 2cm/min or 3cm/min:
1) Select the MENU key
on the main interface.
2) Select System Setting > Printer Settings>CTG Print Speed.
3) Select 1 cm/M, 2 cm/M or 3 cm/M (default).
4) Select Save.
NOTE:
Different paper speed setting causes different FHR trace appearance on the record paper. To avoid
misinterpretation, we recommend you to set all monitors in your institution to the same paper speed.
5.4 Print Self-Check
You can print a self-check as below:
1) Select the MENU key
on the main interface.
2) Select System Setting > Printer Settings.
3) Select Print Test Page.
5.5 Select the printing range
1) Press the Bed key to select the current patient, or load the patient file (refer to section 8.9
Reviewing)
2) Rotate the control knob to select the print menu
, and perss the control knob and enter to select the
printing range.
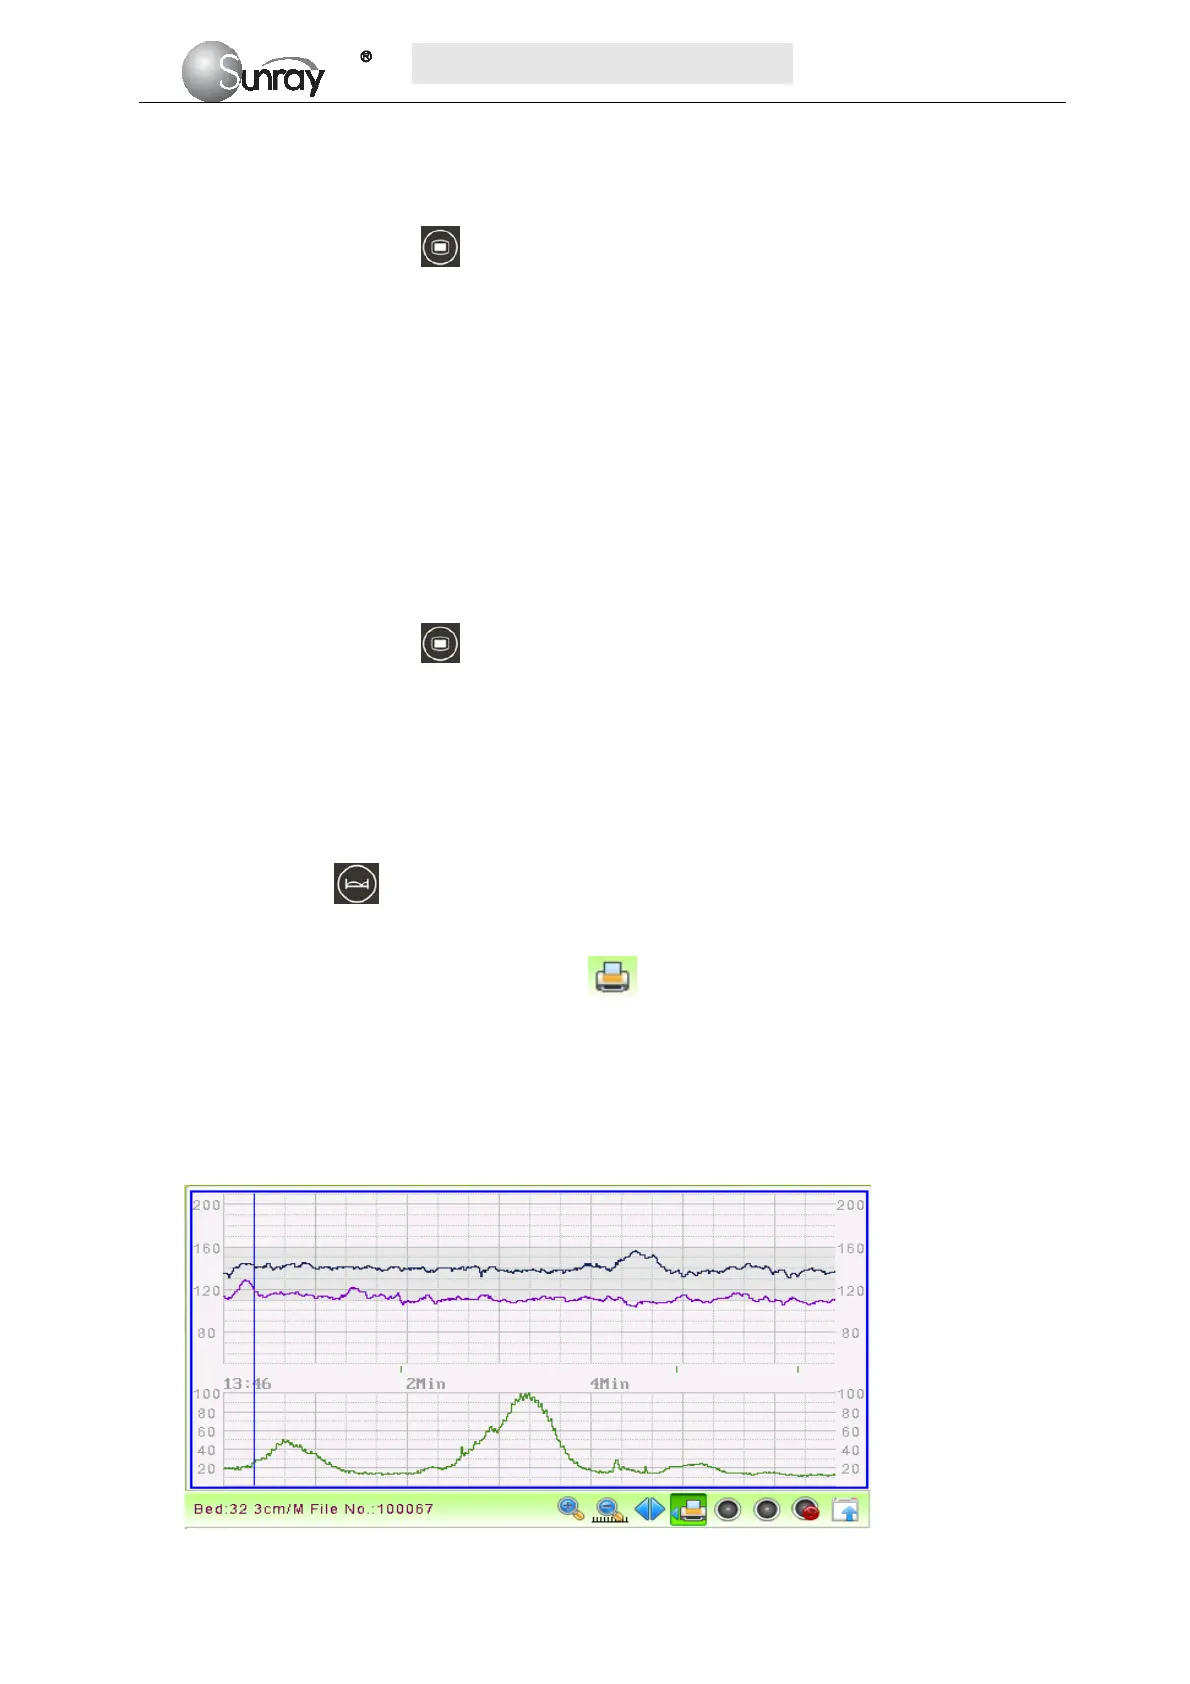
3) Select the printing start time:
Press the control knob, it will show a blue line (see the Fig.5-4). Rotate the control knob, and the blue
line will be backward or forth. Press the control knob to confirm the printing start time. The blue line
will turn to red (see the Fig.5-5).
Fig.5-4