S
S
S
R
R
R
F
F
F
6
6
6
1
1
1
8
8
8
B
B
B
6
6
6
U
U
U
s
s
s
e
e
e
r
r
r
’
’
’
s
s
s
M
M
M
a
a
a
n
n
n
u
u
u
a
a
a
l
l
l
~41~
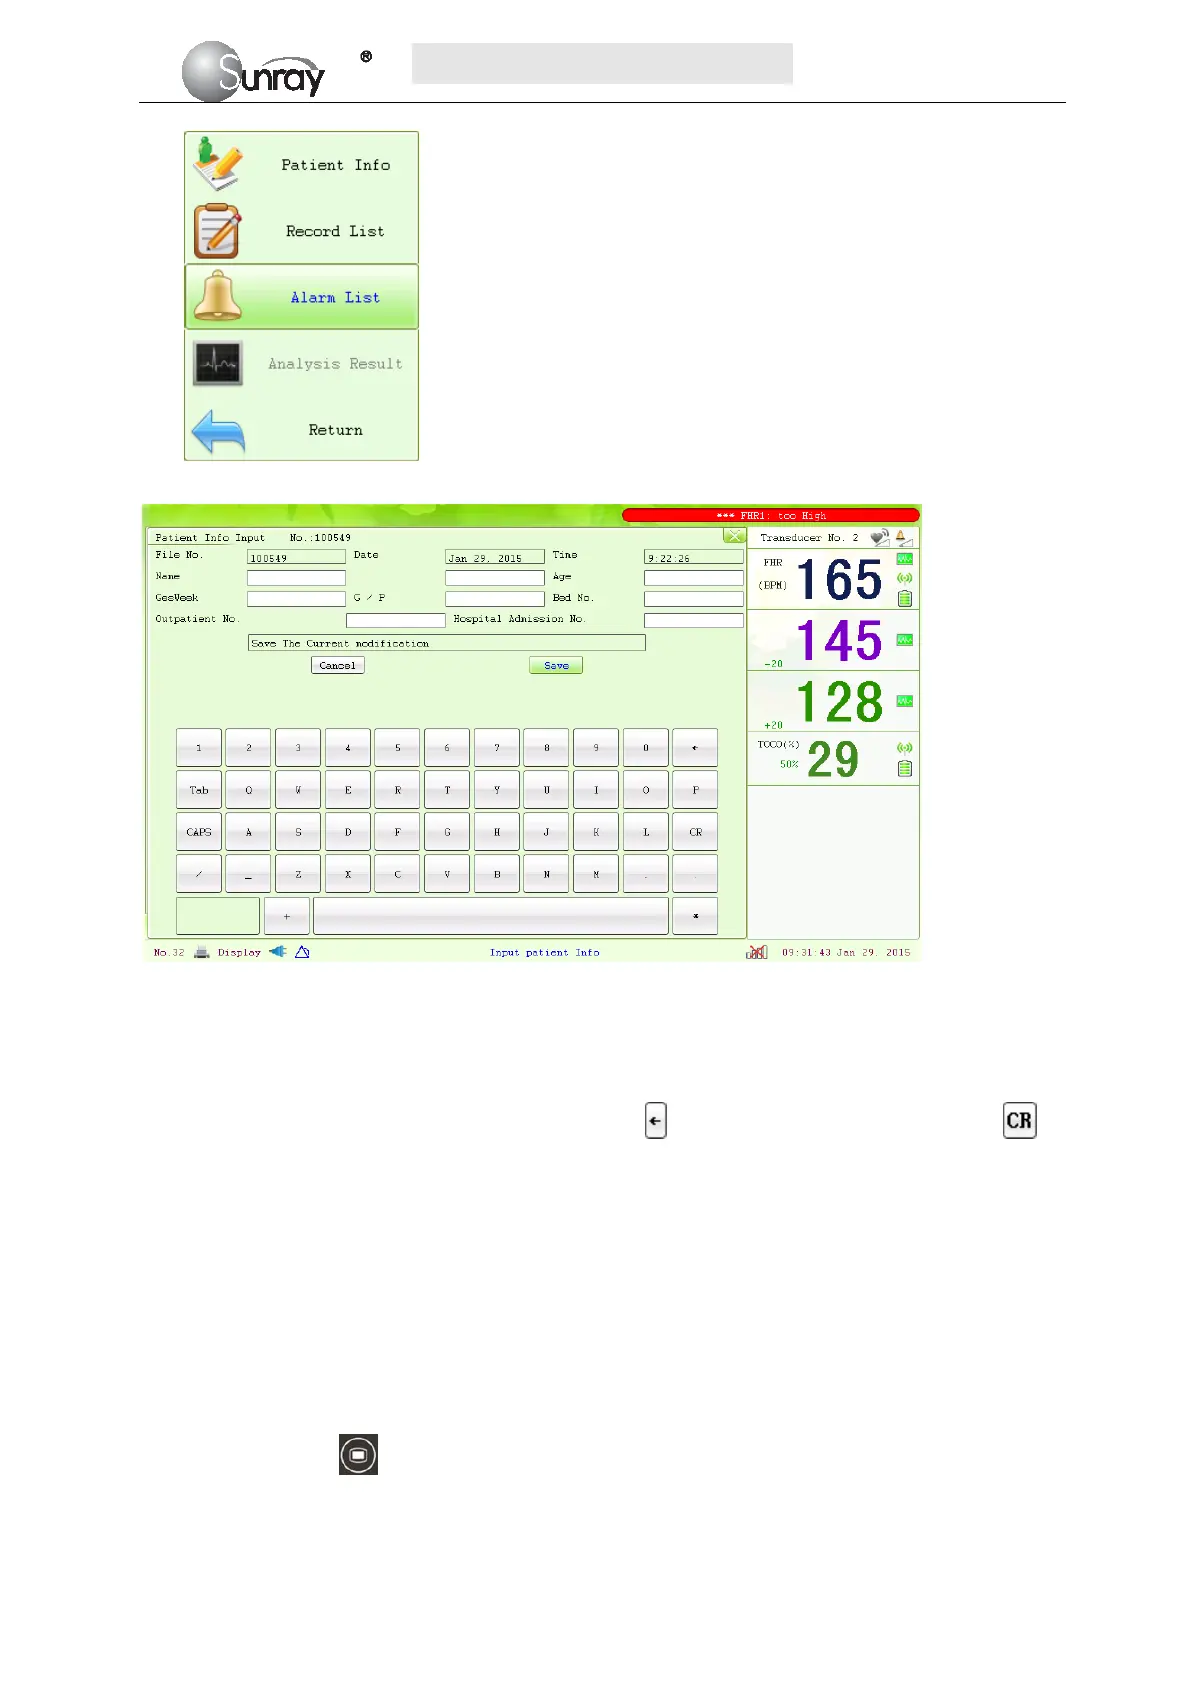
Fig. 8-3
Fig. 8-4
2) Use the soft keyboard and control knob to enter the patient File No., testing Date and Time, patient’s
Name, patient’s Age, Gestation Week, G/P information (G: number for gestation and labor), Bed No.,
Outpatient No., and Hospital Admission No. Select
to delete the entered character; Select to
confirm this field information.
3) Select Save.
The monitoring does not stop when you change maternal information. After you select Save to exit, the new
ID takes the place of the old one for this patient.
8.10 Reviewing
Press the MENU key on the main interface, you may enter the setting interface. Rotate the control
knob until the cursor on the Load Files, and press the control knob, you may enter the files listed, shown as
Fig.8-5. Rotate the control knob until the cursor on the file you want and press the knob, and then you can
review the traces. If the PRINT key is pressed at this moment, the recorder will print the traces starting from