S
S
S
R
R
R
F
F
F
6
6
6
1
1
1
8
8
8
B
B
B
6
6
6
U
U
U
s
s
s
e
e
e
r
r
r
’
’
’
s
s
s
M
M
M
a
a
a
n
n
n
u
u
u
a
a
a
l
l
l
~23~
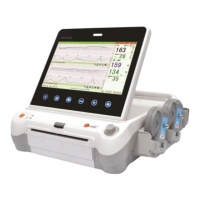
Fig.5-5
4) Select the printing end time:
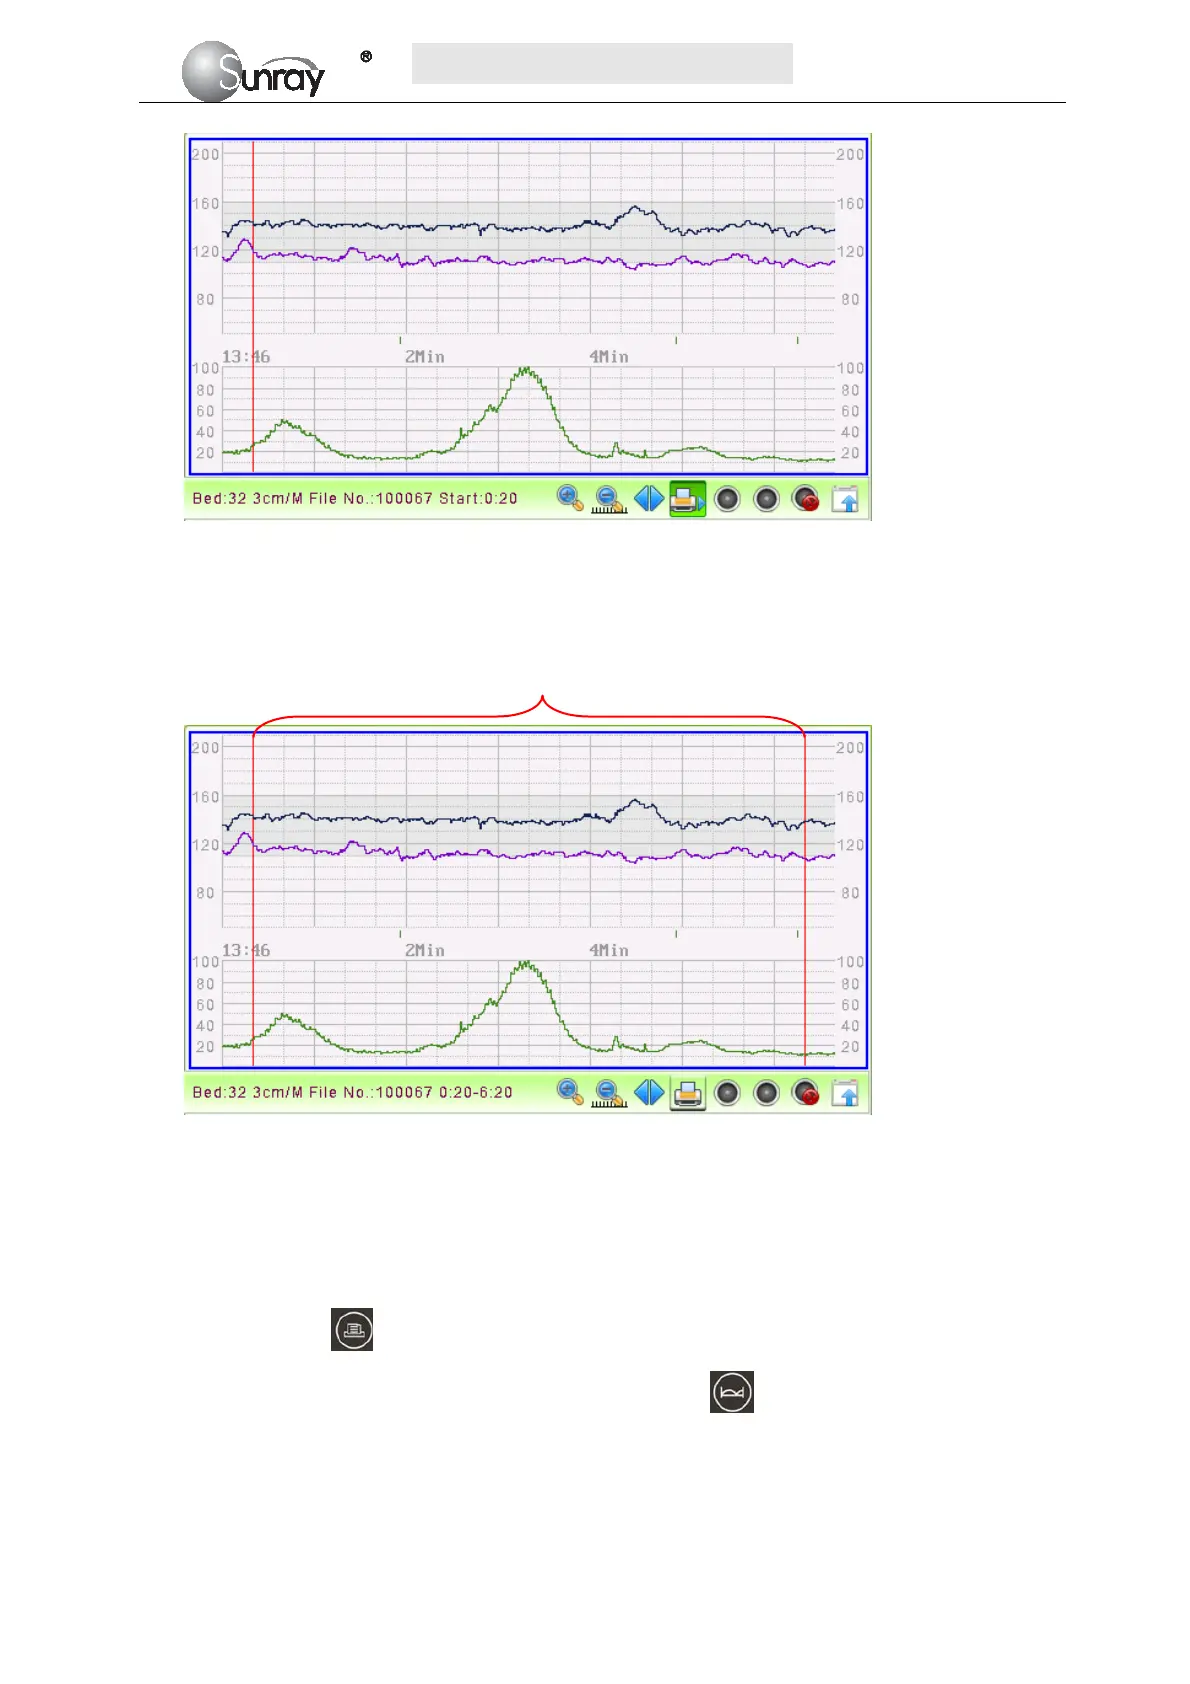
Repeat the operation in step 3) to select the printing end time. The range between the two red lines is the
selected printing range.
Fig.5-6
5.6 Print the traces
1) For the patient being monitored,
Print the selected range: You can select the printing range (refer to section 5.5), and then long press
the print key
, it will print the selected range.
If you don’t select the printing range, press the Bed key
and then long press the print key, it
will print the traces after the monitoring time you press the print key. If you have set the print time,
it will print for the pre-set time period.
2) For loading the patient file,
Print the selected range: You can select the printing range (refer to section 5.5), and then long press
Printing range