40
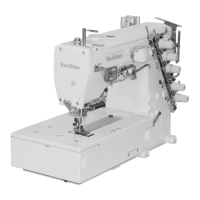
3) Loosen the four fixing screws① and separate the fixing plate⑦ and the cylinder connection link⑥. Separate the
clamp link(C)⑧, the fixing pin(C)⑤, and four fixing pins (L)④.
4) Loosen the four fixing screws③ and separate the clamp plate (upper)⑨. Replace with a new clamp plate (upper).
④
⑤
⑧
⑨
⑦
⑥
①
④
⑤
②
③
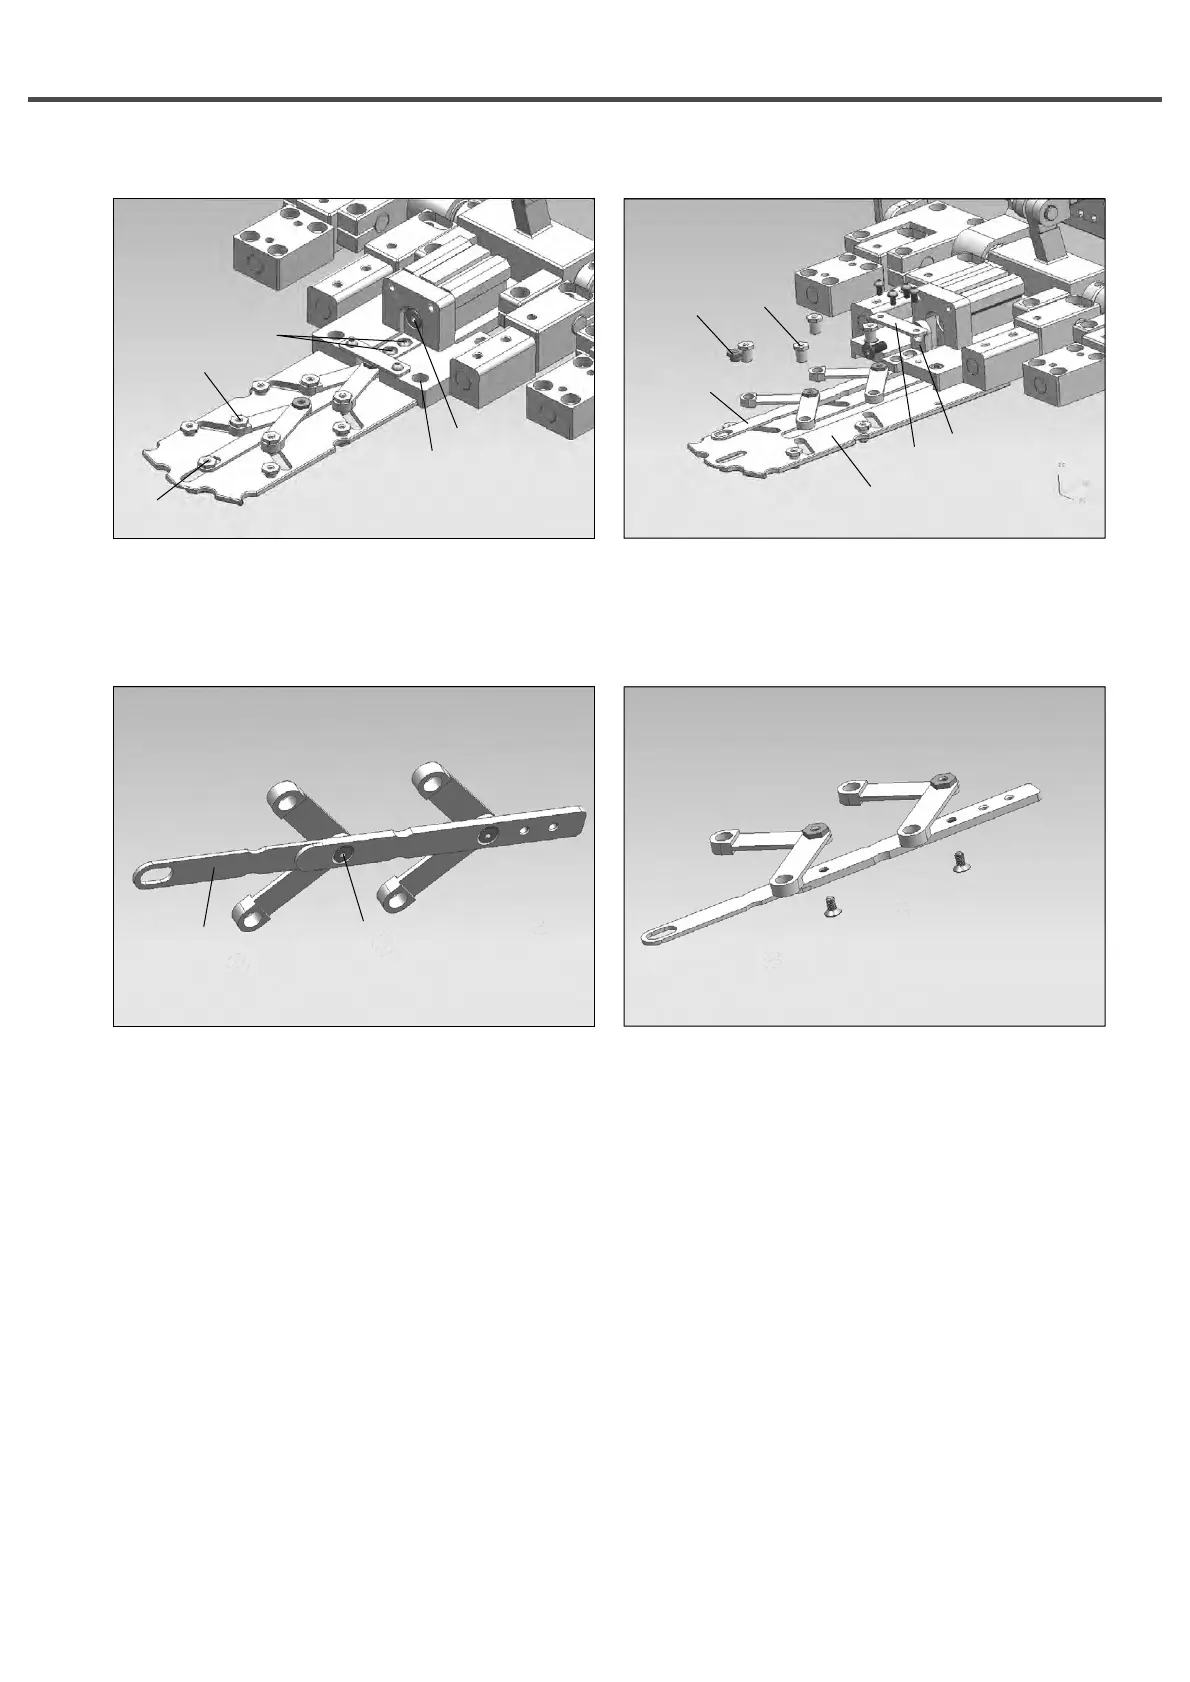
5) Loosen the two fixing screws① and separate the inner presser plate link(C)②. Replace with a new link.
①
②