Safety & security
27
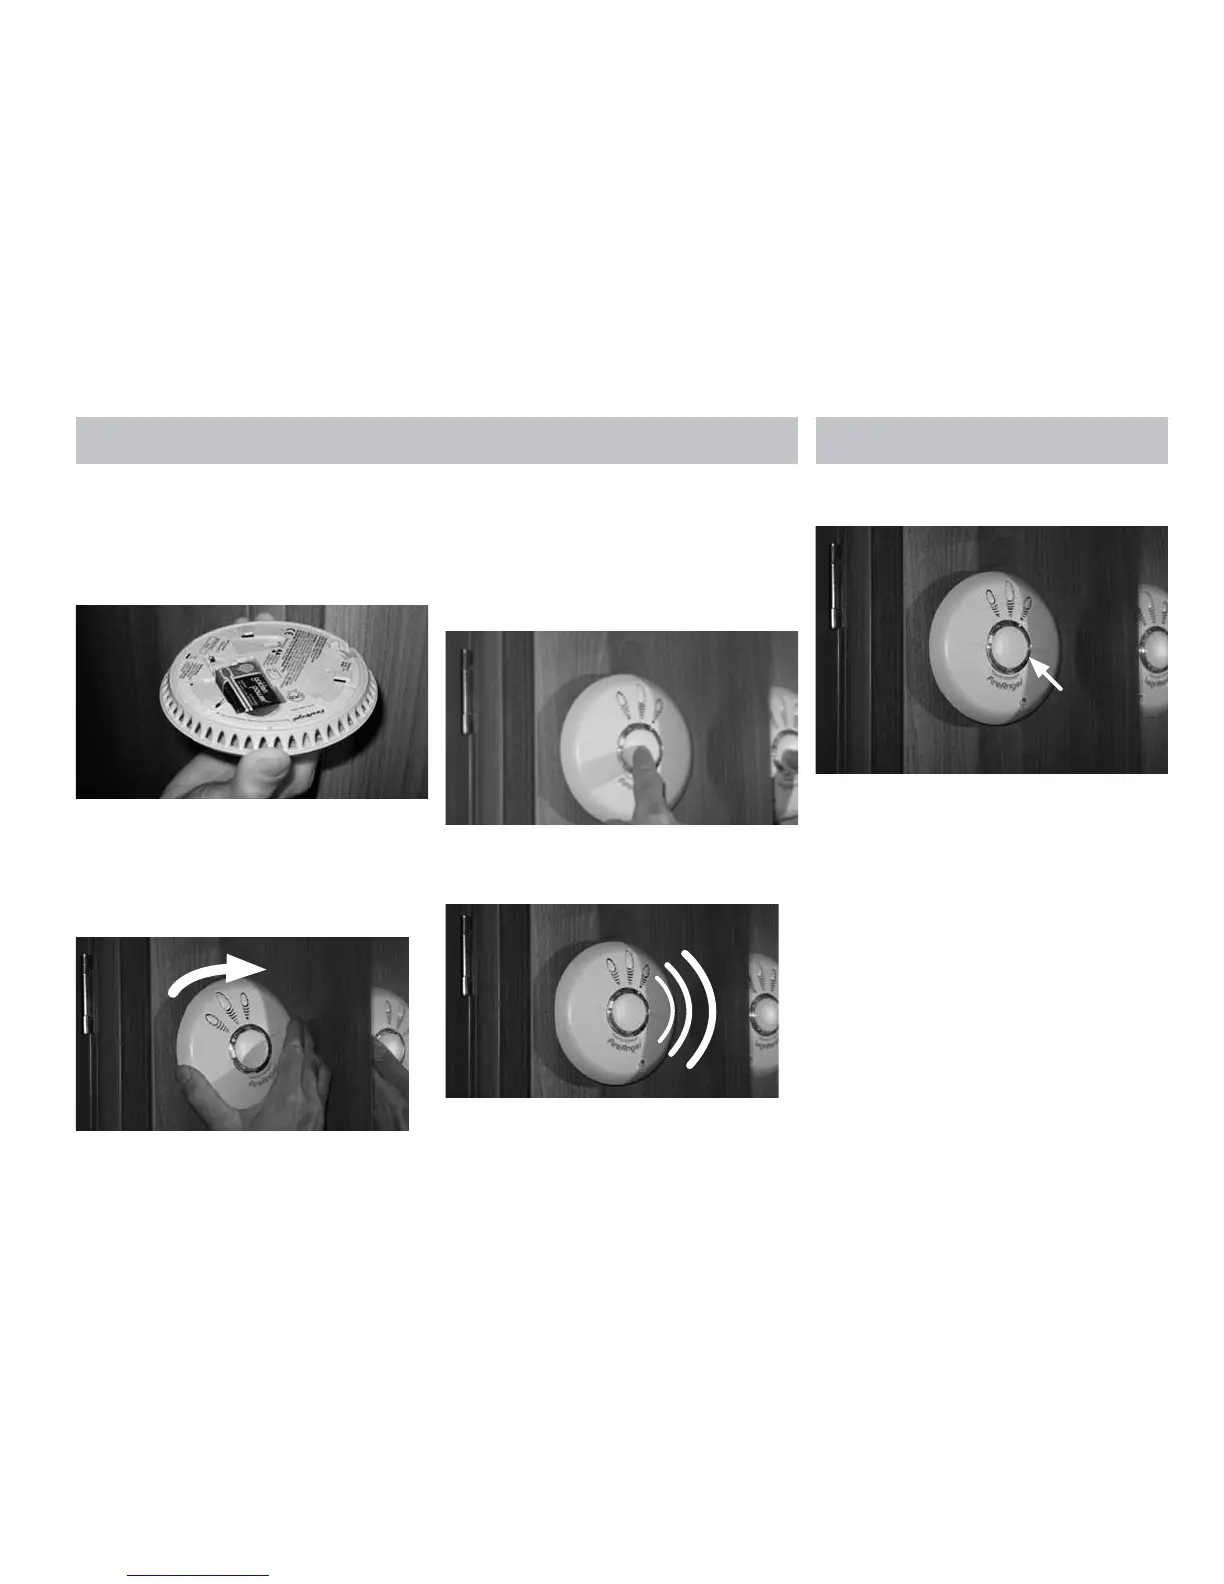
2. Remove the existing battery and replace
with a new battery. From the list on this
page, making sure that the positive and
negative connections are in the correct
position. If unsure see the alarm user
manual.
3. Replace the alarm on its mounting plate,
lining up the large central vent on the front
of the alarm, with the ‘X’ that is moulded
into the plastic on the mounting plate
(if unsure see page 13 of the alarm user
manual). Ensure the unit is securely fitted.
4. Test your alarm as explained in the next
section ‘Alarm Test’.
ALARM TEST
1. Press the test button in the centre and
release.
2. The unit will emit a loud (85dB at 3 meters)
alarm for around 5 seconds and stop
automatically.
3. The red LED on your alarm will flash rapidly
during the audible signal.
NOTE: The test button accurately tests the
alarm’s smoke sensing circuit, there is no need
to test your alarm with smoke. If your smoke
alarm fails to give an audible test signal, please
refer immediately to the troubleshooting guide
at the end of the user manual.