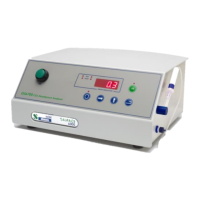
6.0 CALIBRATING THE INSTRUMENT
The GS6000 may be calibrated using atmospheric air or by using a certified mixture. All calibrations
should be conducted only after the analyzer has warmed up for at least 30 minutes.
Air can be used as the reference gas in virtually all applications. The instrument specifications will be
met by using air for calibration. Make sure the sample probe (wand) is in air and the cap is removed
from the needle. You may also want to ensure that you have a new/clean filter and needle before
performing the calibration.
If using a certified calibration gas, it is advisable to use a gas that is in the same range as will be
sampled in testing.
6.1 Calibration with Ambient Air for Oxygen and/or CO
2
(all models)
Press the green ‘CAL’ button (see section 3.1 Front Panel Controls). This sets the Oxygen value to
20.9%. When calibrating the GS6600 or GS6700, it will also zero the CO
2
reading to 0.0% CO
2
.
6.2 Calibration with Certified Calibration Gas
Periodically individual calibrations on O
2
or CO
2
at other concentrations may be required. For gas
calibrations, use only certified bottles of gas that are supplied with an analysis certificate.
Note: It is recommended that gas calibrations are carried out at the following levels:
O
2
– between 1% and 10% or between 30% and 100%, in keeping with your packaging requirements.
CO
2
– between 15% and 100%, in keeping with your packaging requirements.
The GS6000 will only allow gas calibrations within the O
2
and CO
2
limits listed above. If you attempt to
input a gas value outside the limits, a “CAnt” (Can’t) error message will be displayed.
6.2.1 Oxygen Calibration with Certified Calibration Gas (GS6500 & GS6600)
Using a good quality regulator, open the O
2
gas flow and adjust the regulator until you can hear and
feel a flow of gas exiting the regulator. The pressure will only need to be approximately 0.1 Barg.
Connect a close-fitting flexible tubing to the outlet of the regulator approximately 0.5 meter long.
To perform an O
2
calibration, go to the menu on Page 2 (see section 3.1 Front Panel Controls) and
locate the “OSpn” (Oxygen Span) parameter. Set the O
2
certified
concentration using the ’Digit select’
and ‘Digit increment’ buttons.
Pierce the flexible tubing with the sample probe (wand). Be careful not to pierce through both sides of
the tubing.
Press the ‘TEST’ button. The pump will start and the display will flash “Cal”. Once the reading
stabilizes, press the ‘Enter’ button. The display will flash “Stor” indicating the analyzer is calibrated.
Return to Page 0 for testing.
 Loading...