8.0 SETTING UP THE OPTIONAL EXTERNAL PRINTER FOR THE
GS6000
NOTE: All display pictures in this section reflect GS6600 displays. Refer to section 3.3 tables for
GS6500 and GS6700 display pictures.
8.1 Setting the Time and Date for Printouts
Besides setting up the time, date, and year as described in section 4.0, it can also be accomplished
via the Systech Illinois Client on a PC connected to the analyzer with the provided USB cable.
Use the command RTC= dd/mm/yy hh:mm:ss to re-set the real time clock.
There are three optional date formats for printouts (see section 5.5):
DD/MM/YY - 12/06/15 (format “0”)
MM/DD/YY - 06/12/15 (format “1”)
YY/MM/DD - 15/06/12 (format “2”)
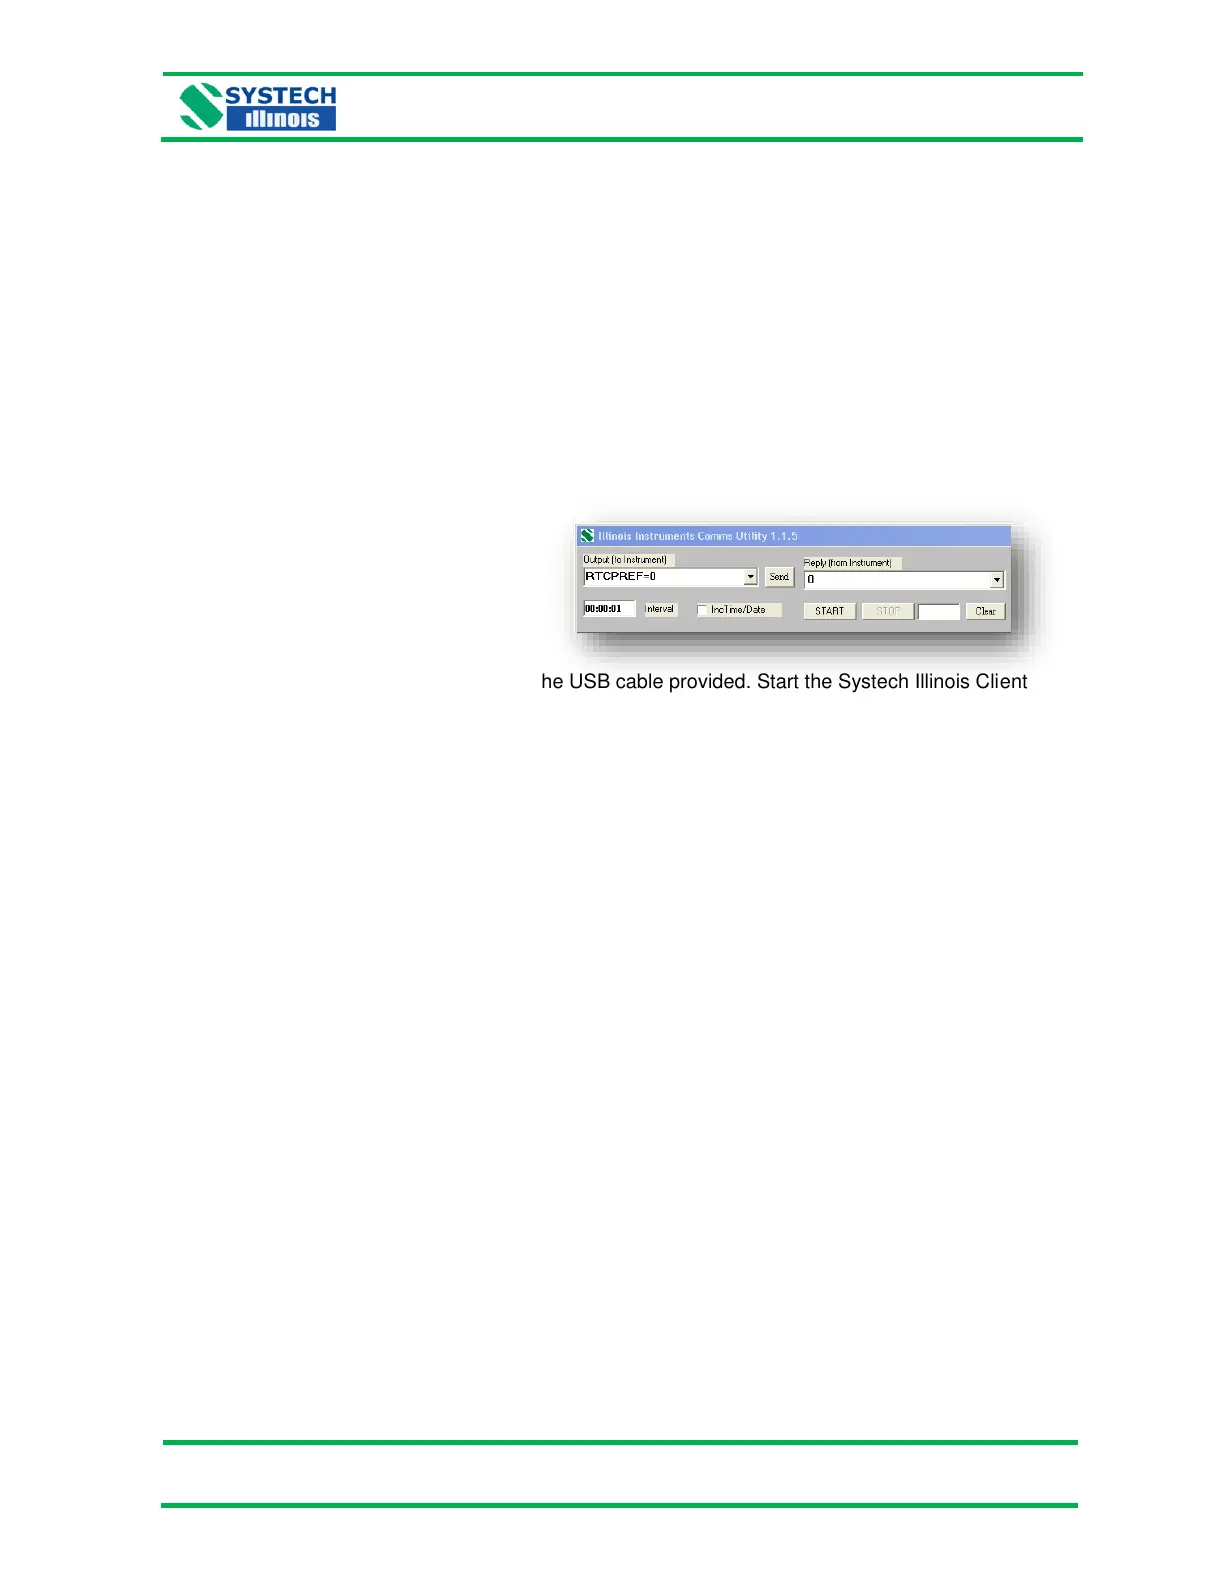
Connect the GS6000 to a computer using the USB cable provided. Start the Systech Illinois Client
program. In the “Output (to instrument)” window, key in the preferable format with the command
“RTCPREF=0” for DD/MM/YY format and click “send”. The instrument will reply “0” as shown above
indicating the acceptance of the command. The formats MM/DD/YY and YY/MM/DD can also be set
with the commands “RTCPREF=1” and “RTCPREF=2” respectively.
8.2 Setting the Product Code and Description for Printouts
If you want to print only your test results, simply connect the optional printer. See section 9.1 for
more information.
If printing a product description along with the result is needed, a user will first need to set up the
product code via the analyzer keypad and its corresponding description via the Systech Illinois Client
Utility on a PC connected to the analyzer with a USB cable (see section 7.0). You can also enter a
Line Description and the Header Text for the printout using the Systech Illinois Client Utility.
NOTE: Remember to select the appropriate product code prior to taking a measurement.
 Loading...