TAC 2112, Manual Day-to-day Usage
TAC AB, 1999-08-01 0-004-7459-3, 4:3(6)
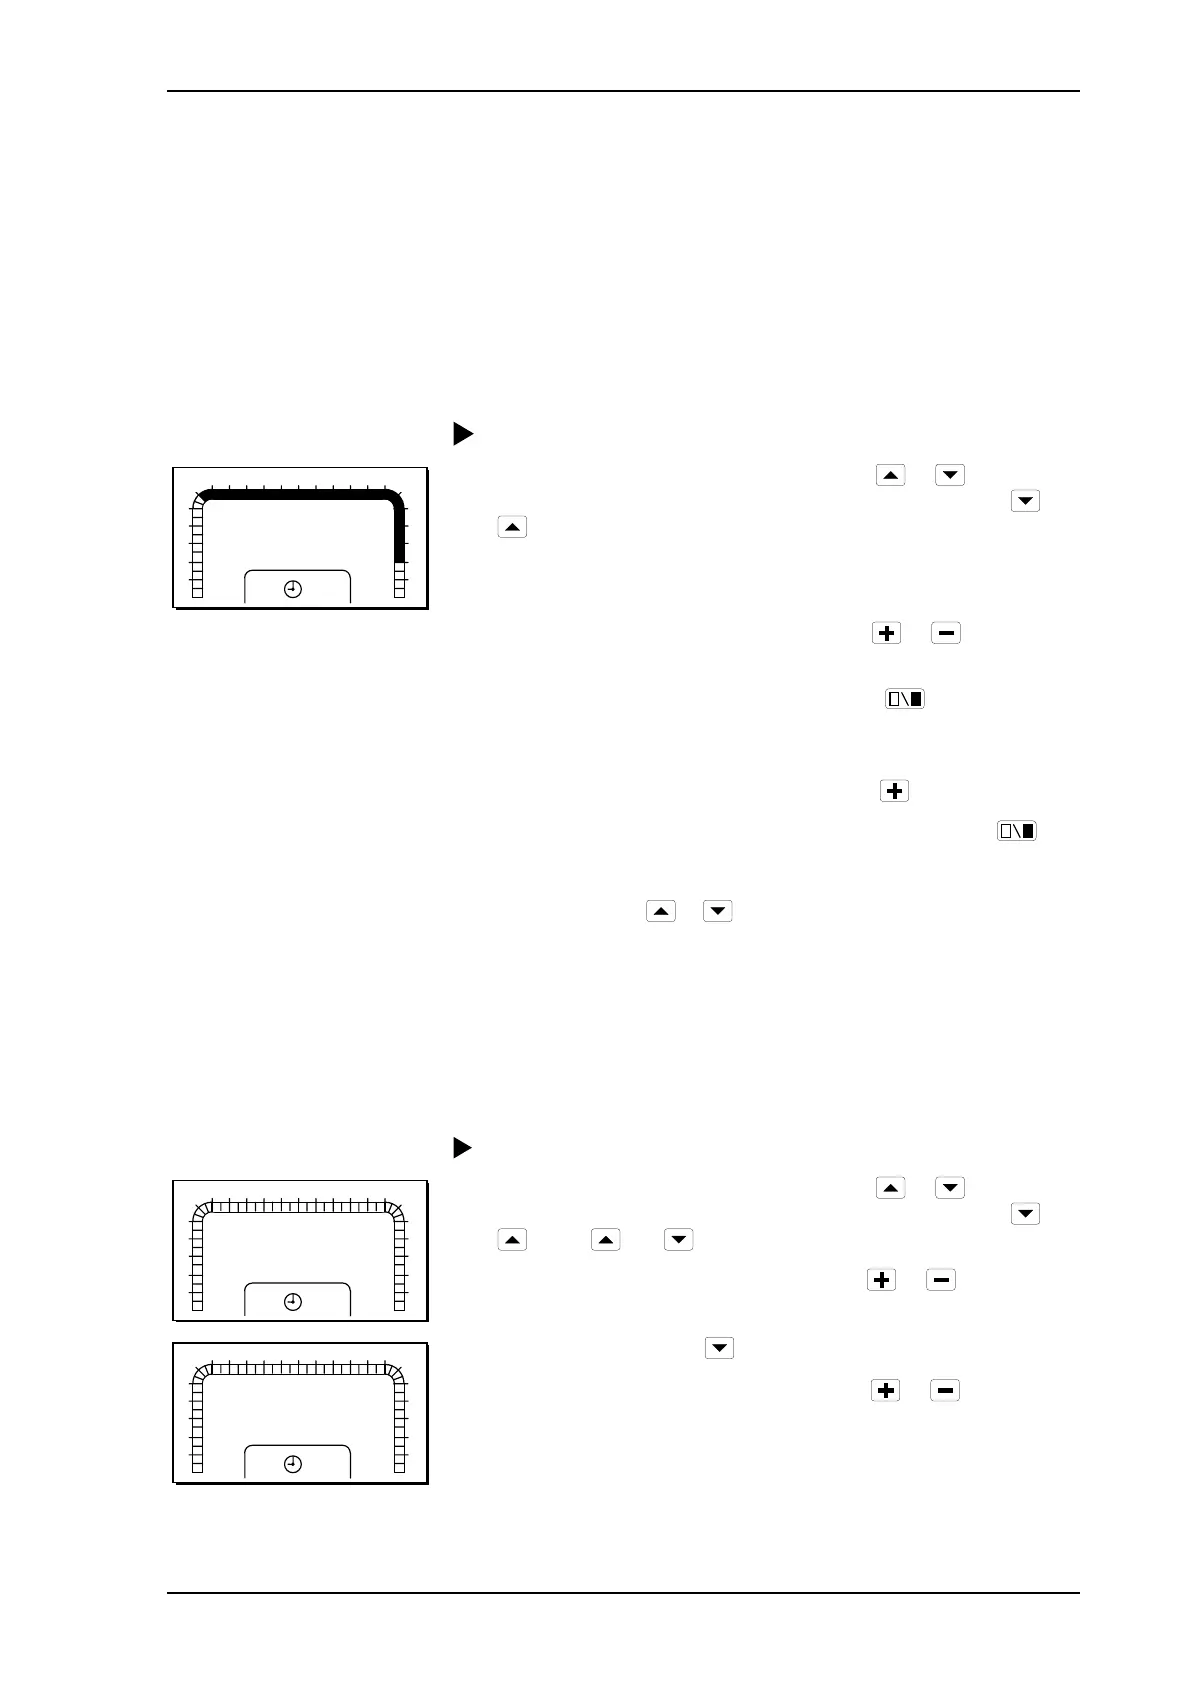
4.5 Setting the time schedule for
daytime/night operation
4.5.1 Weekly program for night setback of heat
When the controller is supplied, it is set for night setback of heat
between 22:00 and 06:00 for all days of the week. See chapter 7 for a
more detailed description of the time schedule.
Procedure for changing the weekly program:
1
2
3
4
5
6
7 8 9 10 11 12 13 14 15 16 17
18
0
23
22
21
20
19
24
K1
MO
P 14
1 Select parameter number P 14 by pressing
or . The
parameter number is increased and decreased by pressing
or
.
2 When the parameter number has been selected, the 24-hour time
bar will be displayed showing “MO” for Monday.
3 Scroll in the 24-hour time bar by pressing
or
until you
get to the segment to be changed. The segment will flash.
4 Change the half-hour segments by pressing
. A filled-in
segment will result in daytime operation. When a segment has
been changed, the next segment will start to flash.
5 Scroll on to “TU” for Tuesday by pressing
.
6 Change the half-hour segments for Tuesday by pressing
.
7 Repeat steps 5 and 6 for each day of the week.
8
Exit by pressing
or .
4.5.2 Reduction in heating during a holiday period
It is possible to program up to six holiday periods. During a holiday
period, the heating is controlled at the setpoint for the night. No
holiday periods are programmed prior to delivery. See chapter 7 for a
more detailed description of time schedules.
Procedure for setting a holiday period:
1
2
3
4
5
6
7 8 9 10 11 12 13 14 15 16 17
18
0
23
22
21
20
19
24
K1
P 63
1
1 Select parameter number P 63 by pressing
or . The
parameter number is increased and decreased by pressing
or
. Press
and at the same time to get to P 15 – P 99.
2 Select a holiday period (1–6) by pressing
or .
1
2
3
4
5
6
7 8 9 10 11 12 13 14 15 16 17
18
0
23
22
21
20
19
24
K1
P 64
01.01
3 Go to P 64 by pressing .
4 Set the start date (month.day) by pressing
or . Hold the
button down for fast increase/decrease.