10
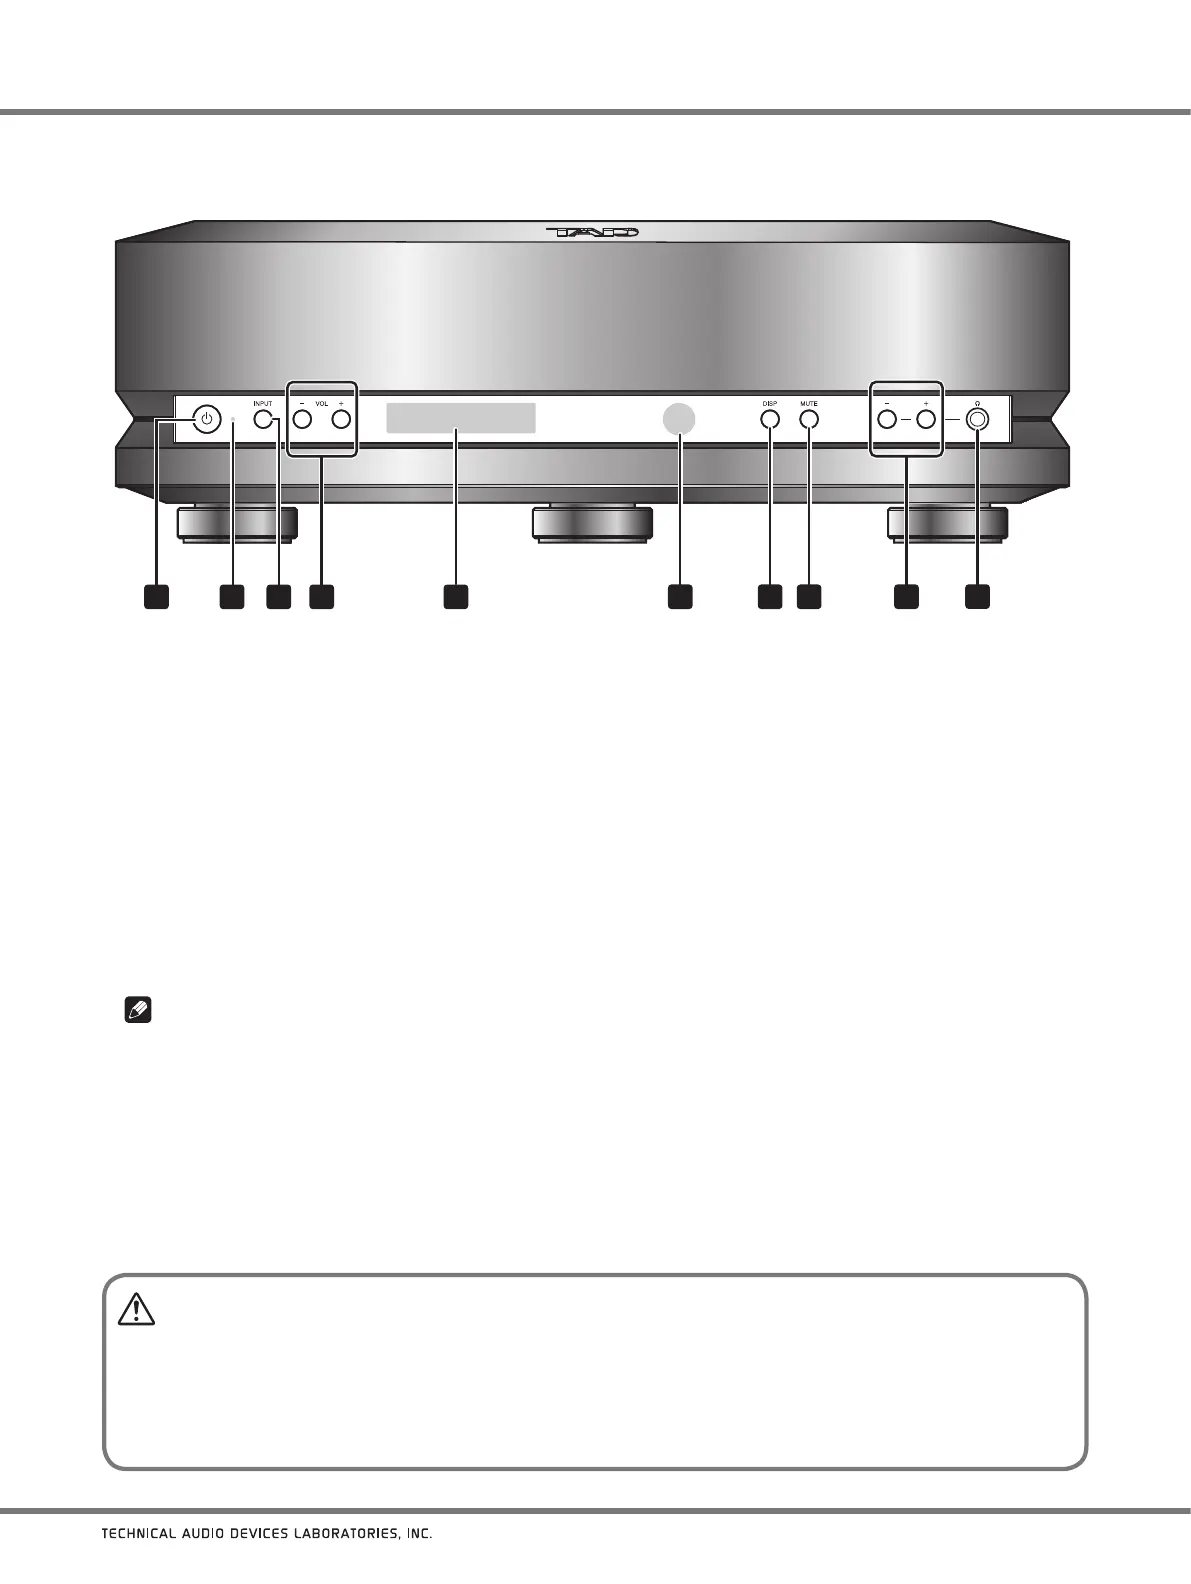
Main unit front panel
1 2
3
4
9
6
5
10
7 83
NAMES OF PARTS AND THEIR FUNCTIONS
1
Power button
Use to set power to ON/standby mode.
2 Power indicator
Lights to indicate the unit’s power status.
Lighted yellow: ON (unit can be operated).
Off: Standby (indicates power cord is connected and unit
is in standby mode).
3 INPUT button
Use to select the input source.
4 VOL (
−
/+) buttons
Use to adjust sound volume at the unit’s line
output connectors (ANALOG OUTPUT: BALANCED/
UNBALANCED).
Note
These buttons are deactivated in their default factory-
shipped status, and output is fixed at its maximum
value. To activate these buttons, hold the
VOL (−)
button depressed for several seconds.
5 Display
The display provides graphic information about the TAD-
DA1000’s many operations and functions.
6 Remote control sensor
Point remote control unit at this sensor to operate.
Effective distance is within about 7 meters (23 ft.).
7 DISP button
Use to change or hide information items shown in the
display.
8 MUTE button
Press to temporarily turn off playback sound.
9 Headphones volume (
−
/+) buttons
Use to adjust the headphone sound volume.
10 Headphones jack
Insert headphones jack here.
CAUTION
When using the volume function and connecting directly to a power amplifier (without using a pre-amplifier), be sure
to make the connection only after setting the volume to
“0” (zero)
. If the connection is made with the volume set to its
default value (maximum), the speakers could be damaged.
When
going on vacation, or otherwise leaving the unit unused for an extended period of time, the power plug should
be disconnected from its power outlet.