TB8100 Installation and Operation Manual Replacing Modules 89
© Tait Electronics Limited June 2005
2. Also at the rear of the PMU disconnect the mains d and battery e
supply leads, and the auxiliary DC supply lead
f (if fitted).
3. If the base station is using a 12V PA, disconnect the battery supply
lead
g.
Remove the Front
Panel
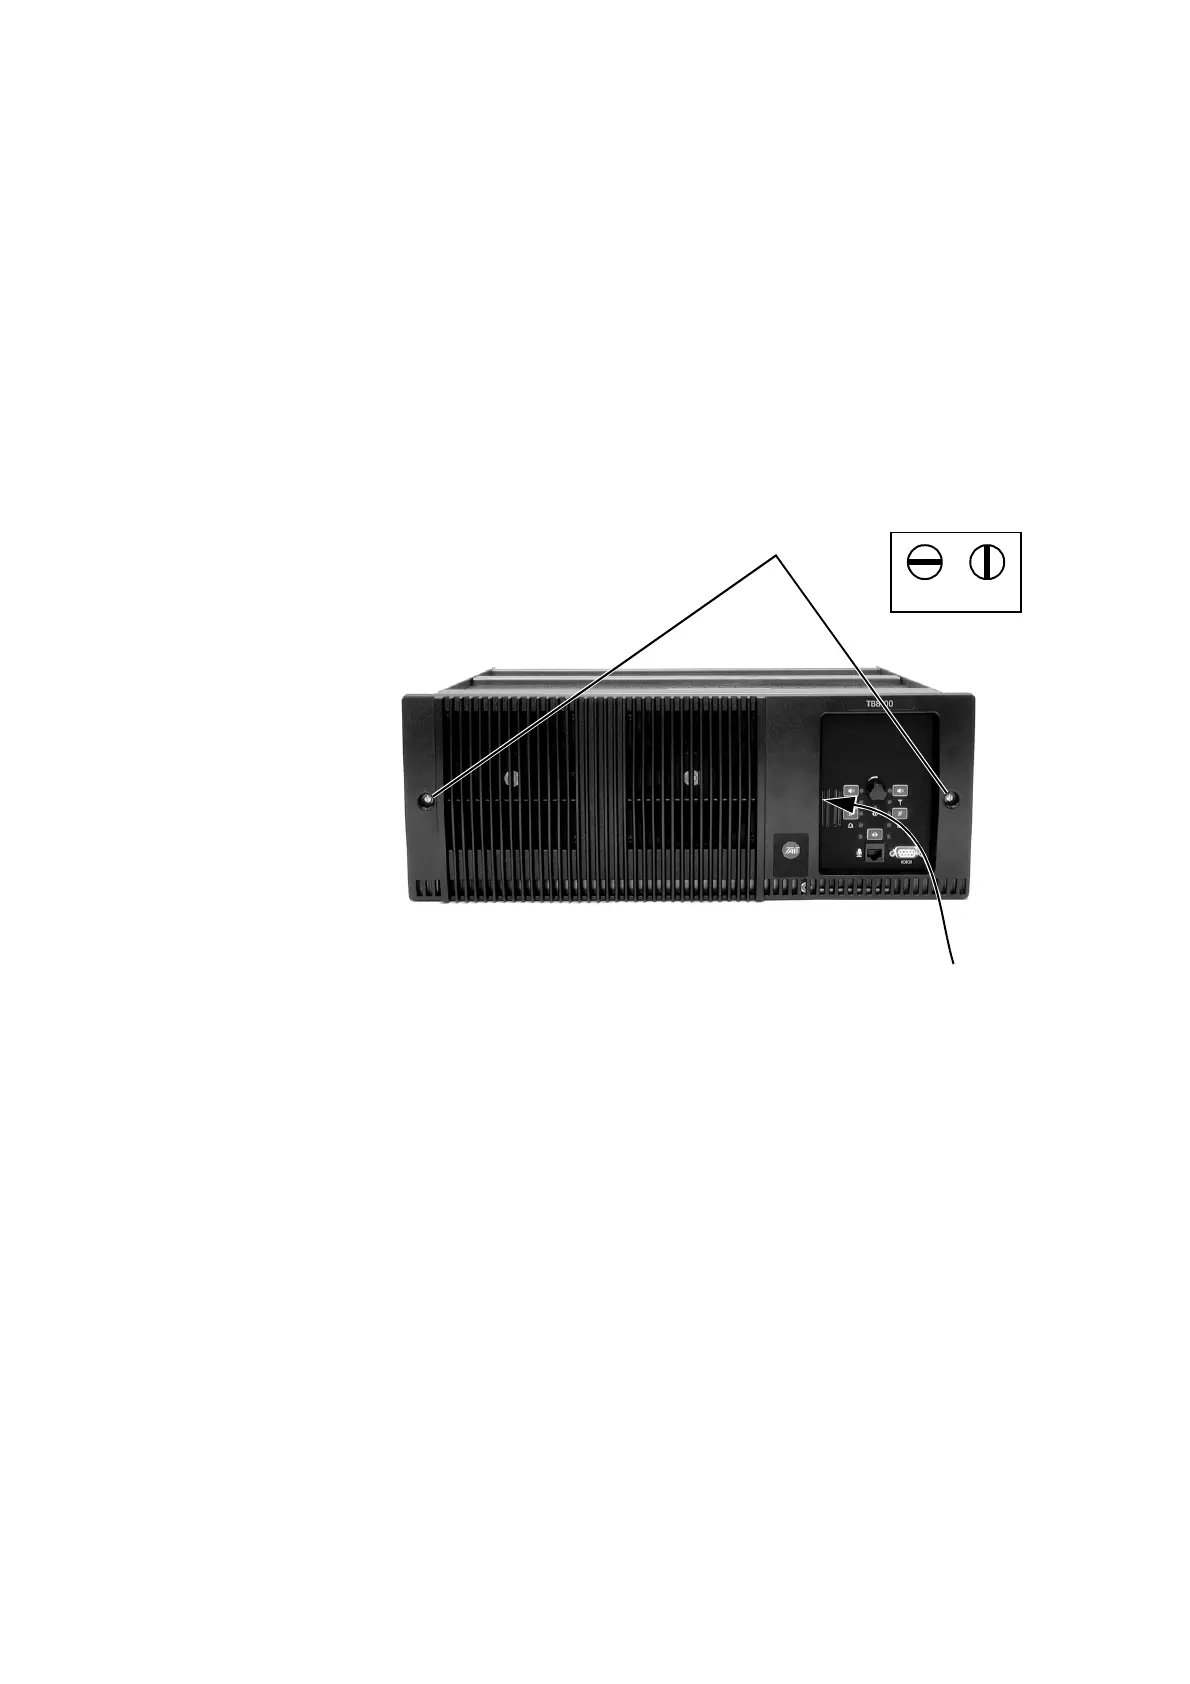
1. Undo the fastener at each end of the front panel b with a quarter
turn anti-clockwise.
2. While supporting the left end of the front panel, place your fingers in
the recess provided on the left side of the control panel opening
c
and pull the right end of the front panel away from the subrack. You
will need to overcome the resistance of the spring clip securing the
front panel to the control panel.
6.3 Replacing the Control Panel
Removal 1. If you have not already done so, carry out the instructions in
“Preliminary Disassembly” on page 88.
2. Undo the retaining screw
b. Note that the screw stays attached to
the control panel.
3. Pull the bottom of the control panel away from the subrack
c to
disconnect the D-range socket on the back of the panel from the plug
d on the subrack.
4. Pull the control panel down
e to disengage the centre tab f from
the subrack.
b
lockedunlocked
c

 Loading...


