90 Replacing Modules TB8100 Installation and Operation Manual
© Tait Electronics Limited June 2005
Refitting
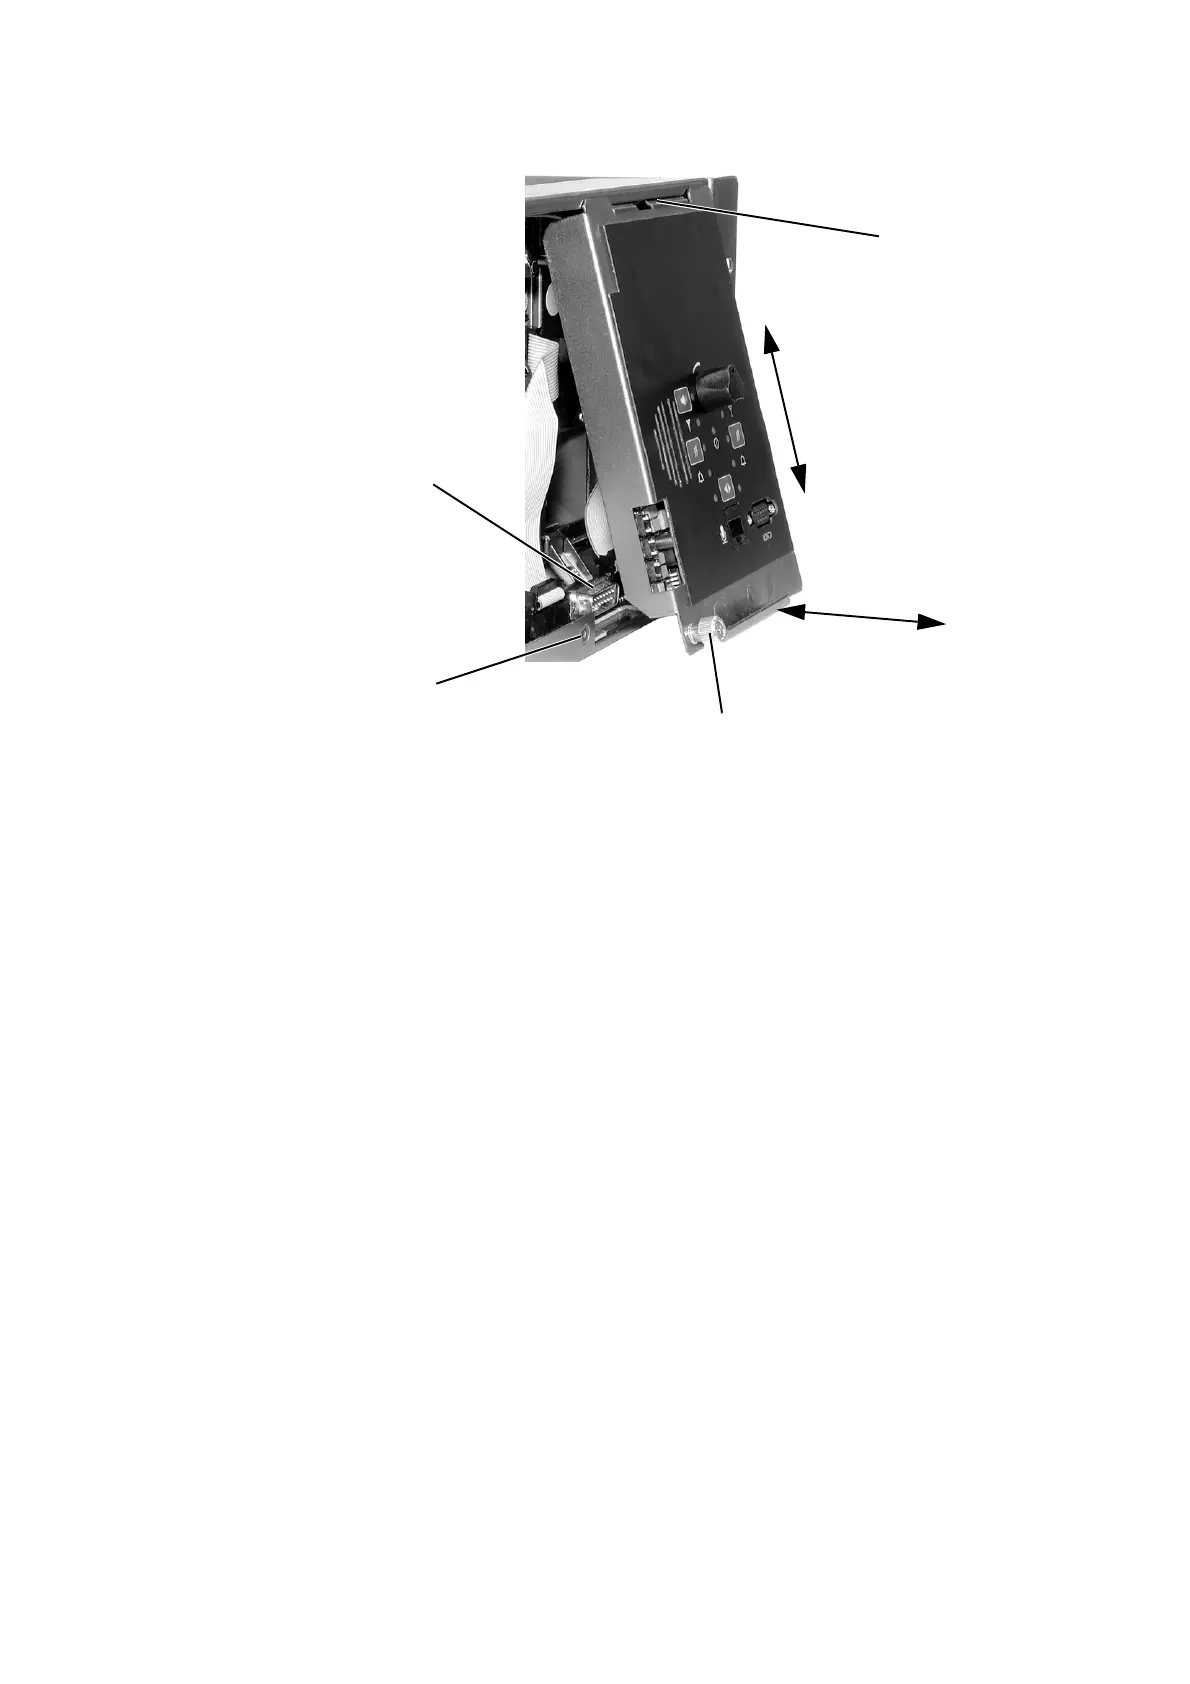
1. Fit the top of the control panel to the subrack so that the centre tab
is behind the lip of the subrack and between the two locating tabs
formed in the lip. Push the control panel firmly upwards
g.
2. Align the D-range socket on the back of the control panel with the
plug on the subrack. Gently push the bottom of the panel home
against the subrack
h to engage the plug into the socket.
3. Insert the securing screw into the floating nut i in the subrack and
tighten. Note that you may have to push the screw in and down to
pick up the floating nut.
4. Carry out the instructions in “Final Reassembly” on page 101.
6.4 Replacing the Reciter
Removal 1. If you have not already done so, carry out the instructions in
“Preliminary Disassembly” on page 88, and remove the control
panel, as described in “Replacing the Control Panel” on page 89.
2. At the rear of the reciter, unplug the RF input cable
b, any system
cables
c and the external reference cable d (if fitted).
b
d
e
f
g
c
h
i
standard control panel shown

 Loading...


