T6215 Maintenance Manual
4–6
Procedure 4: Control Panel Removal
Step 1. Remove the Ribbon Platform.
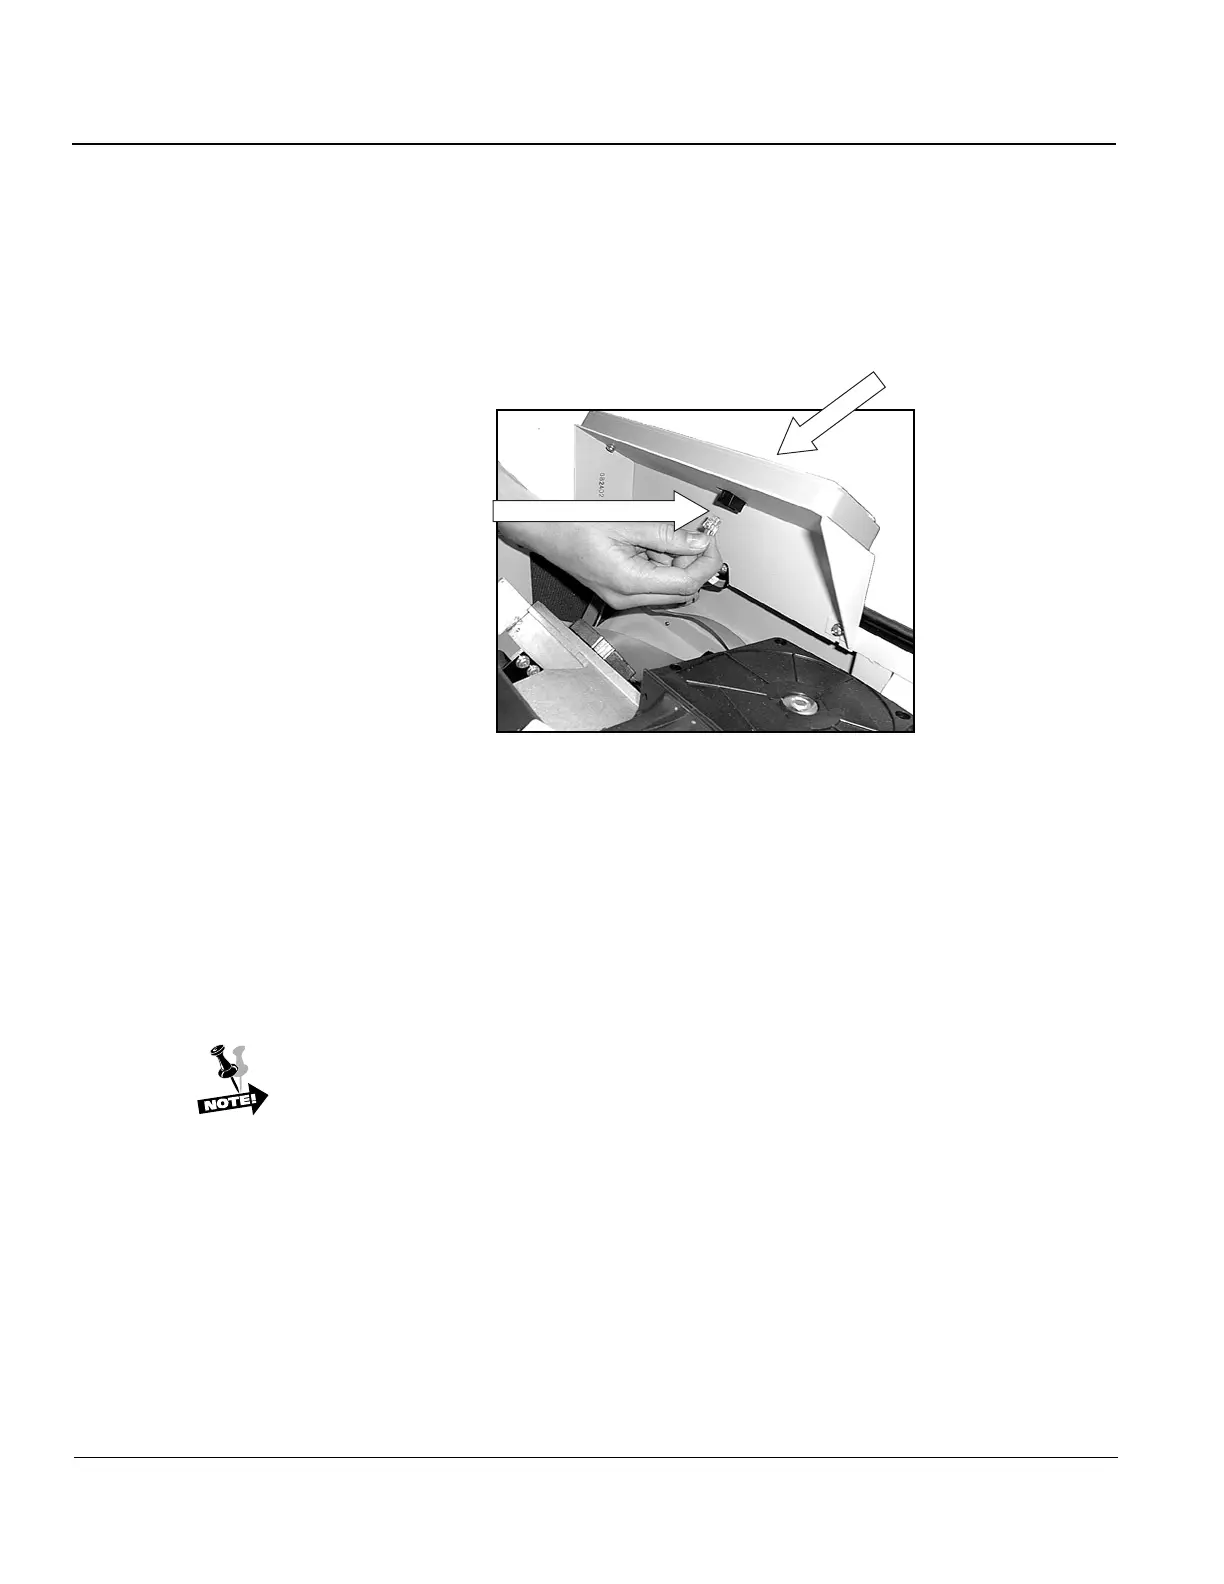
Step 2. Reach underneath the Control Panel assembly and unplug the gray Control
Panel cable.
Control Panel
Unplug Control Panel Cable
Figure 6. Unplugging Control Panel cable.
Step 3. Loosen the four screws underneath the Control Panel at the bottom edge of
the frame.
Step 4. Lift the Control Panel assembly from the printer.
Step 5. Loosen the two screws holding the Control Panel to the metal frame.
Step 6. Lift the Control Panel from the metal frame.
The Control Panel Assembly can be adjusted so that it aligns snugly with the
top cover. To do this, loosen the screws and adjust the assembly until it fits
properly in the opening of the printer cover. Don't forget to tighten the
screws.


 To Next Page