Installing the CD-RW Drive
10 TEAC CD-RW Drive User’s Manual
4e) Connect one end of the included analog audio cable to the analog audio
connector on the rear panel of the CD-RW drive and connect the opposite
end to your sound card. (Skip Step 5 and continue with Step 6.)
5. If you have an IDE CD-ROM/DVD drive installed on your system, do
the following:
Typically, your IDE CD-ROM/DVD drive is connected to the secondary IDE
motherboard connector as a Master. In such cases, it is strongly
recommended that you connect the CD-RW drive as a Slave drive to the same
cable that currently hosts your CD-ROM/DVD drive.
5a) Set the jumper on the rear panel of the CD-RW drive to Slave.
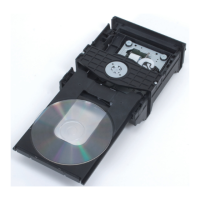
5b) Slide the CD-RW drive into the empty 5.25-inch drive bay. Install the
CD-RW drive in your personal computer in a horizontal or vertical
orientation (within ±5˚ of horizontal or vertical). The Eject button should
be located on the right side of the unit. Secure the drive using the included
3x5mm mounting screws.
5c) Connect the CD-RW to the vacant middle connector on your existing CD-
ROM/DVD interface cable.
If your original cable does not have an available middle connector,
remove this cable and use the cable provided with the TEAC drive.
5d) Your CD-ROM/DVD drive probably uses an audio cable that is
connected to the computer’s sound card. Therefore, there is no need to
connect the audio cable that came with your CD-RW drive. This audio
cable is not necessary for recording audio CDs.
6. Connect the power cable to the power connector on the rear panel of the
CD-RW drive.
Insert the power cable plug in the correct orientation into the power
connector. The plug is shaped so that it can be easily inserted in only one
orientation; do not force the plug into the connector. The +5v terminal is on
the left as you face the rear of the panel; the +12v terminal is on the right. The
two center terminals are ground terminals.
7. Re-install your computer’s cover, faceplate, or bay cover.
8. Start your system.
Note: If your original drive is configured as CSEL, configure the TEAC
drive as CSEL also. System software will configure the drives accordingly.
Warning: Do not use mounting screws longer than the included
3x5mm screws to secure the CD-RW drive or you may damage the
unit.
TEAC52x24x52.book Page 10 Thursday, December 19, 2002 3:29 PM