Installing the CD-RW Drive
TEAC CD-RW Drive User’s Manual 9
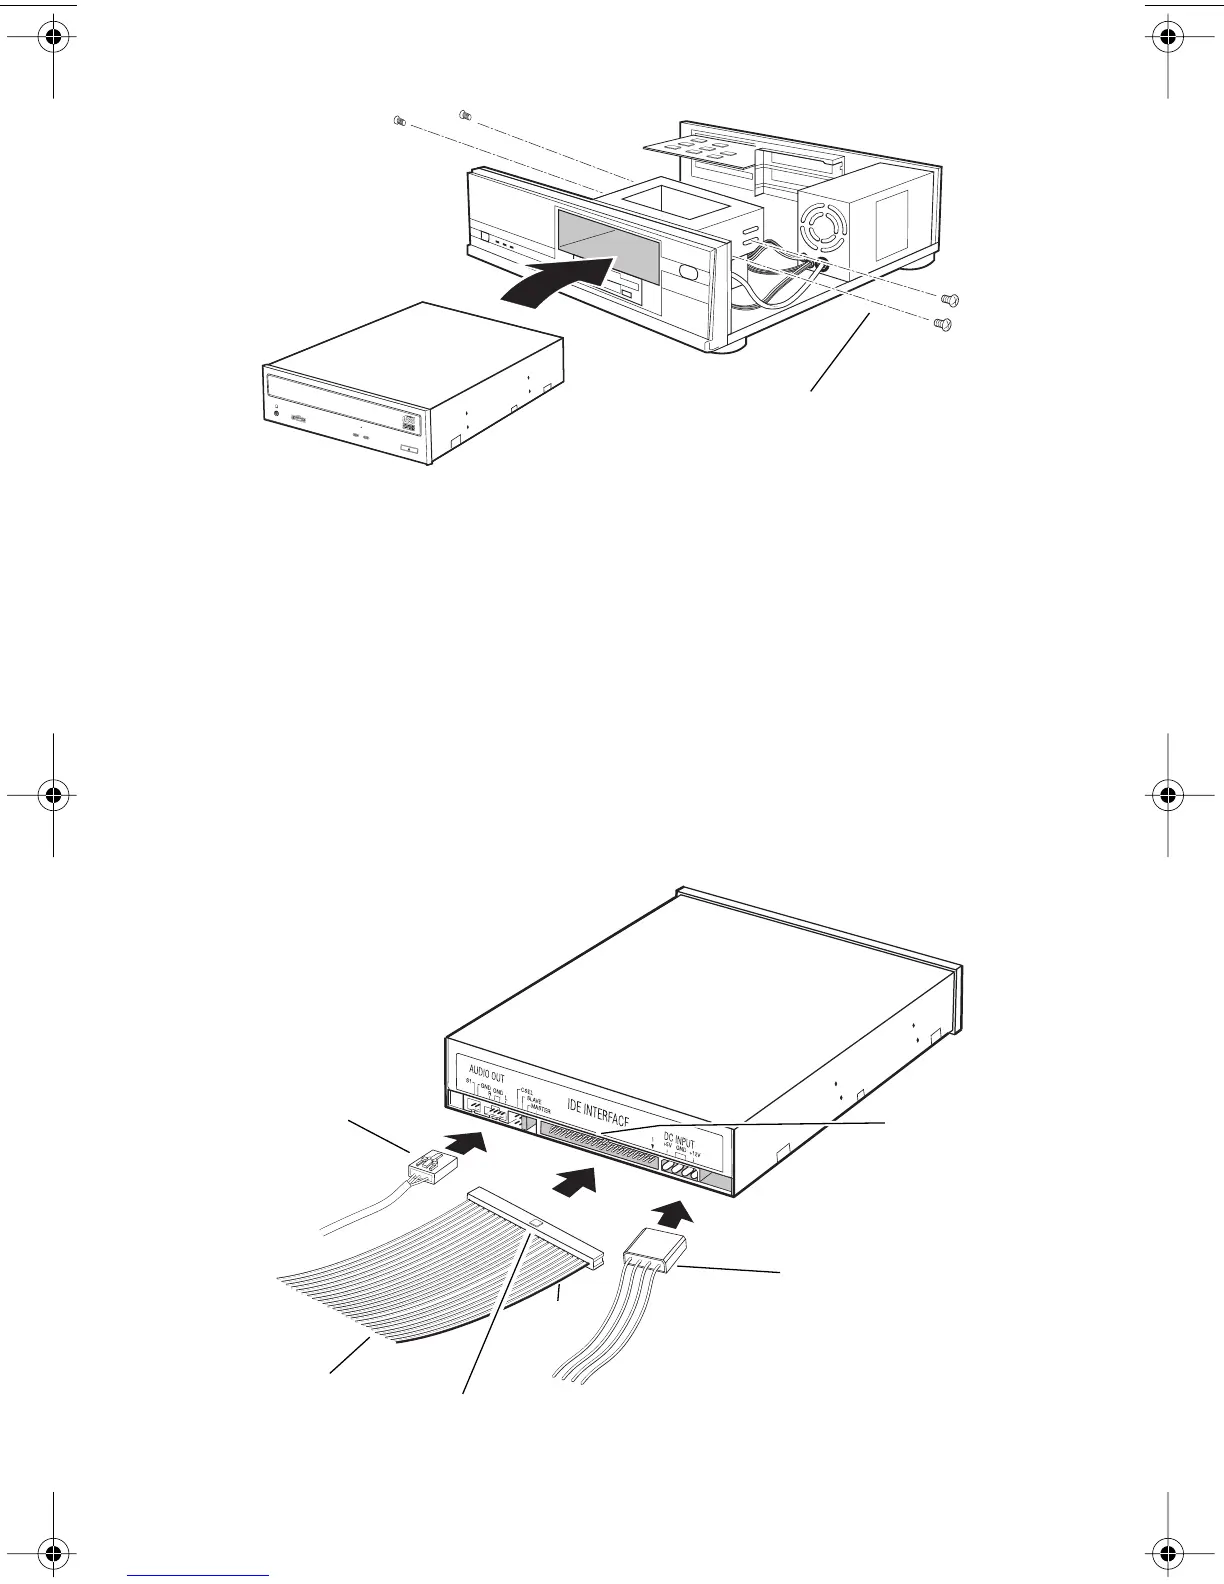
Figure 6. Installing the CD-RW Drive in a Computer
4c)
Locate the secondary IDE connector on your system’s motherboard and
connect one end of the IDE interface cable provided with your TEAC kit.
Be certain to connect Pin-1 of the interface cable to Pin-1 on the
secondary IDE connector on the motherboard. (Pin-1 on an interface
cable is usually designated by a colored strip along one edge of the cable.
The interface ribbon cable connector may feature a tab on one side. Insert
the cable so that the tab aligns with the notch on the interface connector.
Do not use excessive force while trying to insert the cable into position).
4d)
Connect the opposite end of the interface ribbon cable to the interface
connector on the rear panel of the CD-RW drive.
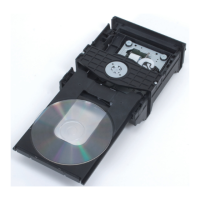
Figure 7. Cable Connections
secure drive with 3x5mm screws
audio cable
IDE interface
ribbon cable
tab
notch
power cable
pin 1
TEAC52x24x52.book Page 9 Thursday, December 19, 2002 3:29 PM