w w w . t e c h n i c o l o r . c o m / m c s
6 Getting Started
6.1 Assembly
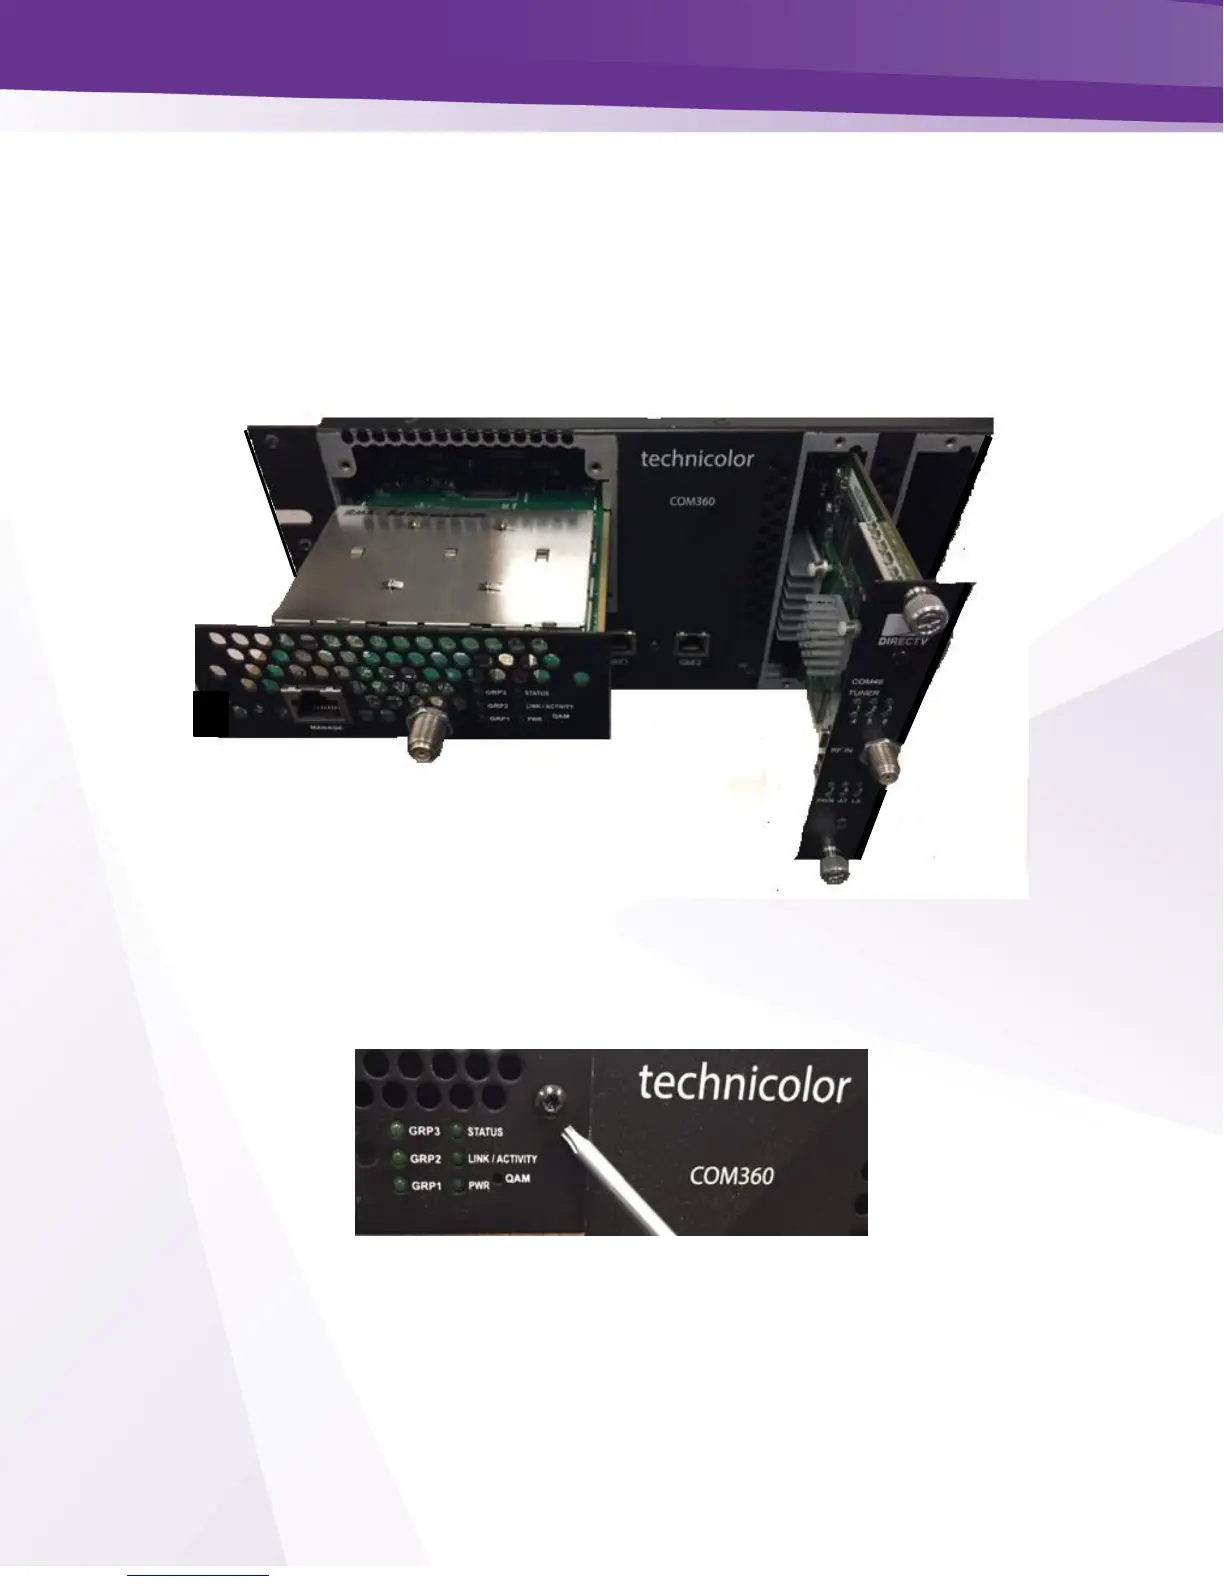
Carefully unpack and install the QAM6 and COM46 cards in the COM360 Chassis as shown in
Figure 8. Be sure to line up the cards with the guides in the chassis.
A #10 Torx driver is required to secure the QAM6 in the COM360 chassis as shown in Figure 9.
Figure 8 - Installation of the QAM6
Figure 9 - Securing the QAM6 in the COM360