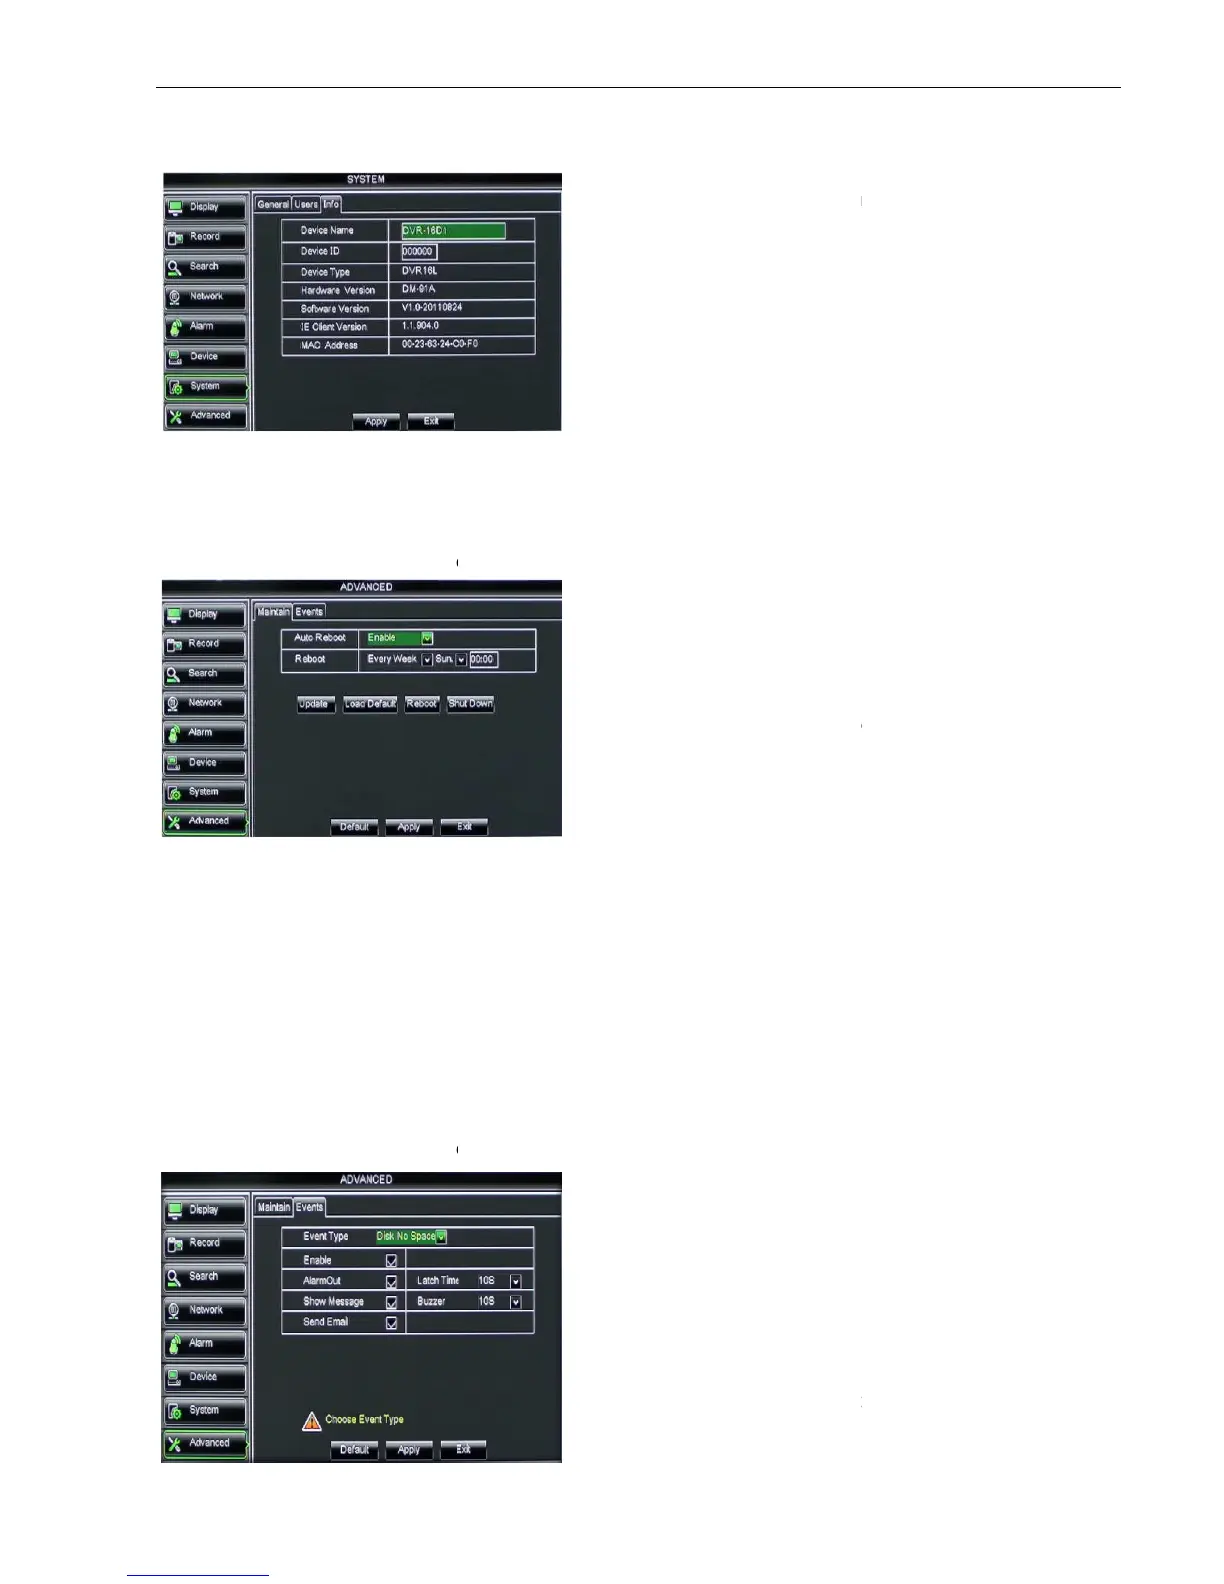
5.2.7.3 Information
Click [Main MenuSystem
Info] and then enter into the interface shown as Picture 5
5.2.8 Advanced
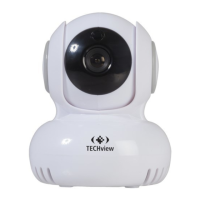
5.2.8.1 Maintain
Click [Main menu
If [Load Default] is selected, you can
Click [Reboot] button to manually restart DVR system.
Click the [Shutdown] button to shutdown the device.
Do not take out the USB memory or break the power during the update;
e update is done, system will be automatically restarted;
Please manually recovery ex
It will be available only when DVR return back to Preview mode and no any operation.
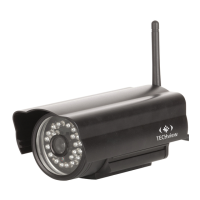
5.2.8.2 Event
Click [Main menu
Picture 5-55
Picture 5-58
Picture 5-56
Info] and then enter into the interface shown as Picture 5
Maintain] to enter into the maintain interface shown as Picture 5
If [Load Default] is selected, you can
initialize the system to the ex
Click [Reboot] button to manually restart DVR system.
Click the [Shutdown] button to shutdown the device.
Do not take out the USB memory or break the power during the update;
e update is done, system will be automatically restarted;
Please manually recovery ex
-factory default after system rebooting;
It will be available only when DVR return back to Preview mode and no any operation.
Event] to enter into the <Event> interface shown as Picture 5
Device ID, Device type, Device S/N, MAC
address, IE version, Software version, Panel
version etc.
Auto Maintain:
maintain function regularly as per user’s need.
After decompressing update file package, copy
the file named “dvrupgrade” to root directory of
Insert the U flash disk into USB port of DVR;
support the three abnormal types:
Disk No Space, Disk Error and Video Loss.
select [Enable] or [Disable]
can set how long the buzzer will
sound when external sensor alarm is detected
(10s, 20, 40s, 60s);
Show Message:
You can set show message on the
screen when sensor alarm is detected.
Info] and then enter into the interface shown as Picture 5
Maintain] to enter into the maintain interface shown as Picture 5
initialize the system to the ex
It will be available only when DVR return back to Preview mode and no any operation.
Event] to enter into the <Event> interface shown as Picture 5
Device ID, Device type, Device S/N, MAC
address, IE version, Software version, Panel
maintain function regularly as per user’s need.
After decompressing update file package, copy
the file named “dvrupgrade” to root directory of
Insert the U flash disk into USB port of DVR;
support the three abnormal types:
Disk No Space, Disk Error and Video Loss.
select [Enable] or [Disable]
can set how long the buzzer will
sound when external sensor alarm is detected
You can set show message on the
screen when sensor alarm is detected.