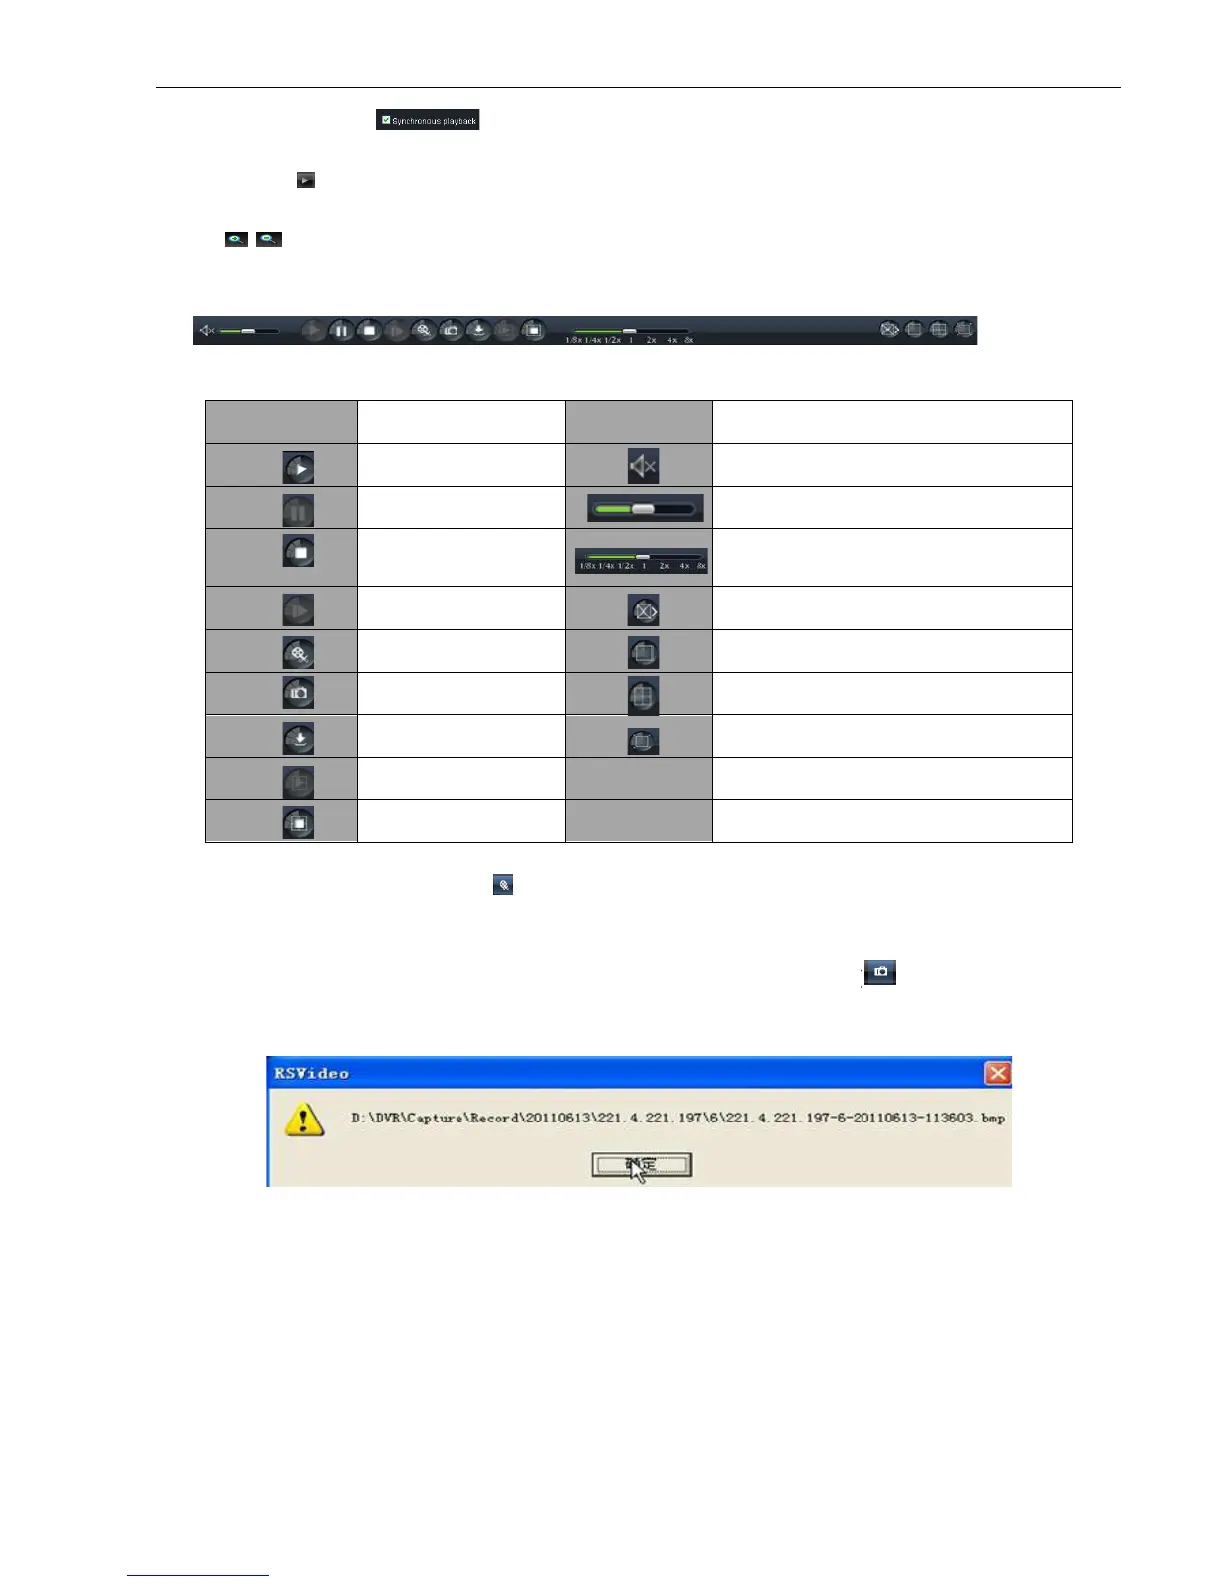
otherwise, you could separately control the channels playback.
] icon to start record playback. When mouse curse is moving on the
time will appear in the screen.
Click [ /
] icon to zoom in/out the time bar display ratio shown as Picture 6
6.3.2.2 Playback control
Below Picture 6-
10 is playback control bar
Detail brief description is
After opening playback, click [
Record clip file will be saved as *.264 format.
Move the mouse curse to the channel you want to capture, and click [
images remotely. After capturing the images successfully, you are allowed to save it to a specified path shown
as Picture 6-11. The captured f
ile will be saved as *.bmp format
> option, that means the selected channel will playback synchronously;
otherwise, you could separately control the channels playback.
] icon to start record playback. When mouse curse is moving on the
] icon to zoom in/out the time bar display ratio shown as Picture 6
10 is playback control bar
Playback control bar (x1/2,1/4,1/8, normal, x2, x4, x8)
After opening playback, click [
] icon to clip the selected file; and click again to stop the clip function.
Record clip file will be saved as *.264 format.
Move the mouse curse to the channel you want to capture, and click [
images remotely. After capturing the images successfully, you are allowed to save it to a specified path shown
ile will be saved as *.bmp format
Picture 6-10
Picture:6-11
User Manual
> option, that means the selected channel will playback synchronously;
] icon to start record playback. When mouse curse is moving on the
Playback control bar (x1/2,1/4,1/8, normal, x2, x4, x8)
] icon to clip the selected file; and click again to stop the clip function.
Move the mouse curse to the channel you want to capture, and click [
] icon to capture the live
images remotely. After capturing the images successfully, you are allowed to save it to a specified path shown