Do you have a question about the Tektronix KEITHLEY SourceMeter 2600B Series and is the answer not in the manual?
Greeting and introduction to the Series 2600B instrument.
Information on purchasing additional warranty coverage for products.
How to contact Keithley Instruments for support or inquiries.
Details on the provided manuals (Quick Start, User's, Reference) and their content.
Information on available software, drivers, and download locations.
Key electrical and environmental specifications for the instrument.
Guidelines for ensuring proper airflow and preventing overheating.
Procedure for powering the instrument on and off, including safety notes.
How to put the instrument into standby mode and associated safety precautions.
Requirement for a minimum warmup time to achieve rated accuracies.
How to configure the instrument's line frequency detection or manual setting.
Procedures for retrieving serial number, firmware, calibration, and memory usage.
Overview of front and rear panel components and their functions.
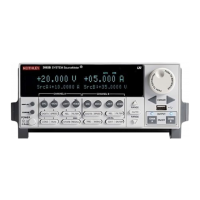
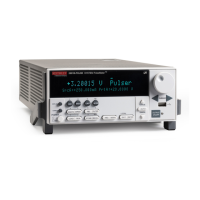
Detailed description of the front panel layout, keys, and indicators.
Identification and description of connectors on the instrument's rear panel.
Details on the input/output connectors for the SMU channels.
Description of Digital I/O, IEEE-488, LAN, and USB ports.
Information on Ground, TSP-Link, Power Module, and RS-232 interfaces.
General guide to navigating and using the instrument's front-panel menus.
Steps for navigating through menus and submenus using front-panel controls.
How to highlight and select options within the instrument's menus.
Summary of the instrument's configuration menu structure and options.
Methods for adjusting instrument parameters using the navigation wheel or keypad.
Step-by-step guide for setting values with the navigation wheel.
Step-by-step guide for setting values using the numeric keypad.
Procedures for adjusting source levels and compliance limits.
How to modify the source voltage or current level.
How to adjust the compliance limit for current or voltage.
How to enable or disable the instrument's audible beeper.
Methods for using the instrument's display to view information.
How to cycle through and select different display modes.
Reference list of display functions and attributes with cross-references.
Options for customizing the front-panel display output.
How to configure display screens for source-measure or user messages.
Setting the display to show measured volts, amps, ohms, or watts.
Setting the display to show current, voltage, or power limits.
How to configure the number of digits shown on the display.
How to define and display custom text messages on the front panel.
How cursor position affects message display and setting.
Making scripts interactive by displaying prompts to the user.
How to present user-defined menus on the instrument's display.
Creating editable input fields for user-entered parameter values.
How to check the status of front-panel display indicators.
How to lock or unlock the EXIT (LOCAL) key to prevent interruptions.
Accessing and running USER, FACTORY, or SCRIPTS tests.
Procedure for adding custom tests to the USER TESTS menu.
Procedure for removing entries from the USER TESTS menu.
Step-by-step guide to execute tests directly from the instrument's front panel.
Instructions for connecting and using a USB flash drive with the instrument.
Guide to accessing and controlling the instrument via its web interface.
Steps to connect to the instrument's web interface using an IP address.
Overview of information presented on the instrument's web interface Welcome page.
How to modify LAN settings such as IP address and subnet mask.
Procedures for setting or changing the instrument's access password.
How to control the instrument remotely using a web-based virtual front panel.
How to access and view data stored in the instrument's reading buffers.
How to save reading buffer data to a CSV file from the web interface.
Utilizing TSB Embedded for script management and sending commands.
How to send commands to the instrument through the TSB Embedded console.
How to access and interpret the LXI Event Log for instrument activity.
Overview of fundamental operational procedures and safety guidelines.
The instrument's ability to source and measure voltage, current, resistance, and power.
Information on setting and understanding voltage and current limits.
Table detailing source and measure ranges across different instrument models.
Table summarizing maximum source limits for various ranges and models.
Procedures for configuring current, voltage, or power limits.
Step-by-step guide to set limits using the front-panel interface.
Commands used to program limits remotely via an interface.
How to configure and operate the instrument in sink mode for energy delivery.
Procedures for enabling or disabling sink mode from the front panel or remotely.
Safety procedures and connection methods for devices under test.
Diagrams illustrating basic voltage and current source configurations.
Description of the physical input/output connectors and their wiring.
How LO connections and chassis ground are managed for signal integrity.
Using 2-wire sensing for current measurements and high-impedance voltage.
Utilizing 4-wire sensing for accurate low-impedance voltage measurements.
How contact check prevents errors caused by lead or connection resistance.
Details on performing contact check measurements, requirements, and limitations.
Summary of programming commands used for contact check functionality.
An example script demonstrating how to perform a contact check.
Techniques for improving performance and safety using guarding and shielding.
Guidelines for using safety shields when dealing with hazardous voltages.
Explanation of driven guard functionality for minimizing leakage current effects.
How to use a noise shield to prevent signal interference in test circuits.
Combined connections for noise shield, safety shield, and guarding in a test system.
Description of the interlock feature and its availability on specific models.
How the interlock circuit functions to enable high voltage output safely.
Information on using test fixtures and their associated safety requirements.
Procedures for configuring an SMU to float off chassis ground in test setups.
Step-by-step guide to perform basic source-measure operations using the front panel.
How to select the source type and set its level.
How to set the compliance limit for the source.
How to choose the measurement function and range.
Procedure to activate the instrument's output.
How to view the measured values on the display.
Procedure to deactivate the instrument's output.
How to configure the instrument for 2-wire local or 4-wire remote sensing.
Selecting the sense mode through the front-panel menus.
Commands to set the sense mode remotely.
Description of Normal, High-impedance, and Zero output-off modes.
Details on the default normal output-off mode and its settings.
Information on the high-impedance output-off mode and its relay function.
Details on the zero output-off mode, maintaining programmed source values.
How to set the output-off function to current or voltage.
How to set limits for current and voltage in output-off states.
A quick reference table of commands for output-off states.
Instructions for safely replacing the instrument's main power line fuse.
Step-by-step guide for safely removing and replacing the fuse.
Procedures for testing the functionality of front-panel keys and the display.
How to run a test to verify each front-panel key is functioning correctly.
How to run a test to check the integrity of the front-panel display pixels and indicators.
Guide on loading newer or older firmware versions onto the instrument.
Steps for upgrading firmware using a USB flash drive and the front panel.
Steps for upgrading firmware using the instrument's web interface.
How to use Test Script Builder (TSB) to perform firmware upgrades.
How to retrieve and display the instrument's serial number from the front panel.
Resources for further information, including manuals, handbooks, and application notes.
| Model | 2600B Series |
|---|---|
| Category | Measuring Instruments |
| Manufacturer | Tektronix KEITHLEY |
| Type | SourceMeter |
| Voltage Range | ±200 V |
| Operating Temperature | 0°C to 50°C |
| Channels | 1 or 2 |
| Current Range | ±10 A |
| Power Output | 100 W |
| Resolution | Up to 6.5 digits |
| Interface | GPIB, USB, Ethernet |
| Display | LCD |


