Power up Sequence
1. Main Power Switch set to OFF position (down)
2. Control Switch set to PC Control
3. Brake, Processor, and Motor Driver Switches are powered ON (up)
4. Connect and check all cable connections are secure
5. Turn power ON by switching the Main Power Switch to ON (up)
Connecting the Winch to a PC
To connect the winch to the PC and verify communication:
1. Apply power to the Control Module, follow Power Up Sequence.
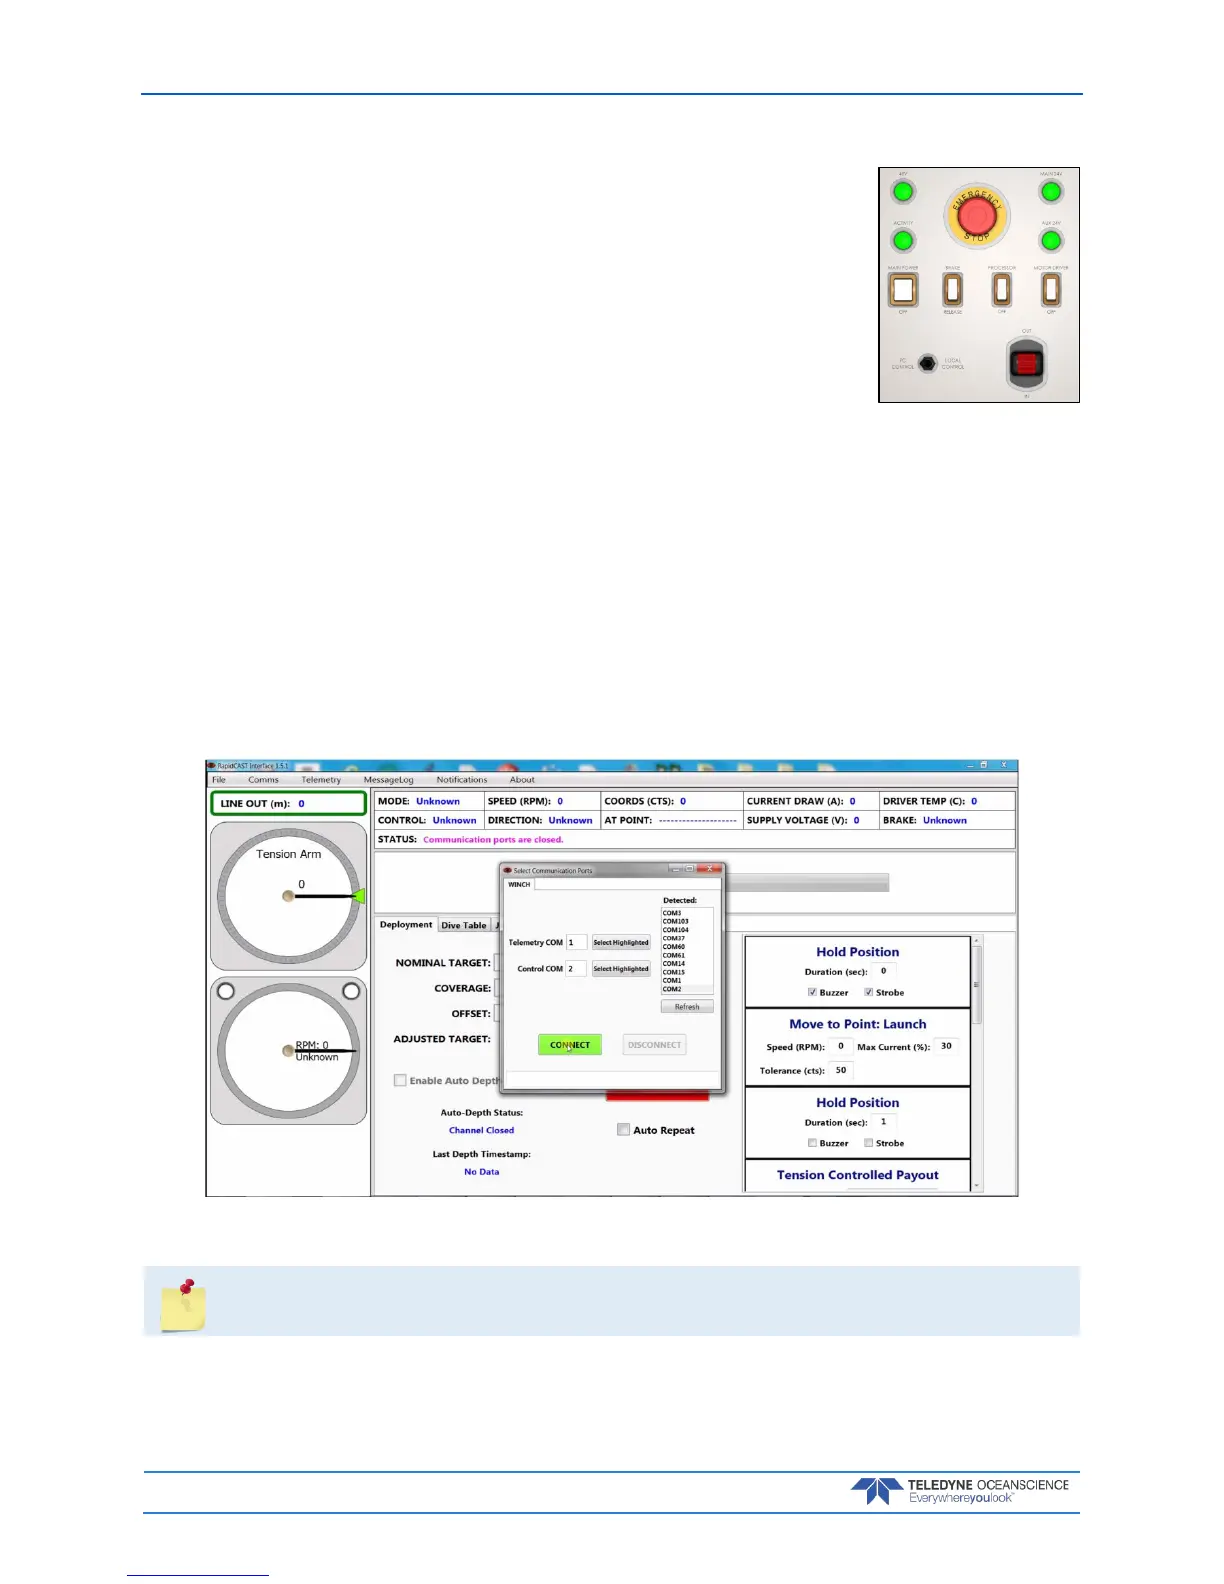
2. Start the RapidCAST Interface software. The Select Communication Ports dialog will open. To re-
open this screen, click the Comms menu.
3. Select the Serial COM Ports that were assigned in Step 1 of Installing Drivers and Software.
Lower COM Port number for the Telemetry COM
Higher COM Port number for the Control COM
4. Once both the Telemetry COM and the Control COM have been assigned a COM Port Num-
ber, click the Connect button.
Figure 28. Assigning the COMM Ports
 Loading...