www.ti.com
Getting Started
5
SLAU680–May 2018
Submit Documentation Feedback
Copyright © 2018, Texas Instruments Incorporated
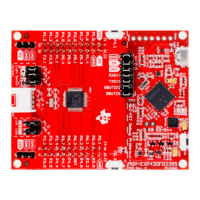
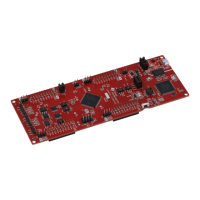
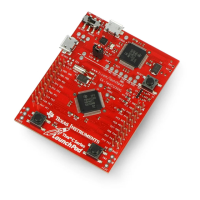
MSP430FR2355 LaunchPad™ Development Kit (MSP
‑
EXP430FR2355)
1.4.2 Running the Out-of-Box Experience
The Out-of-Box Experience (OOBE) of the MSP-EXP430FR2355 LaunchPad development kit
demonstrates how to set up multiple integrated Smart Analog Combo (SAC) peripherals of the
MSP430FR2355 MCU and how to use the interconnections between SAC pairs in various demo
scenarios. The OOBE includes two modes, a Light Sensor mode and a Function Generator mode. In the
Function Generator mode, the LaunchPad development kit transmits digital data to the PC and can be
visualized using the accompanying cloud GUI (visit MSP-EXP430FR2355 OOB GUI).
By default after power up, the MSP-EXP430FR2355 LaunchPad development kit enters the Light Sensor
mode, in which LED1 or LED2 brightens or dims based on the amount of ambient light sensed by the
photodiode, D1. A default brightness threshold is set at approximately half of the full brightness detection
range of D1 at which both LED1 and LED2 are off. Shine a light source such as a flashlight or cover up
D1 using your hand, and notice the green LED2 gets brighter as more light reaches D1, while the red
LED1 gets brighter as less light reaches D1. Press button S1 in the Light Sensor mode to set the new
brightness threshold at the current ambient light level.
Next, try pressing S2 to enter Function Generator mode. By default, the LaunchPad development kit starts
to generate a 1-Hz inverted sine wave at 0.8-V amplitude on pin P1.5. This signal is a result of using one
of the SAC 12-bit DACs to generate a sine wave and feeding it into a second SAC, which is configured as
an inverting programmable gain amplifier (PGA). The resulting waveform on pin P1.5 is also captured by
the MSP430FR2355 internal ADC, and the live data are transmitted to the PC. An accompanying cloud
GUI (visit MSP-EXP430FR2355 OOB GUI) is available to visualize the ADC measurements of the
generated waveform. This GUI also provides various controls for changing the signal type (sinusoidal,
square, or sawtooth), frequency, and amplitude of the DAC waveform generation and for configuring the
PGA mode (inverting or noninverting) and gain. See Section 3.1 for more details on the OOBE and how to
use its accompanying cloud GUI.
This GUI is created with GUI Composer 2.0 with the source available for customization, imported from the
TI Cloud Gallery. The serial communication port on the PC must be configured with 115200 bps, one stop
bit, and no flow control.
NOTE: The OOB cloud GUI is only supported in the latest versions of Chrome, Firefox, and Safari
browsers. An installer for the offline standalone GUI can also be downloaded from the TI
Cloud Gallery.
1.5 Next Steps: Looking Into the Provided Code
After the EVM features have been explored, the fun can begin. It’s time to open an integrated
development environment and start editing the code examples. See Section 4 for available IDEs and
where to download them.
The quickest way to get started using the LaunchPad development kit is to use TI’s Cloud Development
Tools. The cloud-based Resource Explorer provides access to all of the examples and resources in
MSPWare. Code Composer Studio Cloud is a simple Cloud-based IDE that enables developing and
running applications on the LaunchPad development kit.
The out-of-box source code and more code examples are provided and available on the download page.
Code is licensed under BSD, and TI encourages reuse and modifications to fit specific needs.
Section 3 describes all functions in detail and provides a project structure to help familiarize you with the
code.
With the onboard eZ-FET debug probe, debugging and downloading new code is simple. A USB
connection between the EVM and a PC through the provided USB cable is all that is needed.