Installation Premier 412/816/832 Installation Manual
12 INS159
Zone Expander Outputs
The Zone Expander module has two programmable outputs,
which can be used to drive auxiliary devices such as relays,
LED’s, smoke detectors etc. The table below shows the
electrical characteristics for each output:
No Supervised Max Current Type
1 No 100mA Switched –ve
2 No 100mA Switched –ve
Wire as per Panel Outputs shown on page 18.
Zone Expander Speaker Driver
The Zone Expander has a Speaker driver output and can be
used for driving 8 or 16 Ohm loud speakers as shown on
page 17.
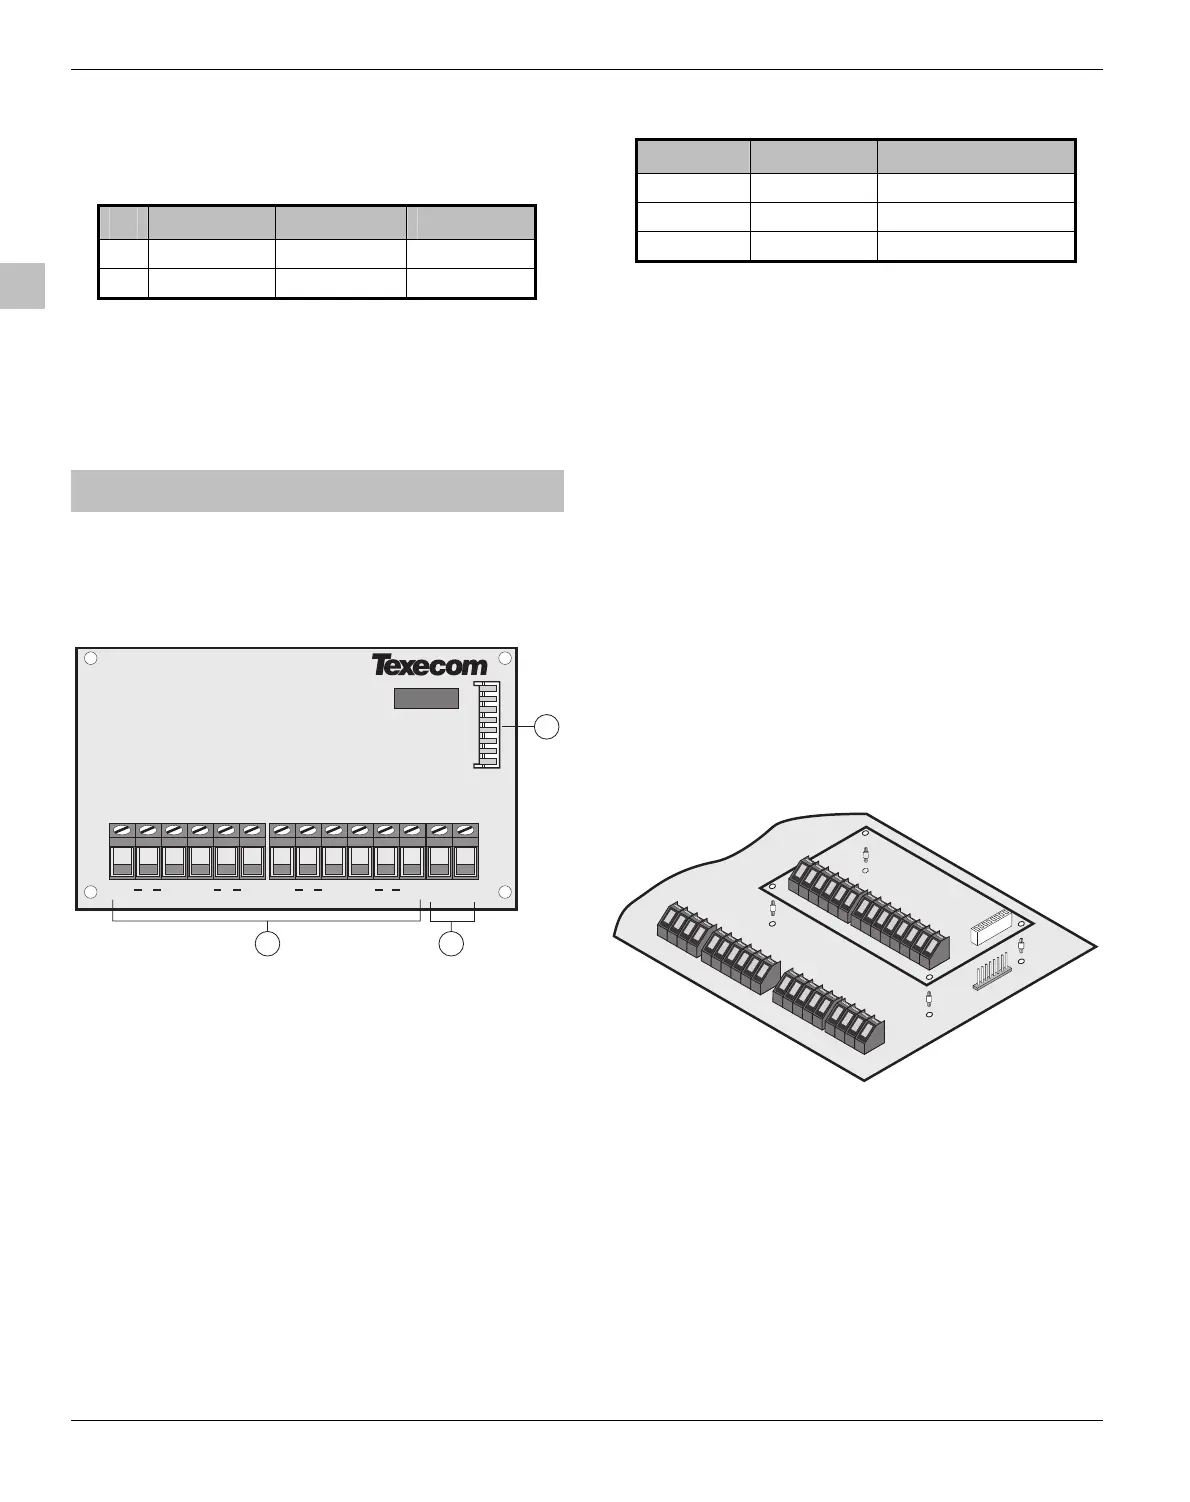
Local Zone Expander Module
The Premier 8XE Local Zone Expander plugs onto the
control panel to provide 8 additional programmable
detection zones.
Local Expander Layout
Z9 Z11
COM
COM
Z10 Z12
+
-
Aux12
3
2
Z13 Z15
COM
COM
Z14 Z16
1
$
Zone Inputs 9 to 16
These terminals provide the connections to the zone inputs.
%
Auxiliary 12V Power
These terminals provide auxiliary power for devices that
require 12V power. The auxiliary output is protected by fuse
F2 (1 Amp) on the control panel.
&
Plug-On Connector
The Premier 8XE Local Zone Expander plugs onto the
control panel via this connector and is held in place by four
plastic pillars located in each corner.
Local Expander Zones
The Premier 8XE Local Zone Expander has eight
programmable zone inputs (see page 13 for wiring details).
Each zone is also fully programmable (see page 24 for
programming details).
The table below shows the zone allocation when the module
is installed:
Panel Panel Zones Expander Zones
Premier 412 1 to 4 9 to 16
Premier 816 1 to 8 9 to 16
Premier 832 1 to 8 9 to 16
!
When the system is expanded above 8 zones, it
MUST be fitted with a suitable remote keypad. For
systems up to 16 zones a Premier RKP16 or Premier
RKP16 Plus should be installed. For systems above 16
zones a Premier LCD/LCDL should be installed.
The system will only support one type of expansion
device for zones 09 - 16, i.e., you can fit either a
Premier 8X Remote Expander (Address = 1) or a
Premier 8XE Local Expander, you cannot fit both.
Installing the Local Zone Expander
" To install the Local Zone Expander proceed as follows:
1. Ensure that all power is removed from the control panel
(mains and battery) before attempting to fit the
expander.
2. Push the four support pillars (supplied) into the four
locating holes on the control panel PCB.
3. Align the Local Expander Connector with the 8 way plug
(JP2) on the control panel. Push expander into place,
ensuring that all four pillars clip into the four locating
holes on the local expander.
 Loading...


