Premier 412/816/832 Installation Manual Commissioning & Troubleshooting
INS159 19
3. Commissioning & Troubleshooting
Commissioning
Once ALL connections have been made to the control panel
and power is ready to be applied, you should read this
section before continuing.
When applying power for the first time, the factory
default settings will automatically be loaded. The default
settings ensure that the control panel software is reset
and all programming information is loaded into memory.
For a complete list of factory default settings, please
refer to the accompanying “Installation Records and
Defaults” booklet.
!
The control panel will only load the default values if
the lid tamper is open.
• Connect the black battery lead to the negative (–)
terminal of the standby battery and the red battery lead
to the positive (+) terminal of the standby battery. The
green power light on the main PCB will flash whilst the
default values are being loaded.
• If the system has gone into an alarm condition, enter the
default Master User code
&'(). The alarm
tone will then stop.
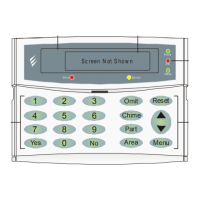
• To access the Engineer Programming Menu, enter the
default Engineer code !#$% and press
, followed by *. All the zone lights will illuminate.
• Program the system date and time, see page 67.
• Program the system as described in the next section
(Programming the Control Panel).
• Perform a walk test as described on page 67.
Remember that some powered detectors (e.g. PIRs and
combined technology detectors) take several minutes to
warm up and become operational.
• Test the internal sounder, external sounder and strobe
as described on page 67.
• Replace the lid and secure with the two lid screws
supplied - do not over-tighten.
• Replace the screw covers.
• Press
, to leave the programming menus. All the
zone lights will turn off.
• The Service light will be flashing to indicate that action
is required. Switch on the mains supply to the control
panel. The Service light will stop flashing and stay on
continuously.
Installation is now complete and the system is
ready for use.
Troubleshooting
Power Faults
No Power to Unit (mains only)
• Check the mains block fuse and replace if blown.
• Check for any loose wires at the mains block, the
transformer and the AC terminals on the PCB.
• Check the mains block is connected correctly; live to
live (brown), neutral to neutral (blue).
No Power to Unit (battery only)
• Make sure the “Kick Start” pins have been shorted
together.
• Check for any loose wires at the BATT terminals on the
PCB.
• Check that the battery wires are connected correctly;
red from BATT+ to the battery positive [+], black from
BATT- to the battery negative [–].
Remote Keypads
Keypad Does Not Operate at All
• Check that the remote keypad is wired correctly from
the control panel.
• Check that the network fault indicator is off. If the
indicator is on, the electronic fuse has activated
indicating a short circuit across the [+] and [–] of the
network terminals.
Keypad Does Not Accept Access Codes
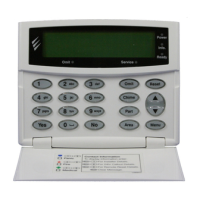
• If the system has more than one remote keypad check
that each keypad is addressed differently, see page 10
for details. The address of a keypad can be checked by
pressing the
- and . keys together, the address is
displayed by the relevant zone light.
• Check that the remote keypad is wired correctly from
the control panel.
• If the remote keypad is on a cable run that is longer
than 100m, check the voltage between the [+] and [–]
terminals at the remote and ensure that it measures no
less than 10.0V.
• Check that you are using the correct Access code. The
default Engineer code is
!#$% and the
default Master User code is
&'().
• Check that the User code you are using is not “Time
Locked”, if the User code is time locked then the
Access code will only be accepted when Control Timer
1 is off, see page 64 for further details.

 Loading...
