Do you have a question about the Texecom Premier Elite Ricochet Kits and is the answer not in the manual?
Lists necessary components beyond the kit for installation.
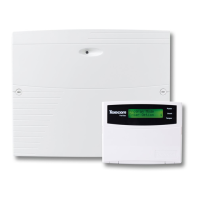
Illustrates the system's components and connectivity.
Details electrical safety and connection procedures for the control panel.
Explains how to connect the AC mains supply to the control panel.
Guidelines for selecting a secure and accessible location for the control panel.
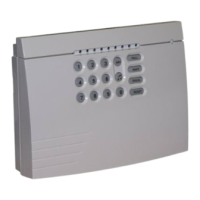
Recommendations for placing keypads for optimal system access and control.
Guidelines for positioning movement sensors for effective detection.
Instructions for installing door contacts on doors and frames.
Advice on mounting shock sensors on protected doors or windows.
Recommendations for external sounder placement for visibility and maintenance.
Guidance on positioning smoke detectors for effective coverage.
Tips to prevent false alarms by choosing correct device locations.
Visual examples of good and bad locations for devices.
Step-by-step guide for installing and powering up the control panel.
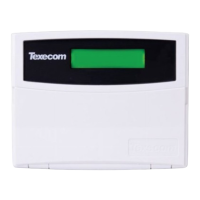
Shows layout of Premier LCDLP Keypad with icons and keys.
Details UK and English key equivalents for the keypad.
Explains the meaning of LED indicators on the keypad.
Illustrates wired connection of panels with integral keypads.
Table showing network terminal functions (+12V, 0V, T, R).
Table detailing DIL switch settings for keypad/expander addresses.
Procedure for learning Ricochet devices to the system before final placement.
Default zone types and areas assigned to Ricochet devices.
Flowchart and steps to remove devices from the system.
Guidelines for physically installing learned devices in their final locations.
Step-by-step guide to learning SmartKeys for users.
Procedure to remove a SmartKey and its user data from the system.
Final steps including fitting covers and conducting system tests.
Steps to verify all system features and functions are operating correctly.
Overview of common programming options in Engineering mode.
Settings for various system timers like exit delay and bell duration.
Options for setting arming modes such as Entry/Exit and Instant.
Configuration for area suites and their associated text.
How to select and configure zone areas.
Customizing text labels for zones.
Setting chime tones for zones.
Configuring zone wiring types (e.g., NO, NC, EOL).
Detailed system timer settings and their functions.
Configuration options for panel behavior and features.
Settings for advisory volume and multiple knocks.
Options for monitoring hardware faults like line and power failures.
Settings for control timers related to areas and day of operation.
Configuration for system text messages.
Customizing text for part arming.
Setting holiday dates for system behavior.
Configuring speaker tones.
Configuring text output for PC.
Configuring custom output text.
Keypad setup for specific panel models and 640-area panels.
Mapping zones to keypads.
General keypad options and volume adjustment.
Configuring sounder behavior for keypads.
Expander setup for specific panel models and 640-area panels.
Configuring text for expanders.
Configuring auxiliary inputs for expanders.
Adjusting expander volume and configuring sounder options.
Configuring outputs on the control panel.
Configuring Digi outputs.
Configuring communication channels.
Configuration related to RedCARE.
Configuring keypad outputs.
Configuring expander outputs.
Configuring custom outputs.
Configuring X-10 outputs.
Types of system outputs and their functions.
Output types specific to panel areas.
Selecting zone output types.
Selecting user codes.
Selecting control timers.
Selecting PC control options.
Selecting door control options.
Selecting X-10 outputs.
Attributes and types for keys.
Resetting digital communication and initiating test calls.
Setting manual pre-dial numbers.
General configuration settings for UDL/Digi.
Specific options for Digi communication.
Options related to UDL communication.
Setting second and third call-back numbers.
Setting the UDL password.
Various UDL options and configuring required rings.
Configuring UDL dial attempts.
Setting up area accounts.
Setting up communication modules like Radio-Pad, AV, and IP.
Setting primary/secondary numbers and prefixes for Pad ARCs.
Setting AV module numbers, dial attempts, and re-dial delay.
Configuring IP Data including address, port, gateway, and mask.
Setting polling/SMG IP address and port.
Setting up GPRS Data including Access Point Name.
Setting user name and password.
Setting primary and secondary SMS centre numbers.
Configuring modem setup and speed.
Setting Pad ESN.
Viewing signal status, error rates, and redundancy.
Setting up communication ports.
Setting up the onboard Digi port.
Configuring Com Ports 1, 2, and 3, including 640 model specifics.
Options for expansion ports: Nothing Fitted, AV Module, X10 Module.
Selecting users, setting user codes, and managing tags.
Assigning areas to users for specific panel models.
Assigning user types (Master, Manager, etc.).
First and second sets of user options, including custom user settings.
Configuring user settings.
Setting time locks for users.
Assigning text descriptions to users.
Configuring door control for users with Door Strike attribute.
Assigning proximity tags to users.
Accessing and viewing system, alarm, or mandatory logs.
Performing a bell test to check sounder operation.
Conducting a walk test to verify detector functionality.
Checking the status of individual zones.
Performing various system tests.
Verifying connected devices.
Checking the status of Radio Keypad.
Checking expander status.
Setting the system time.
Setting the system date.
Viewing location text.
Printing system logs.
Initiating a soak test.
Changing the engineer's code.
Adjusting system volumes.
Restoring default NVM data.
Viewing ID data.
Configuring radio settings.
Performing Ricochet diagnostics.
Procedure for learning Ricochet devices to zones.
Procedure to alter part arms.
Steps to change default Engineer and Master User codes.
Steps to change the system time.
Steps to change the system date.
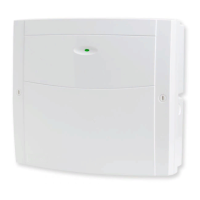
Lists features of Premier Elite 12/24/48-W panels.
Diagram of the control panel's main circuit board.
Details for connecting the rechargeable battery.
Terminals for digicom power and inputs.
Terminals for programmable digicom outputs.
Connector for an engineer's portable keypad.
Terminals for network data connections.
Explanation of network data LEDs.
Serial communication ports for PC connection.
Terminals for auxiliary 12V power.
Port for connecting expansion modules.
Terminals for connecting an external sounder.
Button to load factory default settings.
Terminals for monitoring auxiliary device tamper/fault.
Terminals for connecting loudspeakers.
Description of panel outputs.
Description of zone connections.
Explanation of Ricochet network LEDs.
Enabling 2-wire smoke detector connection.
Switches for selecting receiver functionality.
Connector for Ricochet engineer keypad.
Port for firmware updates.
Jumper for commission mode.
RF antenna connection.
Explanation of RF LEDs.
Connections for plug-on communicators.
Serial port for PC connection.
Tamper protection for the control panel.
Heartbeat LED status.
Option to disable cover tamper.
Port for panel firmware flashing.
Battery charge current selection.
Pads for measuring current draw.
Button for battery kick-start.
Information on provided PTC fuses.
| Typical Wireless Range | Up to 1km (line of sight) |
|---|---|
| Zones | Up to 64 wireless zones |
| Mobile App Control | Yes, via Texecom Connect app |
| Power Supply | Mains powered with battery backup |
| Backup Battery | Yes |
| Tamper Protection | Yes |
| Compatibility | Compatible with Texecom Premier Elite control panels and Ricochet-enabled devices |
| Frequency | 868MHz |
| Encryption | AES 128-bit |
| Two-Way Communication | Yes |
| Wireless Technology | Ricochet Mesh Network |
| Battery Life | Up to 5 years (sensors) |