17
Step 7 - Tighten all hardware at this time.
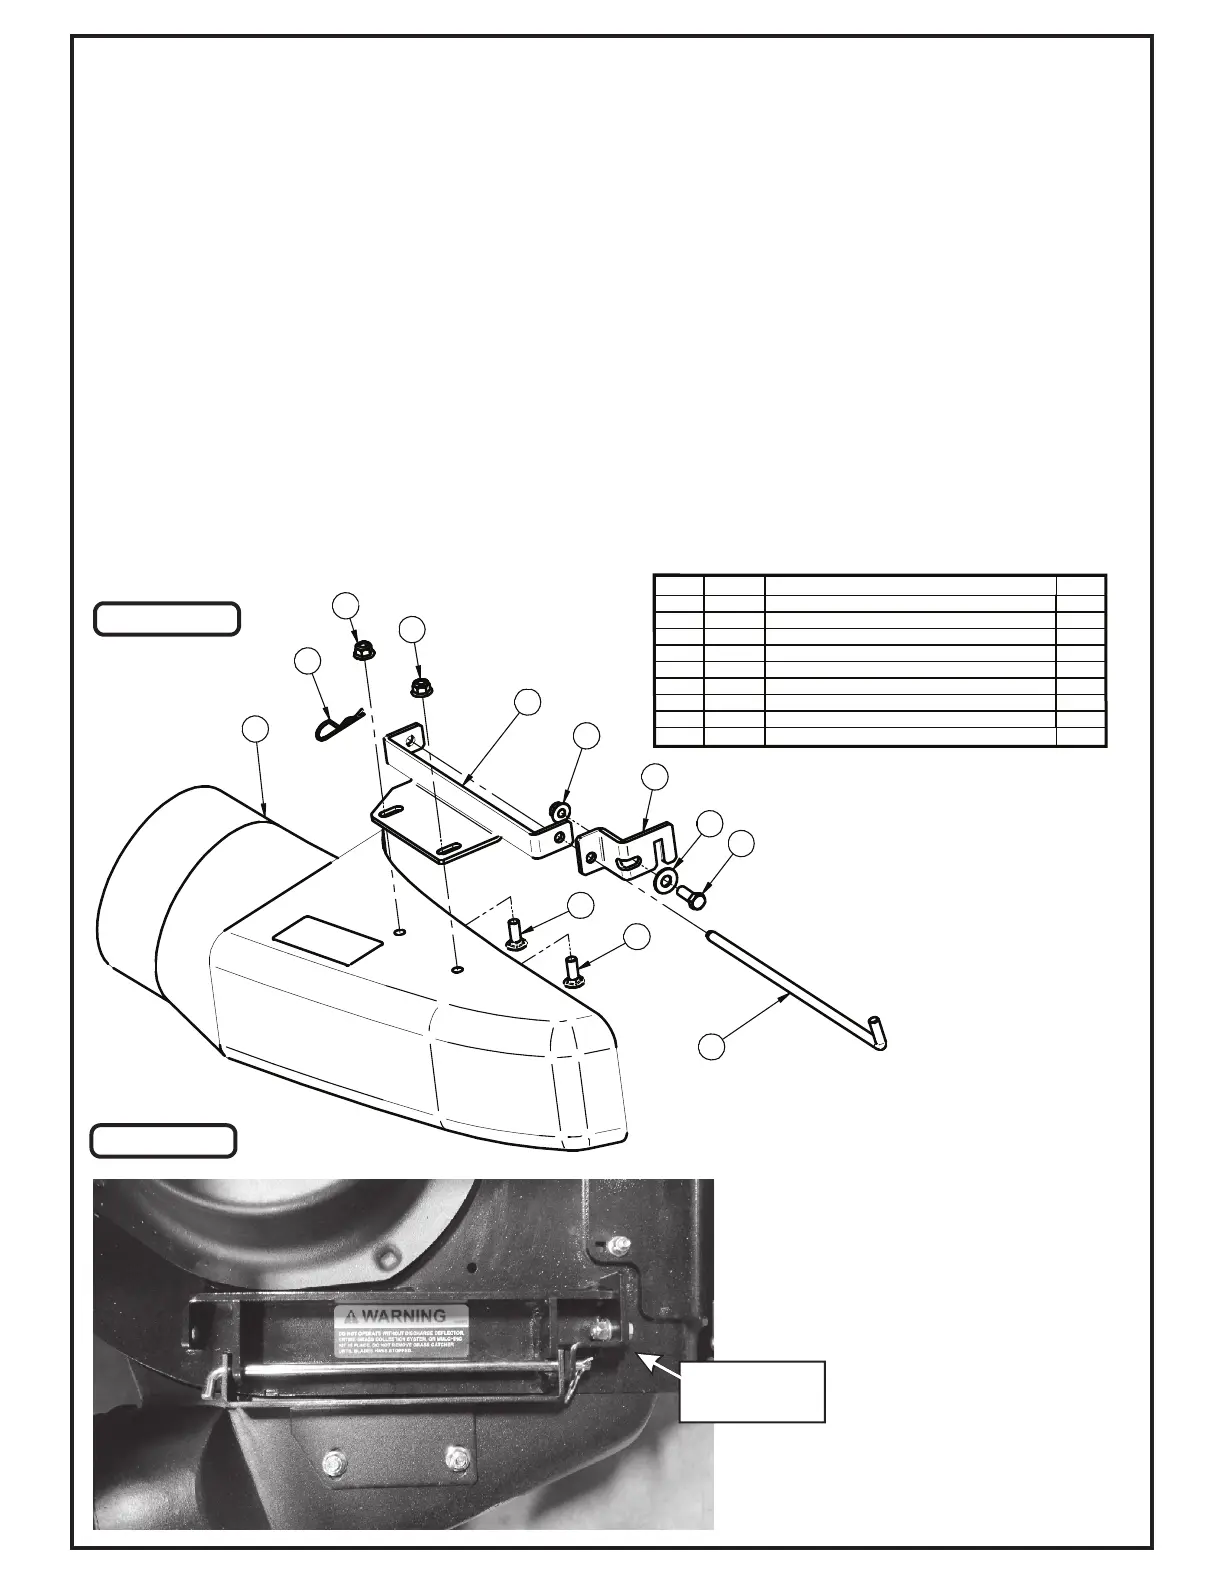
Step 6 - With the Carriage Bolts (Item #5) still loose, adjust the position of the boot so that there is no gap between
the mower deck and the boot.
Step 2 - Secure the Boot Plate (Item #2) to the Aluminum Boot (Item #1) using (2) 3/8”-16 x 1” Carriage Bolts (Item
#5) and (2) 3/8”-16 Ny-Flange Lock Nuts (Item #6). Insert the Carriage Bolts from the inside of the Boot so the threads
are on the top of the Boot. This will prevent grass clippings from collecting on the threads. Leave the hardware loose
until the boot plate has been attached to the mower deck.
Step 4- Insert Boot Rod (Item #3) through the Boot Plate Adapter & Boot Plate Bushings.
Step 3 - Align Boot Plate Bushings to the Boot Plate Adapter Bushings.
Step 1 - Remove the mower’s Operator Controlled Discharge Chute (OCDC) and attach the Boot Plate Adapter (Item
#7) to the far right mounting hole as shown in Figure B using (1) 3/8”-16 x 1” Hex Head Cap Screw (Item #8), (1) 3/8”
Flat Washer (Item #9) and (1) 3/8”-16 Ny-Flange Lock Nuts (Item #6).
Boot Kit Installation
Step 5 - Secure the Boot Rod using a Hair Pin Clip (Item #4).
Figure A
Figure B
Secure Boot
Plate Adapter
Item # Part # Desc. Qty.
1 E0030 8" Aluminum Boot 1
2 B0988 Boot Plate 1
3 B0189 Boot Rod 1
4 K0099 Hair Pin Clip 3/32" 1
5 K1182 Carriage Bolt 3/8"-16 x 1" 2
6 K2038 Ny-Flange Lock Nut 3/8"-16 3
7 B0990 Boot Plate Adapter 1
8 K1191 HHCS 3/8"-16 x 1" GR5 1
9 K0047 Flat Washer 3/8" / 1.00 OD x .446 ID x .075 T 1
E033A