6
NOTE: The mower deck PTO belt must be removed
from the electric clutch before continuing with the
installation. Refer to your mower’s owner’s manual for
instructions on PTO belt removal.
Preparation Of Mower
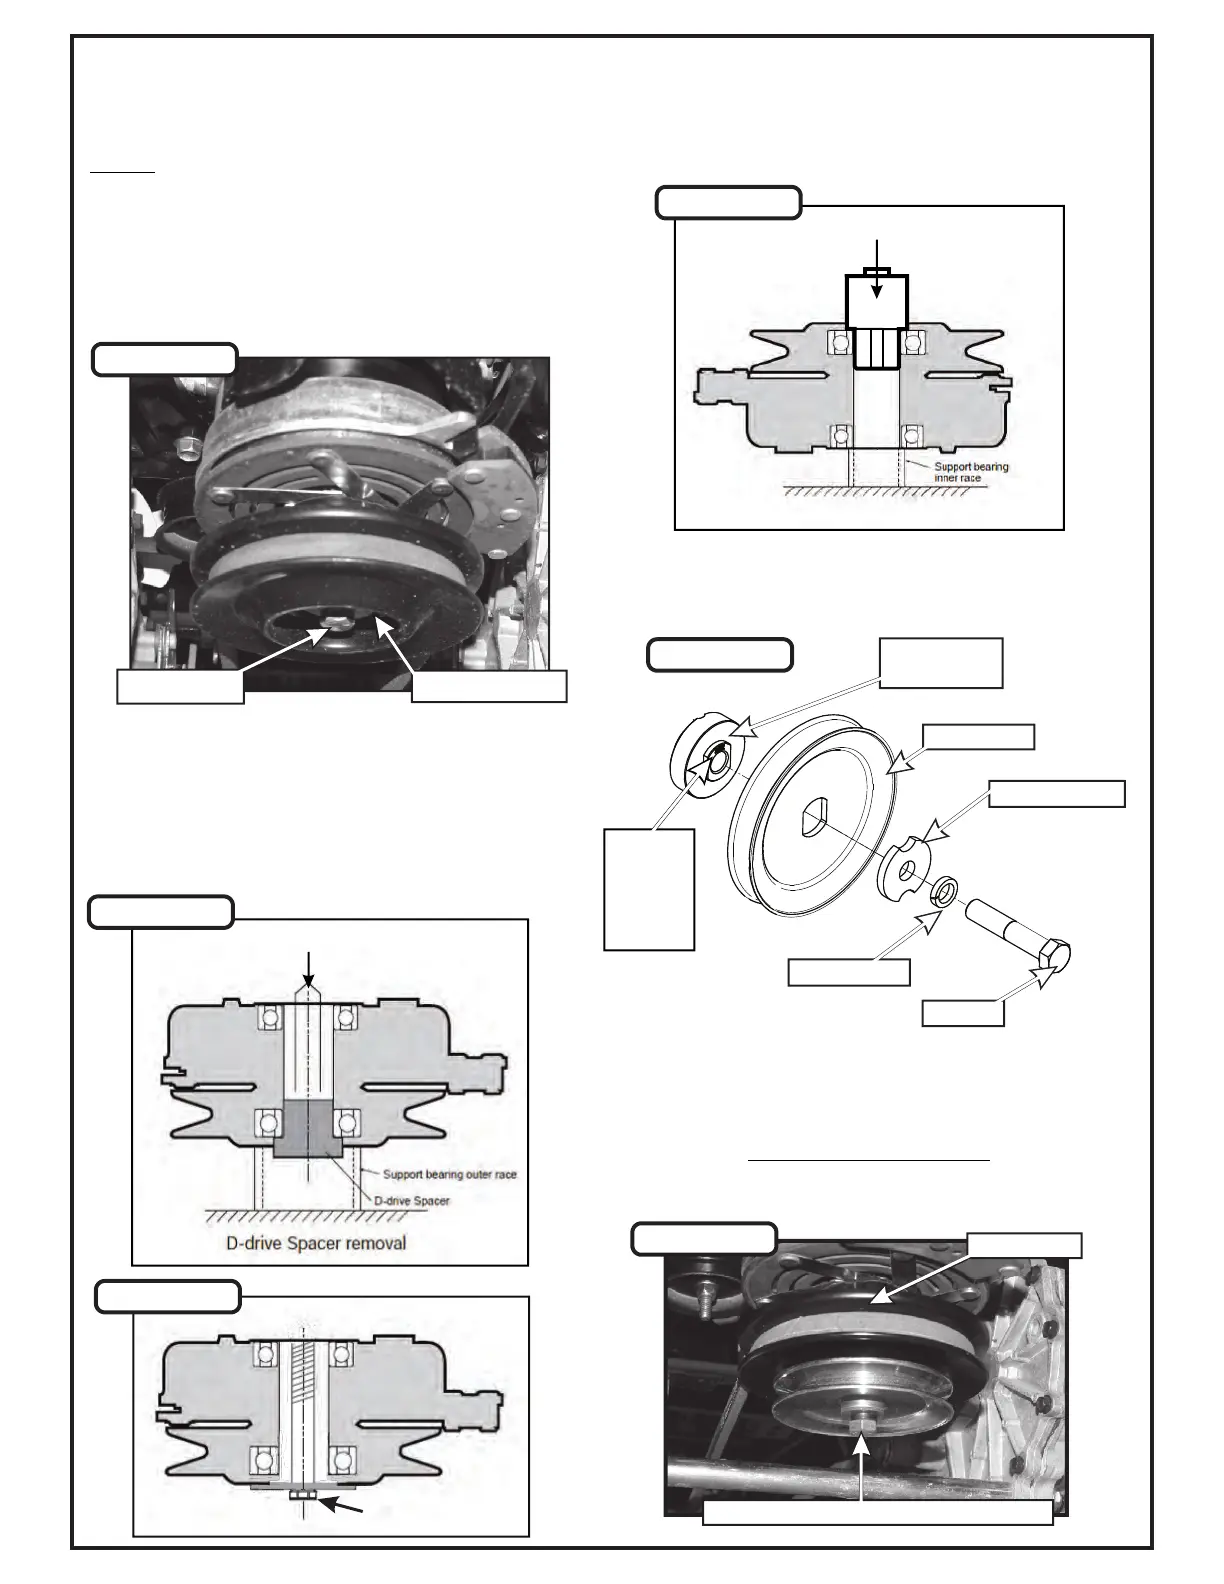
Upon removal of clutch determine if your mower is
equipped with a D-drive spacer. If so, then proceed to
Figure B. If your mower is equipped with bolt, fender
and lock washer without D-drive spacer proceed to
Figure C. Remove the D-drive spacer using an arbor
press or equivalent. On removal, adjacent bearing
OUTER race must be supported or bearing damage
may occur. Refer to Figure B.
From the underside of the engine, disconnect the wiring
harness attached to the electric clutch. Remove the bolt
and electric clutch from the mower. Refer to Figure A.
The engine pulley assembly must be installed using an
arbor press or equivalent. During installation, opposite
bearing inner race must be supported or bearing
damage may occur. Refer to Figure D.
Once the Engine Pulley Bushing is installed, reattach
the clutch assembly & deck PTO belt to the mower and
then review Figure E.
To assemble and fasten the Engine Pulley, align the
Engine Pulley Bushing to the mower’s clutch pulley and
fasten using (1) Clamp Washer, (1) Lock Washer, and
(1) Hex Bolt. Torque the bolt to 55 ft./lbs. The added
pulley will power the collection system and should
resemble Figure F when installed.
Section II - INSTALLATION FOR USE
Remove Bolt
D-Drive Spacer
Remove 7/16”-20
Bolt & Washers
Engine Pulley Bushing Installation
Engine Pulley
Bushing
Hex Bolt
Lock Washer
Pulley
Bushing
Number
Located
Here
Clamp Washer
Engine Pulley
Electric Clutch
Engine Pulley Assembled Into Electric Clutch
Figure A
Figure B
Figure C
Figure D
Figure E
Figure F
P#S0228 - #38
P# M0309
P# K0278
P# K0140
P# K0550 - 7/16”-20 x 3-1/2” HHCS