CUTMASTER 42
OPERATION 4-6 Manual 0-5141
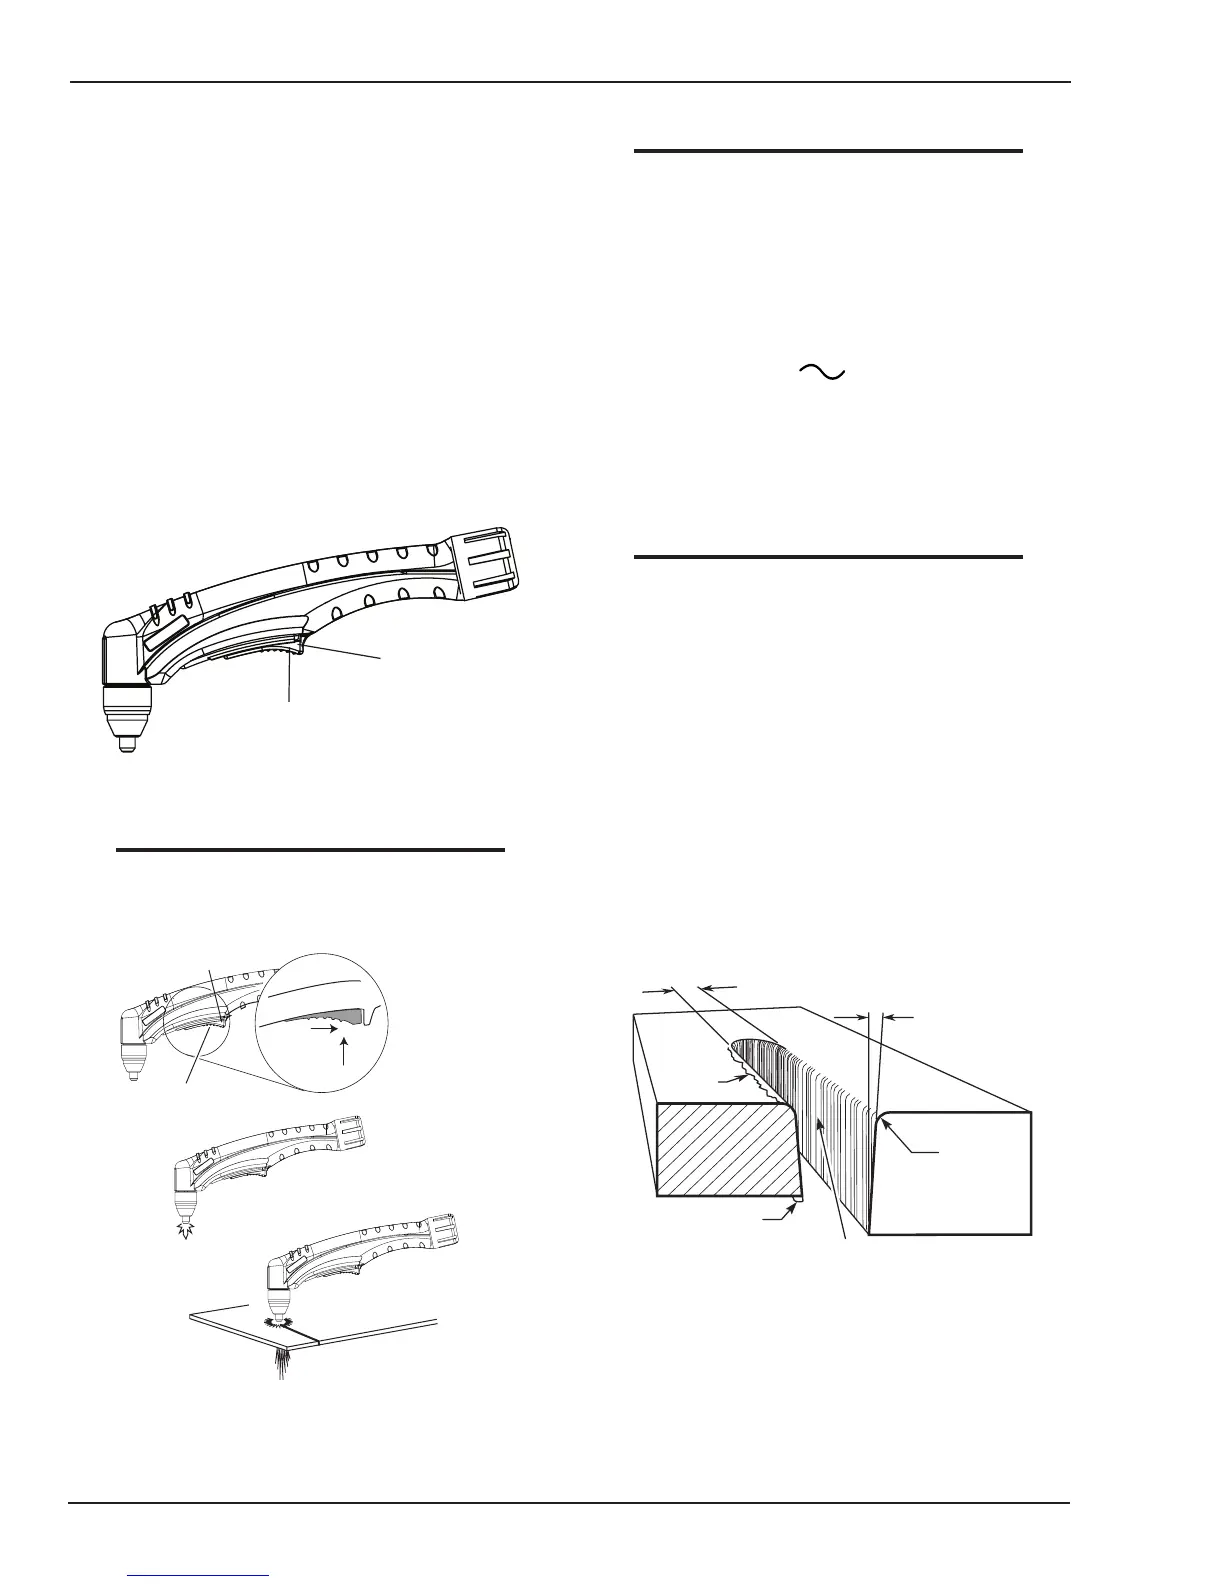
B. The torch can be comfortably held in one hand
or steadied with two hands. Position the hand
to press the Trigger on the torch handle. With
the hand torch, the hand may be positioned
close to the torch head for maximum control
or near the back end for maximum heat protec-
tion. Choose the holding technique that feels
most comfortable and allows good control and
movement.
C. Keepthetorchincontactwiththeworkpiece
during the cutting cycle.
D. Hold the torch away from your body.
E. Slide the trigger release toward the back of the
torch handle while simultaneously squeezing
the trigger. The arc will start.
Trigger
Trigger Release
F. Place the torch tip on the work. The main arc
will transfer to the work.
NOTE
Thegaspreowandpostowareacharacter-
istic of the power supply and not a function
of the torch.
3
4
Tr igger
2
1
Tr igger Release
Art# A-09341
G. Cut as usual. Simply release the trigger as-
sembly to stop cutting.
H. Follow normal recommended cutting practices
as provided herein.
3. Complete cutting operation.
NOTE
If the torch is lifted too far from the workpiece
while cutting, the main arc will stop and the
pilot arc will automatically restart.
4. Release the torch trigger.
a. Main arc stops.
5. Set the power supply ON / OFF switch to OFF
(down position).
a. AC indicator turns OFF.
6. Set the main power disconnect to OFF, or unplug
input power cord.
a. Input power is removed from the system.
4.04 Cut Quality
NOTE
Cut quality depends heavily on setup and
parameters such as torch standoff, alignment
with the workpiece, cutting speed, gas pres-
sures, and operator ability.
Refer to appendix pages for additional infor-
mation as related to the power supply used.
Cut quality requirements differ depending on application.
For instance, nitride build-up and bevel angle may be ma-
jor factors when the surface will be welded after cutting.
Dross-free cutting is important when finish cut quality
is desired to avoid a secondary cleaning operation. The
following cut quality characteristics are illustrated in the
following figure:
Kerf Width
Cut Surface
Bevel Angle
Top Edge
Rounding
Cut Surface
Drag Lines
Dross
Build-Up
Top
Spatter
A-00007
Cut Quality Characteristics
Cut Surface
The desired or specified condition (smooth or rough)
of the face of the cut.