CUTMASTER 42
Manual 0-5141 5T-1 SERVICE
SECTION 5 TORCH:
SERVICE
5T.01 General Maintenance
NOTE
Refer to Previous "Section 5 System" for com-
mon and fault indicator descriptions.
Cleaning Torch
Even if precautions are taken to use only clean air with
a torch, eventually the inside of the torch becomes
coated with residue. This buildup can affect the arc
initiation and the overall cut quality of the torch.
WARNING
Disconnect primary power to the system be-
fore disassembling the torch or torch leads.
DO NOT touch any internal torch parts while
the AC indicator light of the Power Supply is
ON.
The inside of the torch should be cleaned with electri-
cal contact cleaner using a cotton swab or soft wet
rag. In severe cases, the torch can be removed from
the leads and cleaned more thoroughly by pouring
electrical contact cleaner into the torch and blowing
it through with compressed air.
CAUTION
Dry the torch thoroughly before reinstalling..
5T.02 Inspection and Replacement of
Consumable Torch Parts
WARNING
Disconnect primary power to the system be-
fore disassembling the torch or torch leads.
DO NOT touch any internal torch parts while
the AC indicator light of the Power Supply is
ON.
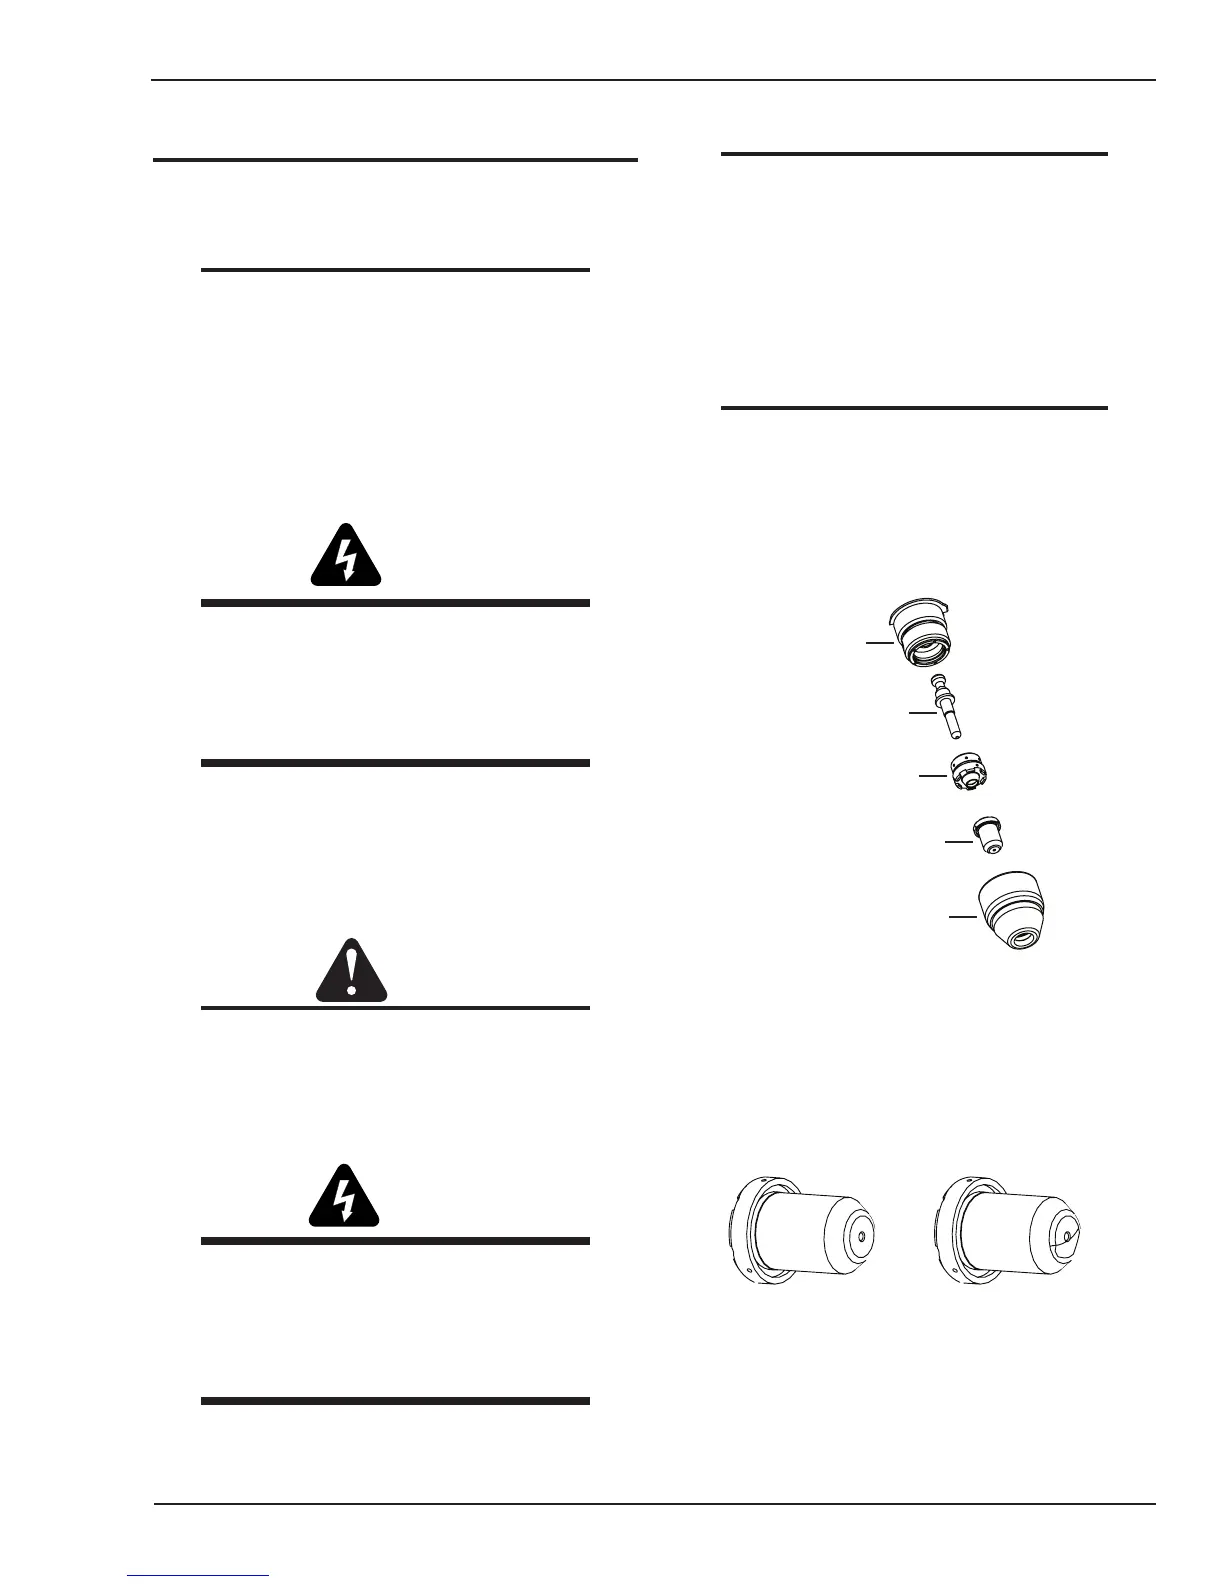
Remove the consumable torch parts as follows:
NOTE
The shield cup holds the tip and starter car-
tridge shield cup in place. Position the torch
with the shield cup facing upward to prevent
these parts from falling out when the cup is
removed.
1. Unscrew and remove the shield cup from the
torch.
NOTE
Slag built up on the shield cup that cannot
be removed may effect the performance of
the system.
2. Inspect the cup for damage. Wipe it clean or
replace if damaged.
Art# A-09345
Electrode
Start Cartridge
Tip
Shield Cup
Torch Head
Consumable Parts
3. Remove the tip. Check for excessive wear (indi-
cated by an elongated or oversized orifice). Clean
or replace the tip if necessary.
Tip Wear