CUTMASTER 42
OPERATION 4-4 Manual 0-5141
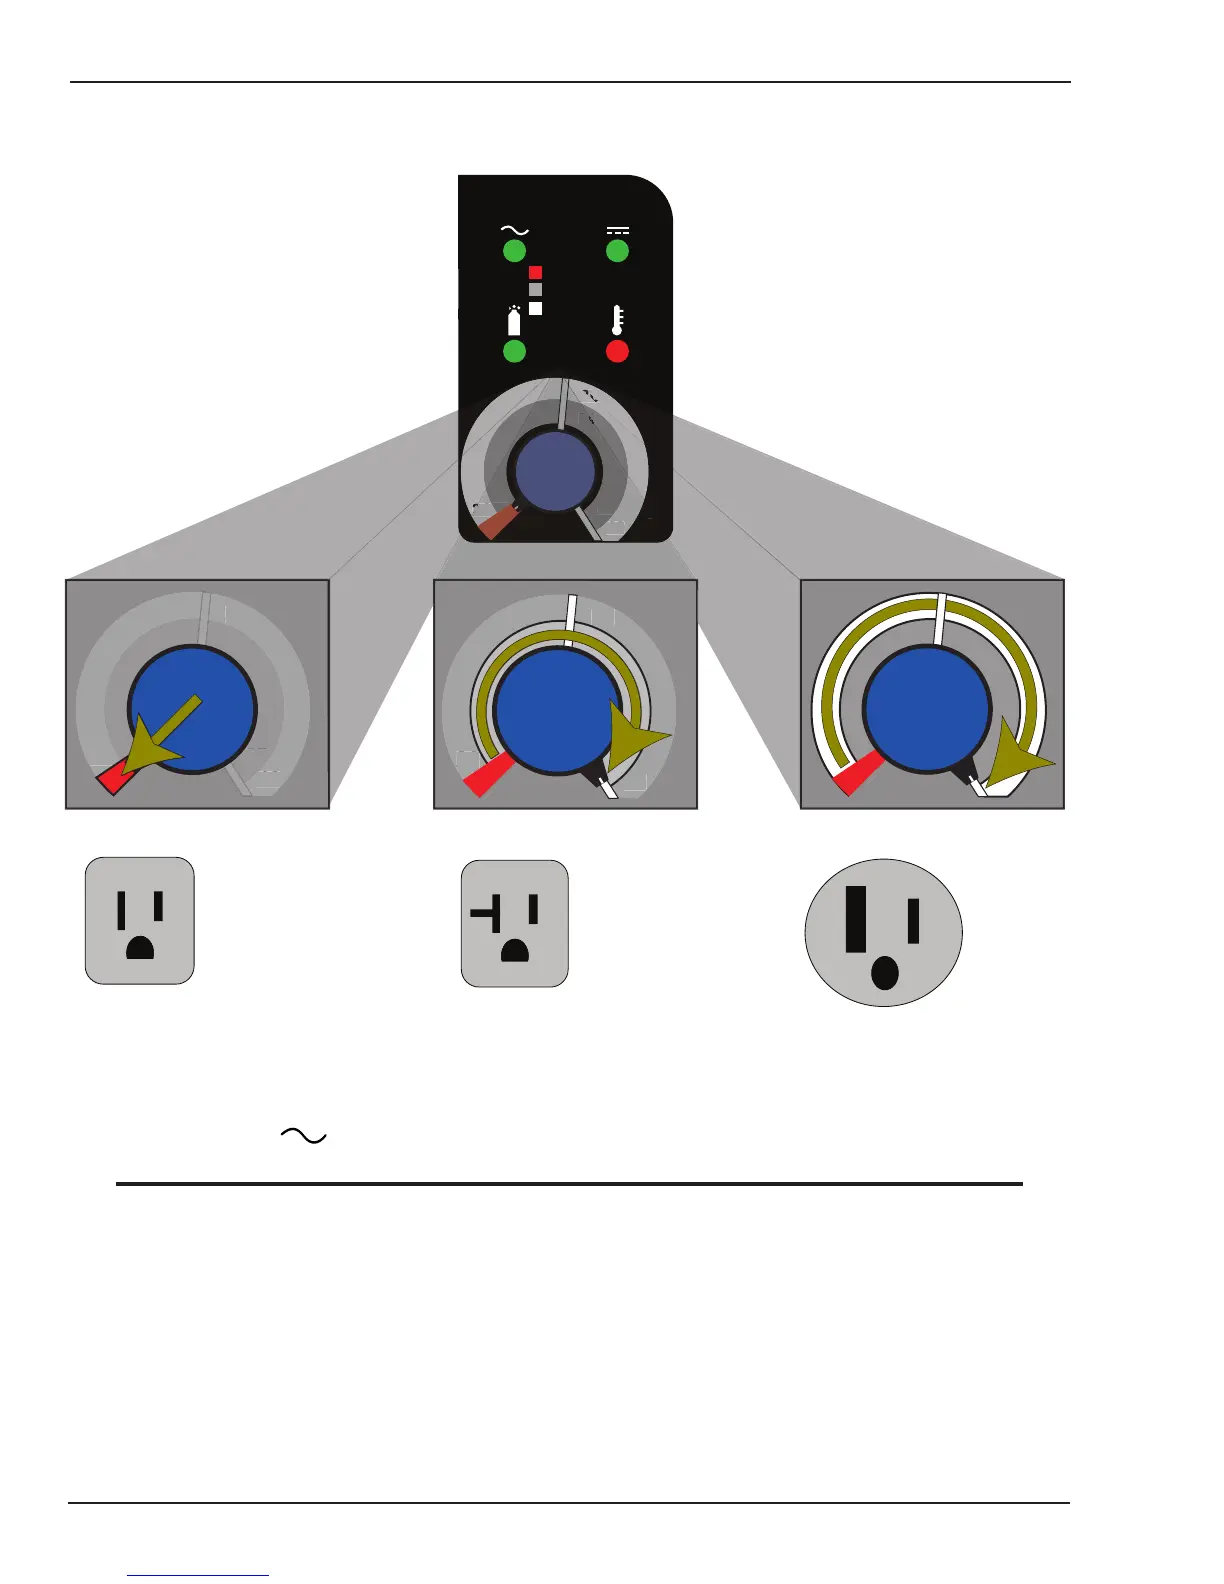
G. Select Current Output Level
Set the desired current output level.
A
120V 15A
120V 20A
230V 20A
24
40
20
20
30
27
120V, 15A
24
40
20
20
30
27
4
230V, 20A
24
20
27
40
20
30
120V, 20A
40
20
30
3
24
20
A
A
A
27
A#09697_AA
4.03 Sequence of Operation
The following is a typical sequence of operation for this power supply.
1. Place the ON / OFF switch on the power supply to ON (up) position (Red indicator lamp is illuminated).
a. AC indicator turnson;fanturnson.
NOTE
During initial power up, there will be a delay of about 2 seconds before the AC Indicator light will illuminate
andthepre-owgasandfanstarts.Thegaswillautomaticallyowfromtorchforapproximately10seconds
(only after the AC Indicator lamp is illuminated) (The AC Indicator lamp and fan turns on approximately 2
seconds after the ON/OFF switch is enabled), this is a process that makes sure all inputs (gas, input power,
torch connection, and torch parts) are acknowledged for proper operation.
2. Wear protective clothing, including welding gloves and appropriate eye protection (see table 1-1). Place tip on
work piece and pull trigger. Arc will initiate and start cutting material.
• Standoff Cutting With Hand Torch