A80
OPERATION 0-4985
4T-2
1. If attached, remove the ohmic clip then unscrew
and remove the shield cup assembly from the torch
head. Wipe it clean or replace if damaged
2. Remove the Electrode by pulling it straight out of
the Torch Head.
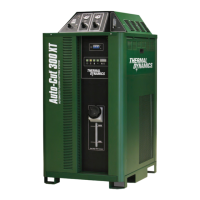
Art # A-04173_AB
Elektrod
Brännarhuvud
yddskoppsenhet
Skyddskåpa
Ohmic Clip
(If installed)
Skärspets
Startkassett
Automation Torch Parts
3. Install the replacement Electrode by pushing it
straight into the torch head until it clicks.
4. Install the starter cartridge and desired tip for the
operation into the torch head.
5. Hand tighten the shield cup assembly until it is
seated on the torch head. If resistance is felt when
installing the cup, check the threads before proceed-
ing
6. If used, attach the ohmic clip to the shield cup.
4T.03 Machine and Hand Torch Parts
Selection
Depending on the type of operation to be done determines
the torch parts to be used.
Type of operation:
Drag cutting, stando cutting or gouging
Torch parts:
Shield Cup, Cutting Tip, Electrode and Starter Car-
tridge
NOTE!
Refer to Sections 4T.08 and following for ad-
ditional information on torch parts.
Change the torch parts for a dierent operation as follows:
WARNING
Disconnect primary power at the source
before assembling or disassembling torch
parts, or torch and leads assemblies.
NOTE!
The shield cup holds the tip and starter car-
tridge in place. Position the torch with the
shield cup facing upward to keep these parts
from falling out when the cup is removed.
1. Unscrew and remove the shield cup assembly from
the torch head.
2. Remove the Electrode by pulling it straight out of
the Torch Head.
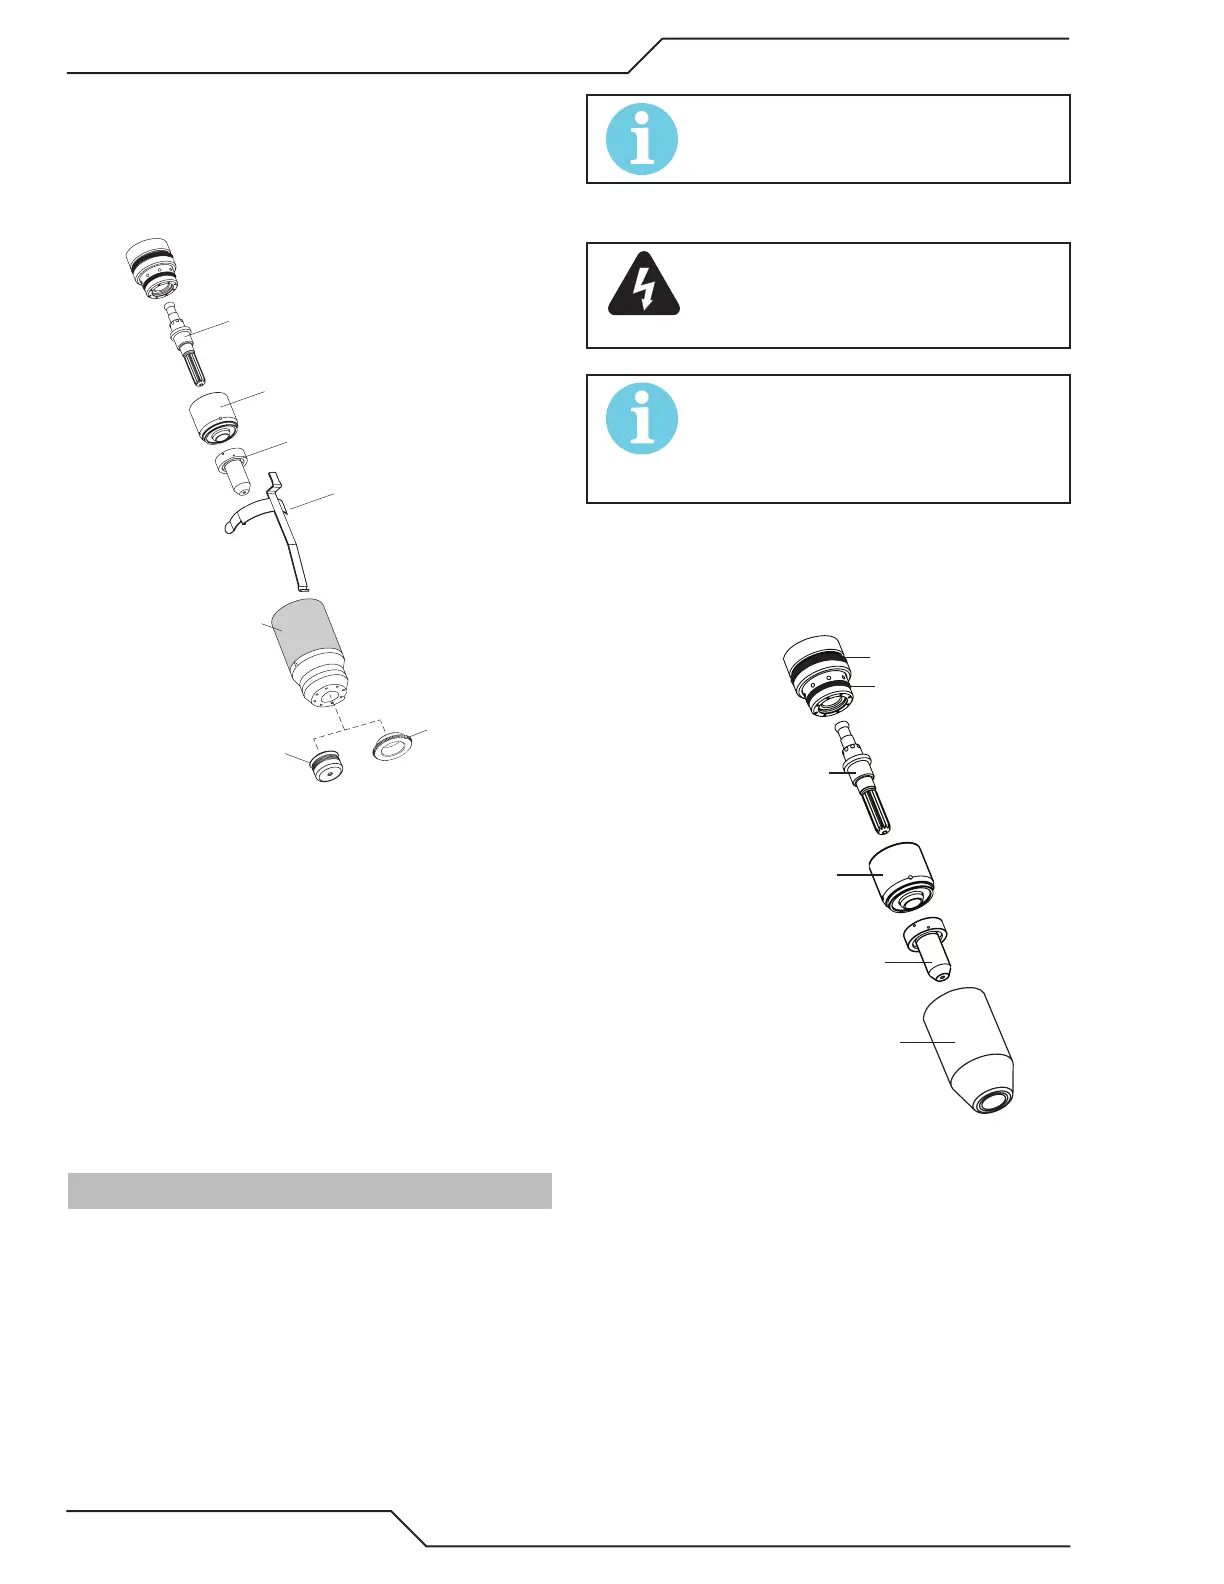
Electrode
Start Cartridge
Tip
Shield Cup
Torch Head
Large O-Ring
Small O-Ring
Torch Parts (Drag Shield Cap & Shield Cup Body Shown)
3. Install the replacement Electrode by pushing it
straight into the torch head until it clicks.
4. Install the starter cartridge and desired tip for the
operation into the torch head.
5. Hand tighten the shield cup assembly until it is
seated on the torch head. If resistance is felt when
installing the cup, check the threads before proceed-
ing.