Installation
Mounting
Mounting
Configurations
The optimum gauge-mounting configuration depends on the application. The
following are examples of different configurations for mounting the DensityPRO
measurement systems.
• Pipe saddle (cradle) mount
• Pipe spool with detector pre-installed
• Isolation mount pipe saddle
• Z-pipe (axial) mount for small diameter pipes (not supported by Thermo
Scientific)
Note: Moving the gauge to a pipe with a different diameter may require
changing the radiation source size. Contact Thermo Scientific Technical
Support for assistance.
In addition to the guidelines listed earlier in this chapter, note the following when
planning detector installation.
– Whichever mounting configuration is used, it is important to align the beam path
(the centerline of the source housing) as closely as possible with the centerline of
the detector housing. Be sure to mount the detector securely, since any movement
or change in alignment can affect the gauge’s calibration.
– The gauge measures only the material that passes through the beam. For best
performance, the beam must pass through a representative cross-section of the
process material being measured. Prevent suspended solids from settling out of the
measured area by mounting the detector on a vertical section of pipe.
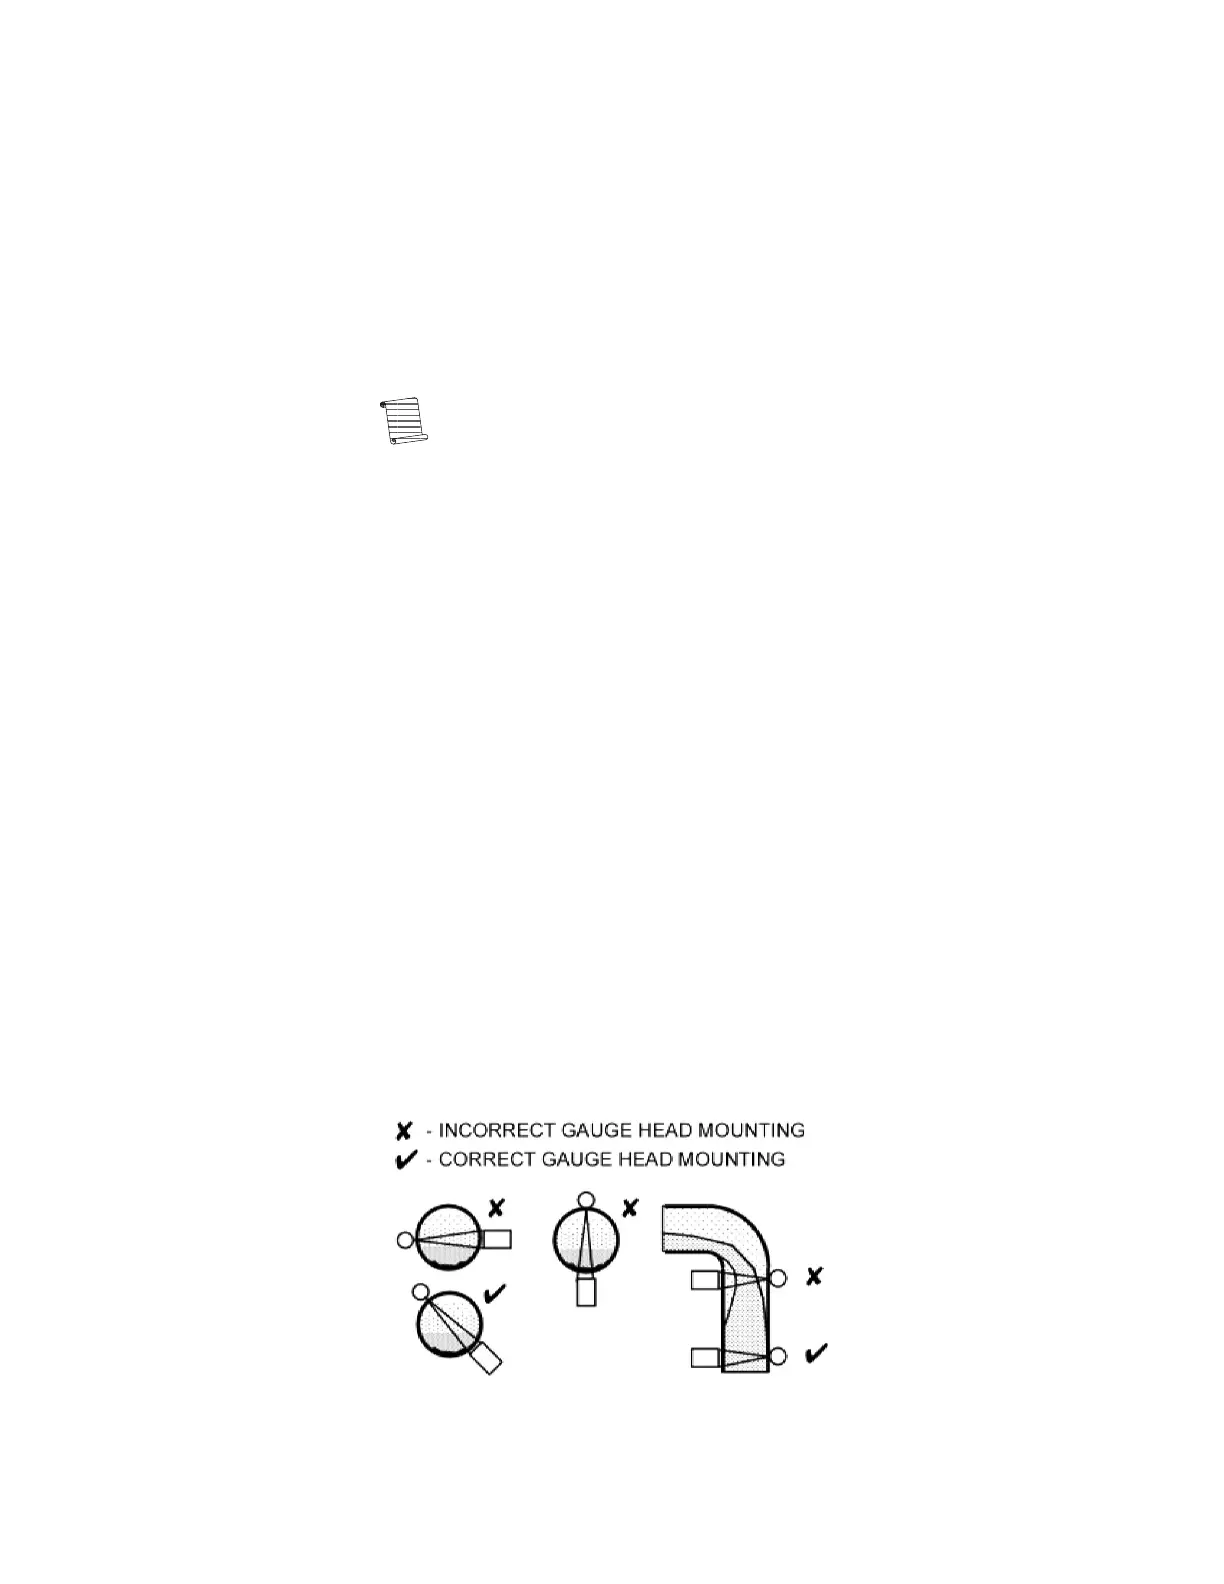
– For mounting on a horizontal pipe:
• Position the beam path at a 30- to 45-degree angle from vertical. This position
tends to average density variations caused by settling, while reducing the effect
of any trapped gases or solids that accumulate in the top or bottom of the
pipe.
• If the process material is a solution, light slurry, or single-phase liquid that will
not separate, the detector can be mounted such that the beam is horizontal.
• If the process material is slurry, position the detector as far as possible from
any elbows, tees, or valves, as these tend to separate suspended solids. Position
the beam path in the plane of the upstream elbow so the measurement
includes any uneven distribution caused by the fitting.
Figure 3-1. Examples of Gauge Installation
Thermo Scientific DensityPRO Installation Manual 3-3
 Loading...