Installation
Mounting
Mounting
Instructions
The following sections provide installation details for the various mounting
configurations. Refer to the dimensional drawings in Appendix C.
Warning: Use proper lifting procedures during installation to avoid injury.
Caution: Do not over tighten the bolts.
Pipe Saddle (Cradle)
Mount
A pipe saddle mount, or cradle mount, consists of two identical mounting plates that
are bolted together on opposite sides of the process pipe.
Refer to Appendix C and follow the steps below to install a detector with a pipe saddle
mount.
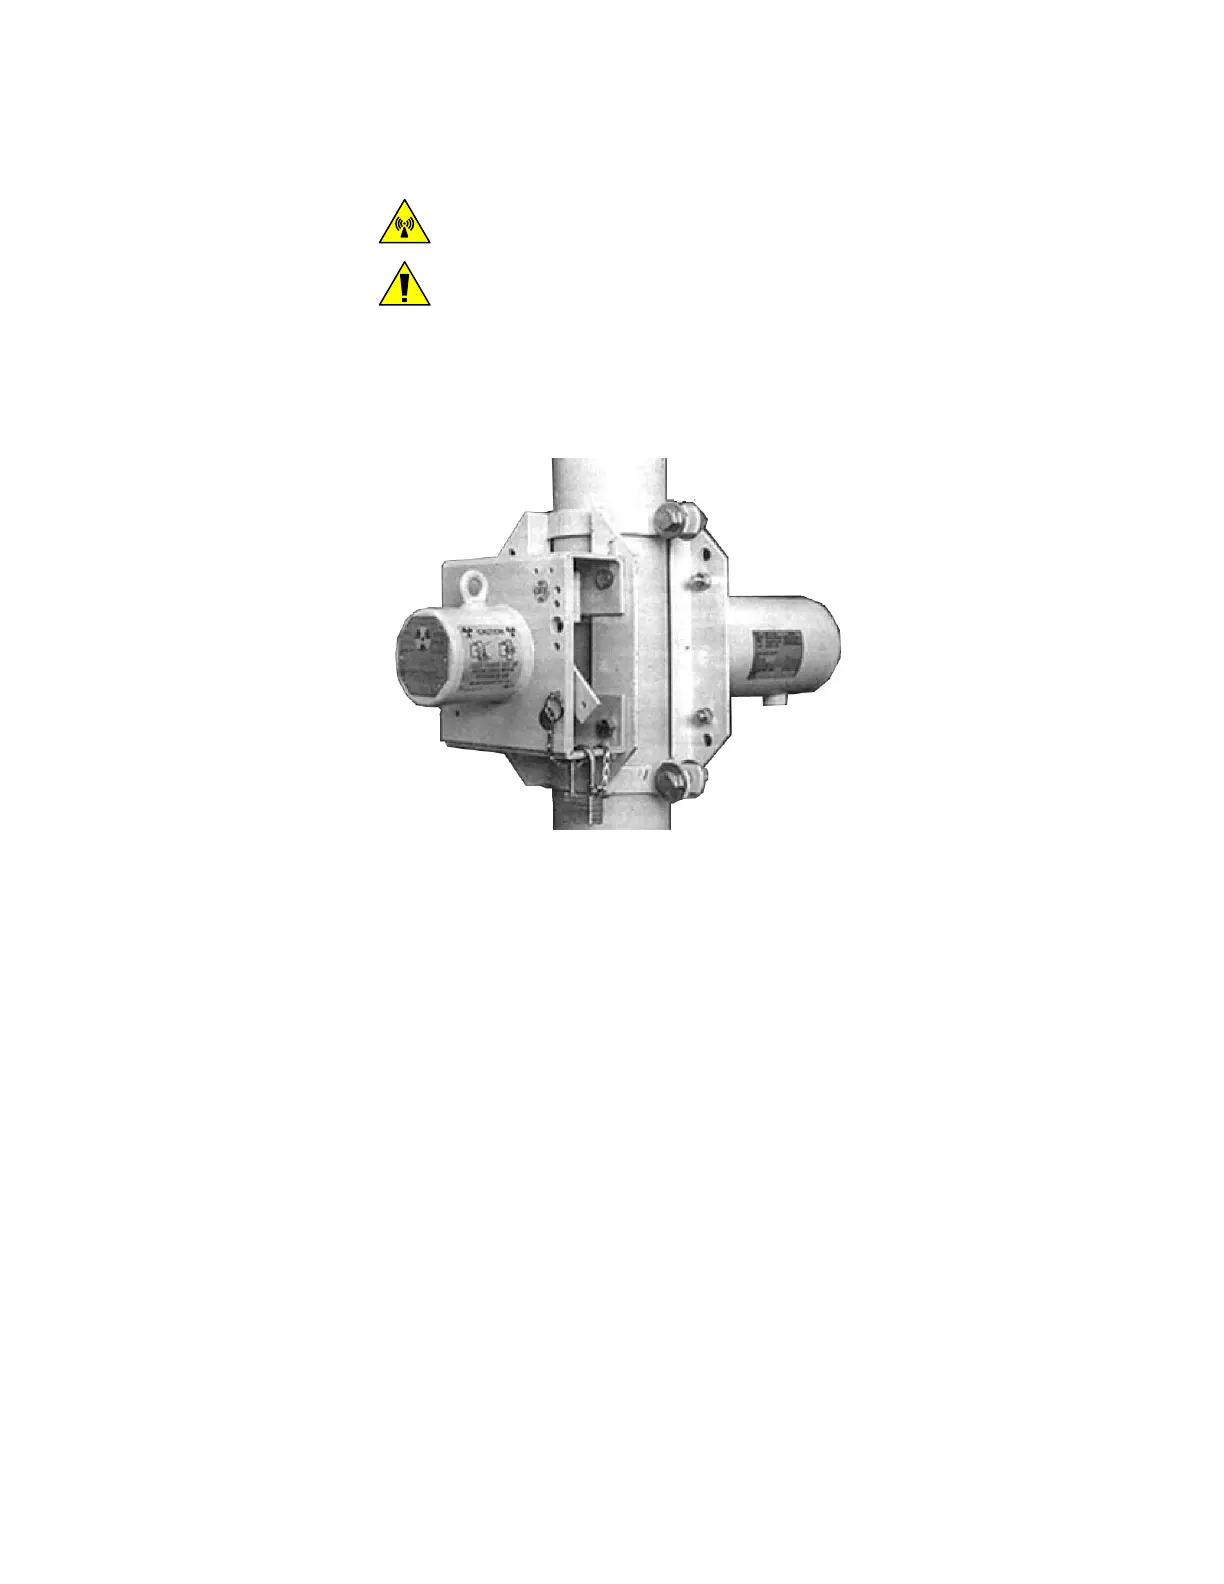
Figure 3-2. Pipe Saddle Mount
1. Assemble the two halves of the saddle mount onto the process pipe using the
supplied nuts, bolts and washers. Thread the nuts and bolts together, but do not
tighten them.
2. Adjust the saddle mount halves so the mounting plates are parallel and even with
each other. Then tighten the bolts evenly so the clamp ends are the same distance
apart on both sides of the pipe.
3. Bolt the detector and source housings to the mounting plates on either side of the
pipe saddle.
4. Tighten all bolts securely so the detector components cannot shift positions.
3-4 DensityPRO Installation Manual Thermo Scientific
 Loading...