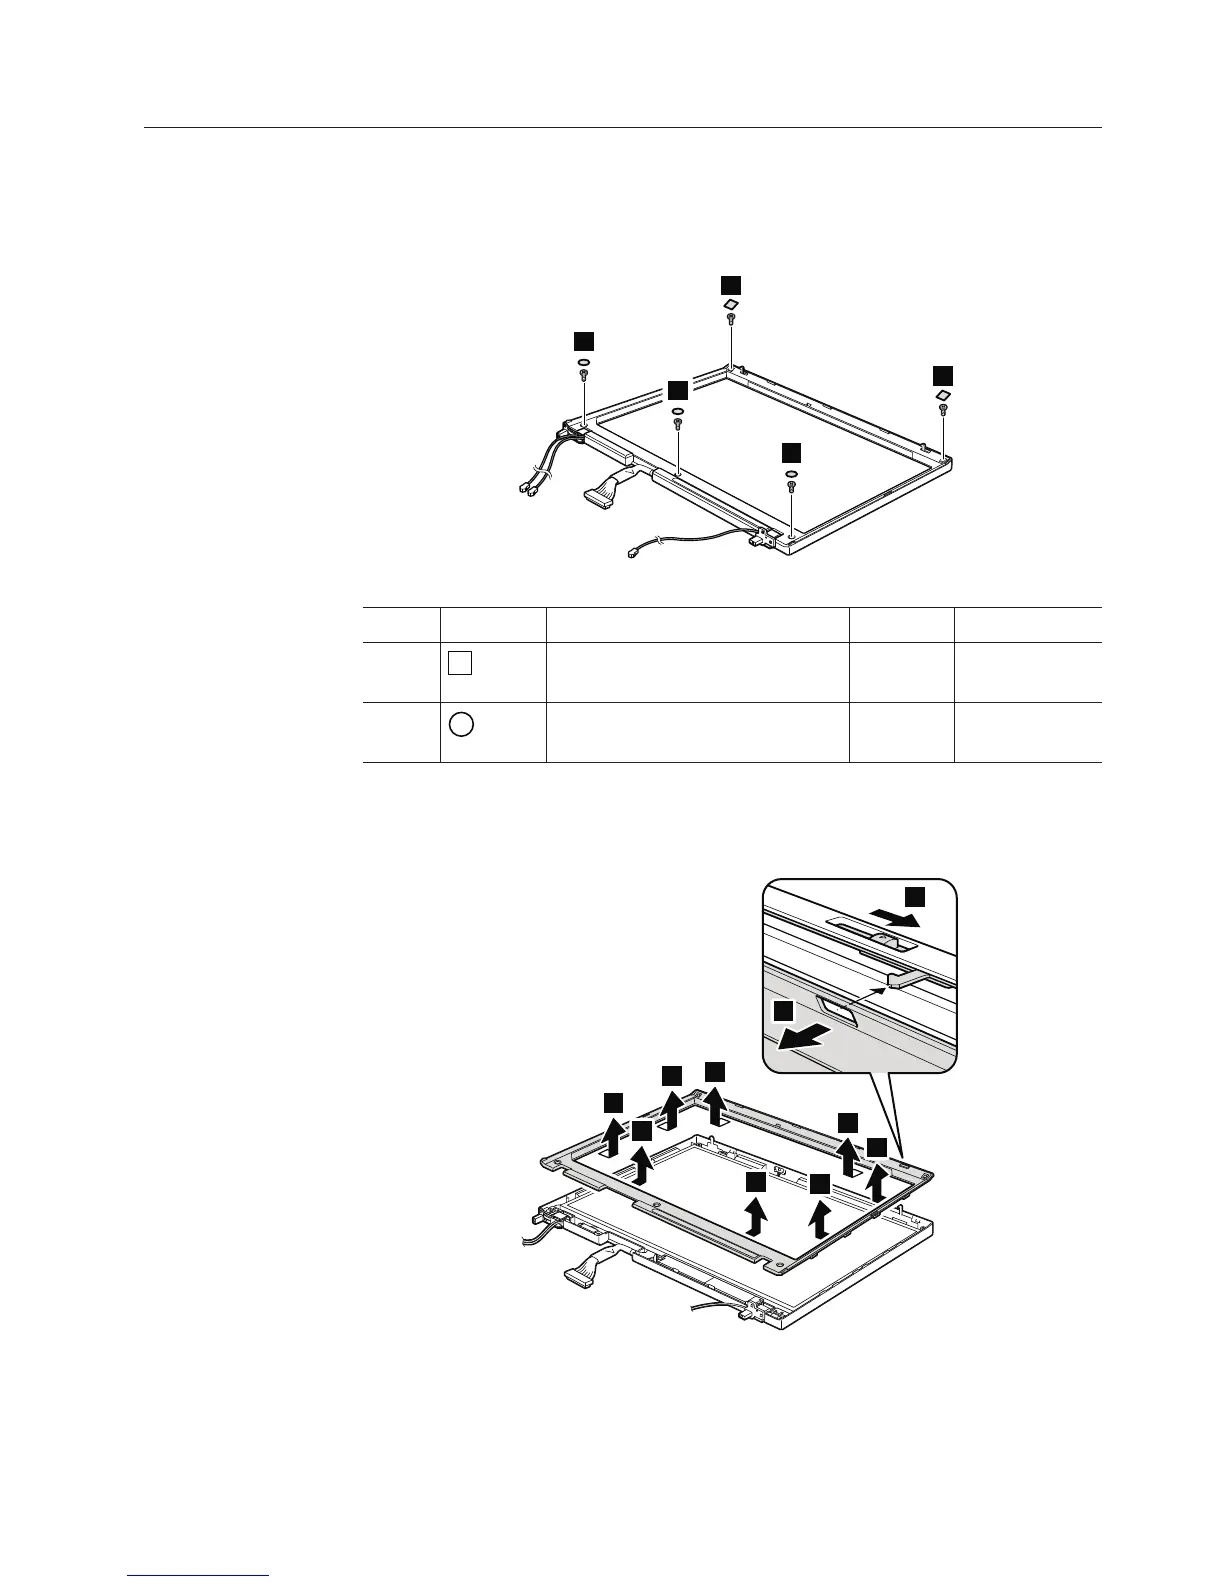
2010 LCD front bezel
For access, remove these FRUs, in order:
v “1010 Battery pack” on page 84
Table 25. Removal steps of LCD front bezel
2
2
2
1
1
Step Screw cap Screw (quantity) Color Torque
1
M2.5 × 6.5 mm, flat-head,
nylon-coated (2)
Black 0.392 Nm
(4 kgfcm)
2
M2.5 × 6.5 mm, flat-head,
nylon-coated (3)
Black 0.392 Nm
(4 kgfcm)
In step 3, detach the claws. Then remove the LCD front bezel.
Note: The LCD front bezel is secured with a double-faced adhesive tape.
5
4
3
3
3
3
3
3
3
3
When installing: Make sure that all claws are attached firmly.
Removing and replacing a FRU 127