Do you have a question about the THOMSON THC300 and is the answer not in the manual?
Instructions to ensure safe installation and operation of the receiver, including ventilation and electrical precautions.
Guidance on proper storage of the receiver and accessories, including packaging for transport.
Instructions for setting up the receiver, including recommended professional installation and basic connection steps.
Lists the included accessories, such as the remote control and batteries, and provides a warning about battery usage.
Recommendations for using USB 2.0 or higher storage devices for optimal performance and compatibility.
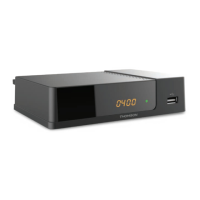
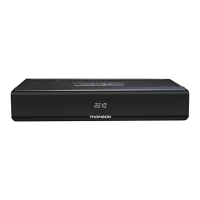
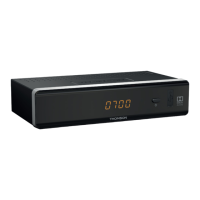
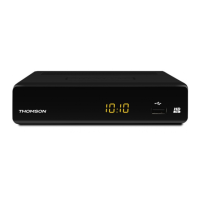
Describes the components on the front panel, including the IR sensor, display, and mode indicator.
Details the connectors on the rear panel, such as CABLE IN, HDMI, TV SCART, and power cord.
Lists and describes all buttons on the remote control and their functions for operating the receiver.
Step-by-step instructions for opening the remote control and inserting AAA batteries correctly.
Explains how to point the remote control towards the receiver and its operating range and angle.
Instructions for connecting the receiver to the wall connector using a coaxial cable.
Details on connecting the receiver to the TV using an HDMI cable for the highest quality.
Explains how to connect the receiver to the TV using a SCART cable.
Guide to connecting the receiver to a digital audio amplifier or home theatre system via S/PDIF.
Instructions for connecting to digital amplifiers and TV using HDMI for optimal audio and video quality.
Details on connecting a USB storage device for playback of multimedia files and recording.
Instructions for DVB-C installation, including selecting installation and entering the installation menu.
Guide to performing a channel scan, including setting scan mode, channel number, and initiating the search.
Instructions for performing an automatic channel scan, including country and network selection.
Explanation of Logical Channel Numbering (LCN) and how to activate or deactivate it for channel ordering.
Describes various methods for changing channels: direct access, channel list, and navigation buttons.
How to directly tune to a specific channel by entering its number using the remote control's number buttons.
Instructions on how to display, select, and navigate through the channel list using remote control buttons.
Explains the function of the up/down arrow buttons for channel selection and navigation.
How to access current channel, event, and technical information using the INFO button.
Guide to selecting different audio formats and languages available for channels.
How to access and navigate Teletext services using the TTX button and remote controls.
Instructions for selecting available subtitle languages for enhanced viewing.
Explains how to pause live broadcasts and resume playback later using the Timeshift function.
How to use the Electronic Programme Guide to view schedules, get event details, and set recordings.
Guide to recording the current program instantly, setting duration, and managing recordings.
Allows management of channels, including sorting, renaming, and locking/unlocking.
How to view, add channels to favourite lists, and lock/unlock channels within the TV channel list.
Steps to add channels to favourite groups and manage them within the channel list.
Instructions on how to lock or unlock channels using a PIN code for restricted access.
How to mark channels to be skipped when zapping, making channel surfing more efficient.
Guide to reordering channels within the channel list for personalized channel surfing.
Covers sorting, renaming, and deleting channels, including details on sort methods and renaming.
Details on managing radio channels, similar to TV channels but without video information.
How to delete all stored channels and favourite lists, with a warning about permanent data loss.
Instructions for personalizing the names of up to 8 favourite channel lists.
Menu for performing channel scans, including by channel, by frequency, and auto scan options.
Detailed guide on channel scanning methods, including by channel, by frequency, and network search.
How to perform an automatic scan to find channels, including options for FTA only and network search.
Explanation of LCN function for operator-defined channel numbering and its activation/deactivation.
Menu for configuring various system settings like language, TV system, time, parental lock, and OSD.
Allows setting preferences for On Screen Display, audio, and subtitle languages.
Configure video resolution, aspect mode, connection type, and digital audio output for TV compatibility.
Set region, time zone, GMT offset, daylight saving, date, and time display preferences.
Configure up to 8 timed events for recording or waking up the receiver, with various modes like Once, Daily, Weekly.
Protect installation menu and channels with a PIN code, set parental rating, and change PIN.
Adjust OSD Timeout and Transparency, and load default OSD settings.
Configure the automatic standby function to reduce power consumption after a period of inactivity.
Access submenus for receiver information, factory reset, and software upgrades.
Displays receiver hardware and software versions, and the official web address for support.
Resets the receiver to factory default settings, clearing all stored channels and configurations.
Information on Over-The-Air (OTA) software upgrades, with advice to check regional availability.
How to upgrade receiver software using a USB port, downloading files from the official website.
Plays various file types (Video, Music, Image) from connected USB storage devices.
Displays details about connected USB devices, including free space, recording size, and file system.
Configure settings for Timeshift, recording, and playback, including Auto/Pause/Off modes.
Instructions on safely removing USB storage devices from the receiver to prevent data loss.
| Type | TV Receiver |
|---|---|
| Model | THC300 |
| Brand | THOMSON |
| HDMI Ports | 1 |
| USB Ports | 1 |
| Resolution | Full HD (1080p) |
| USB Function | Media playback |
| Connectors | HDMI, USB |