heavy snow etc.
3. Prepare one or more conduits for the electrical cables before pour concrete. Remember that cable
conduits have to pass through the hole on the base.
4. Pour concrete and before it starts to harden, check that it is parallel to the gate leaf and perfectly level.
5. Mark the position of four expansion anchors according to the position of mounting hole on the base plate.
Double check your marking, move the base plate and drill the 4 holes using a 14mm (0.55”) masonry bit. Put
the 4 expansion anchors (provided) into the holes and firmly tighten.
6. Mount the base plate to the concrete Pad and firmly tighten, enabling the opener is firmly secured
on the concrete pad during the whole gate travel.
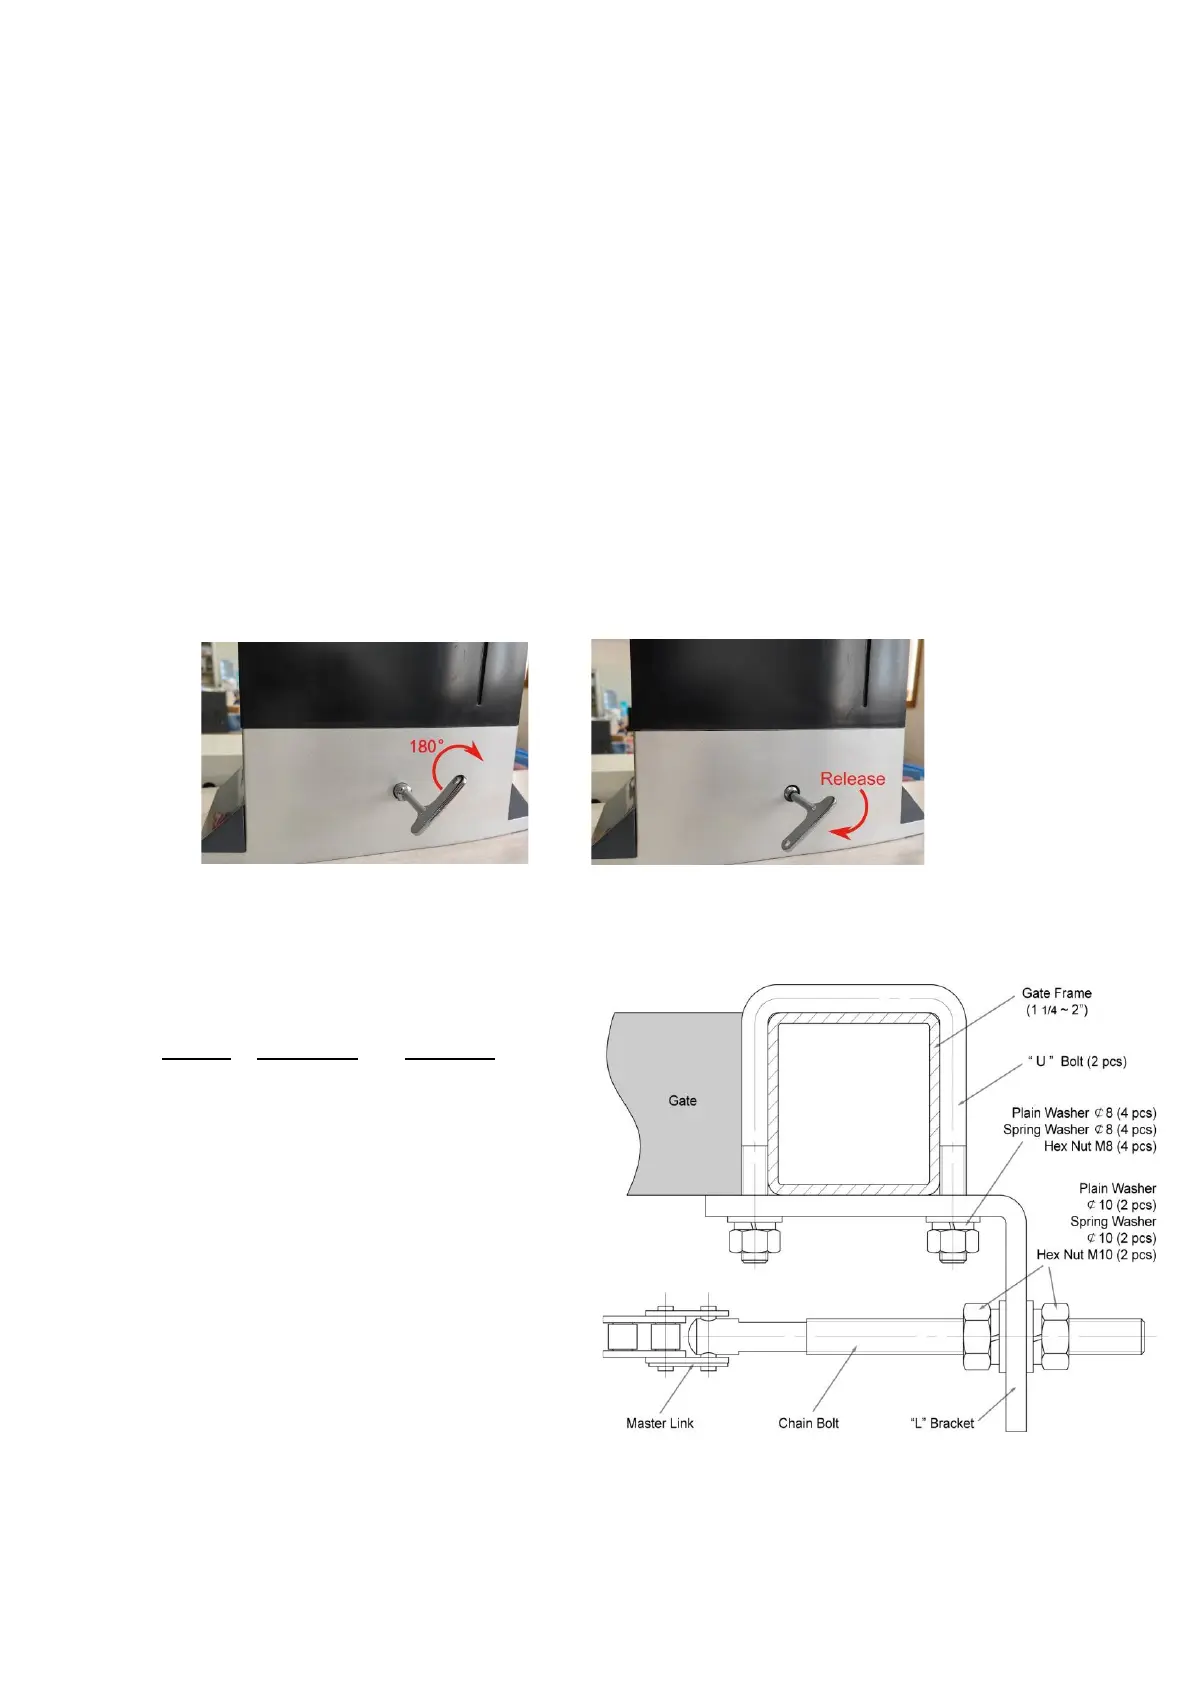
Manual Operation
You can open the gate by manual when power failure. And the opener should be put in the manual
(emergency release) position before fitting the rack, installing the opener and limit switch. The process is as
follows:
Insert the Release Key and turn it in clockwise 180° to disengage the clutch between the gear shaft and
motor. Now the opener is in the manual operation.
Installation of chain and chain brackets
1. Chain Brackets
1). Please refer to below chain brackets figure, which
shows “U” bolt, “L” bracket and chain bolt.
Use the “U” bolts (square or round) to attach the
chain brackets to gate frame.
2). If Both the square bolts and round bolts are not fit
for the gate frame, use the appropriate bolts to
attach the chain brackets to gate frame.
2. How to install the chain
1). Place the chain around the top of the idler wheels
and under the drive sprocket in chain box.
2). Connect a chain bolt to one end of chain from
chain box by using master link. Then insert the chain
bolt to the L bracket and fix them each other by
washers and nuts temporarily. (Nuts will be further
adjusted for a proper chain tension later)
3). Connect second chain bolt with another end of chain from chain box, then attach bolt to the L bracket on
opposite end of gate using the washers and nuts.
4). Make sure that the chain is line up exactly with the position where the chain on the chain idler wheel.