Note: The machine connector is located below
the main-power connector that is secured to the
machine.
g389188
Figure 33
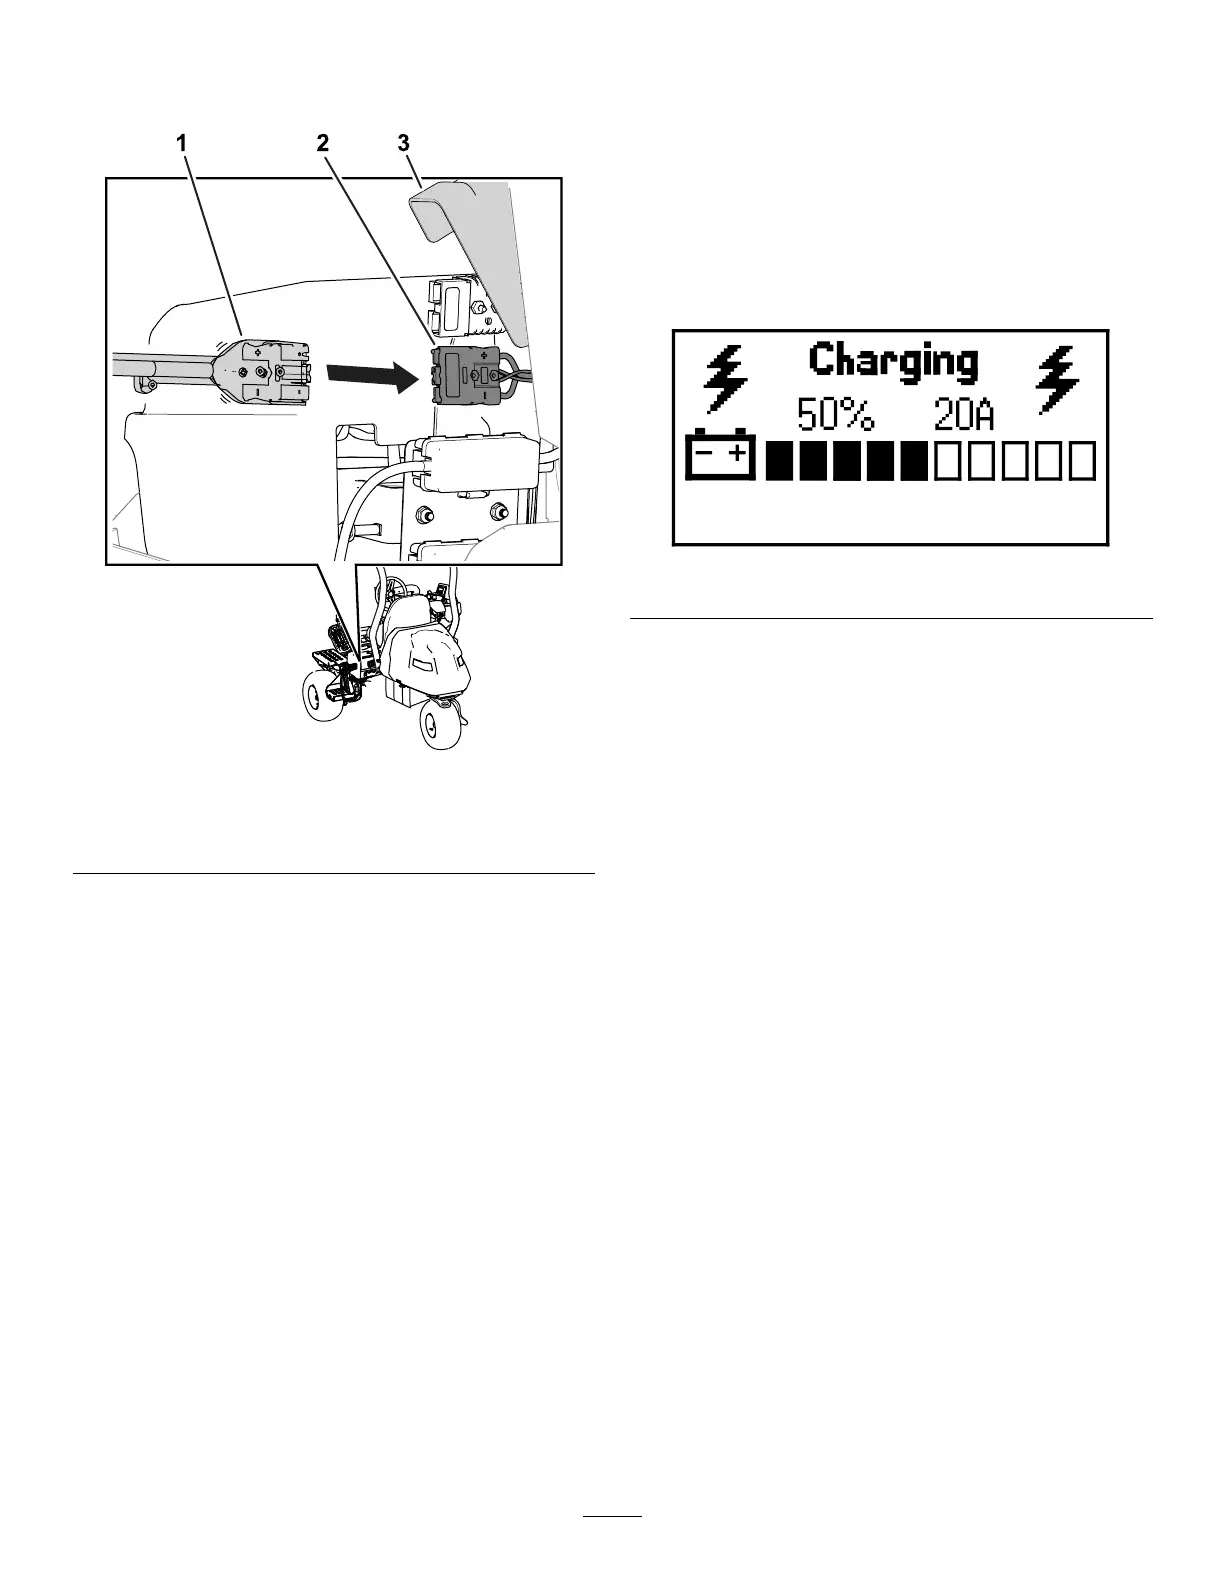
1. Charger connector 3. Connector cover
2. Machine connector
8. Connect the charger power cord to a power
source; refer to Connecting to a Power Source
( page 38 ) .
9. Observe the charger to ensure that the batteries
are charging.
Note: Y ou can connect the main-power
connectors to see the current battery-charge
percentage and amperage in the InfoCenter;
refer to Monitoring the Charging Process and
T roubleshooting ( page 39 ) .
The charger will also illuminate with a green light
while the machine is charging.
10. Disconnect the charger when the machine
reaches a suf cient level; refer to Completing
the Charging Process ( page 39 ) .
Monitoring the Charging Process
and T roubleshooting
• The InfoCenter shows the battery charge
percentage and amperage.
Batteries with a lower voltage charge rst; once
they reach the voltage of the other batteries, all
batteries charge simultaneously .
When charging is complete, the machine
InfoCenter displays 10 solid bars.
g356360
Figure 34
• If there is a fault, an error message will appear in
the InfoCenter .
T o correct an error , refer to the machine Service
Manual . If none of these solutions correct the
issue, contact an authorized T oro distributor .
Completing the Charging Process
When charging is complete, the battery-charging
indicator light shows solid green and the
charging-output indicator light disappears.
1. Disconnect the charger connector from the
machine connector .
2. Place the charger connector and cord in a
storage position that avoids damage.
3. Ensure that the main-power connectors are
clean.
4. Connect the main-power connectors; refer to
Main-Power Connectors ( page 23 ) .
5. T urn on the machine; refer to T urning On the
Machine ( page 30 ) .
6. V erify the charge level; refer to Using the
InfoCenter LCD Display ( page 19 ) .
39