1.Positionthemachineonalevelsurface.Raise
thecuttingunit,engagetheparkingbrake,put
thetractionpedalinneutral,putthePTOlever
intheOffposition,stoptheengine,andremove
theignitionkey.
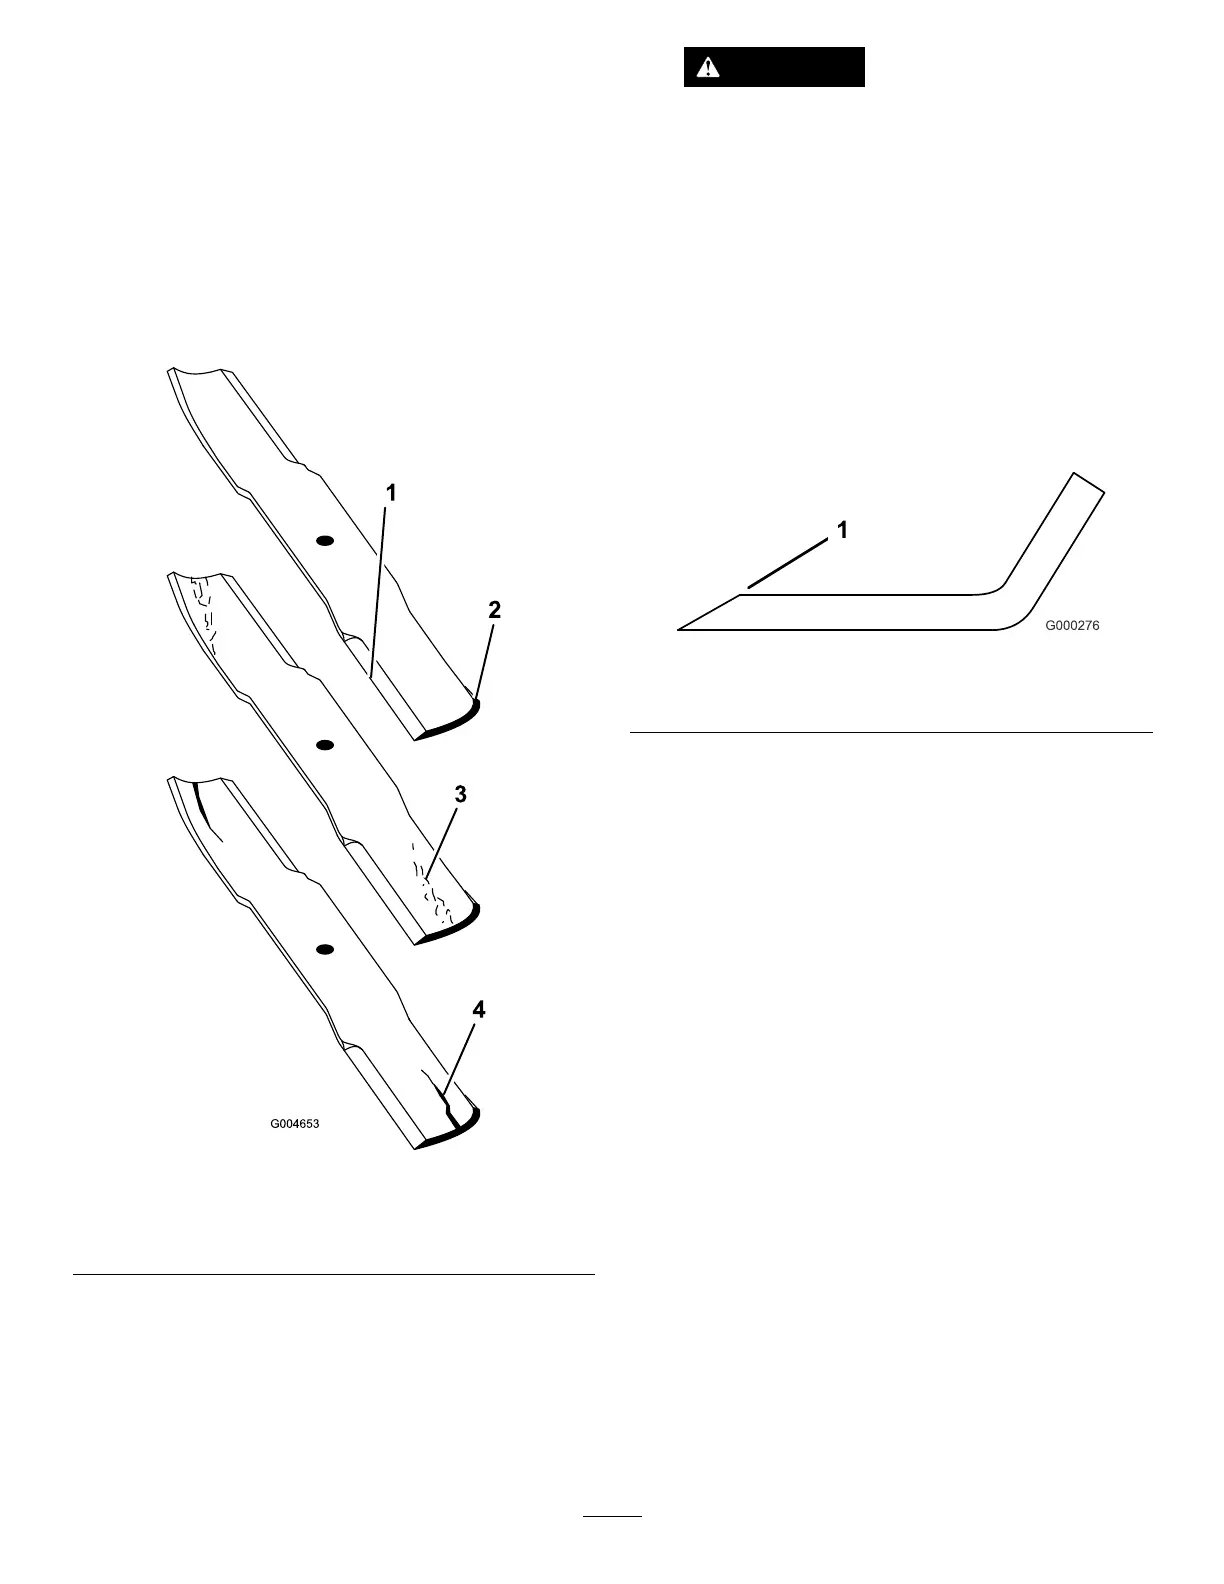
2.Examinethecuttingendsofthebladecarefully,
especiallywheretheatandcurvedpartsof
theblademeet(Figure113).Sincesandand
abrasivematerialcanwearawaythemetalthat
connectstheatandcurvedpartsoftheblade,
checkthebladebeforeusingthemower.Ifwear
isnoticed(Figure113),replacetheblade.
g004653
Figure113
1.CuttingEdge3.Wear/slotForming
2.CurvedArea4.Crack
3.Examinethecuttingedgesofalloftheblades.
Sharpenthecuttingedgesiftheyaredullor
nicked.Sharpenonlythetopofthecuttingedge
andmaintaintheoriginalcuttingangletomake
sureofsharpness(Figure114).Thebladewill
remainbalancedifthesameamountofmetalis
removedfrombothcuttingedges.
DANGER
Ifthebladeisallowedtowear,aslot
willformbetweenthesailandatpart
oftheblade.Eventuallyapieceofthe
blademaybreakoffandbethrownfrom
underthehousing,possiblyresultingin
seriousinjurytoyouorbystanders.
•Inspectthebladeperiodicallyforwear
ordamage.
•Nevertrytostraightenabladethat
isbentorweldabrokenorcracked
blade.
•Replaceawornordamagedblade.
g000276
Figure114
1.Sharpenatoriginalangle
Note:Removethebladesandsharpenthem
onagrinder.Aftersharpeningthecuttingedges,
installthebladewiththeanti-scalpcupand
bladebolt;refertoRemovingandInstallingthe
CutterBlade(s).
CorrectingCuttingUnit
Mismatch
Ifthereismismatchbetweentheblades,onasingle
cuttingunit,thegrasswillappearstreakedwhenitis
cut.Thisproblemcanbecorrectedbymakingsure
thatthebladesarestraightandallofthebladesare
cuttingonthesameplane.
1.Usinga1meter(3foot)longcarpenterslevel,
ndalevelsurfaceontheshopoor.
2.Raisetheheight-of-cuttothehighestposition;
refertoAdjustingtheHeight-Of-Cut.
3.Lowerthecuttingunitontotheatsurface.
Removethecoversfromthetopofthecutting
unit.
4.Loosentheangenutsecuringtheidlerpulley
toreleasethebelttension.
5.Rotatethebladesuntiltheendsfaceforward
andbackward.Measurefromtheoortothe
71